Deux ordinateurs, deux moniteurs, une station d’accueil
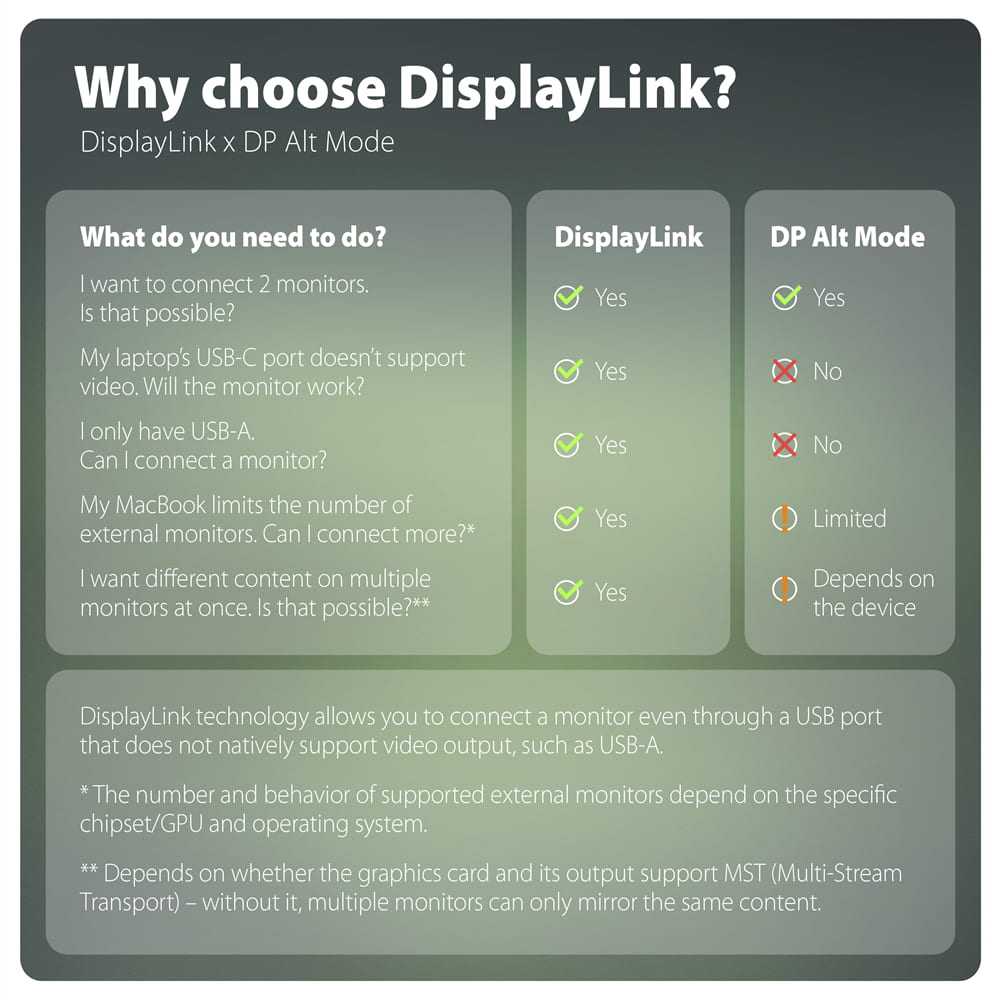
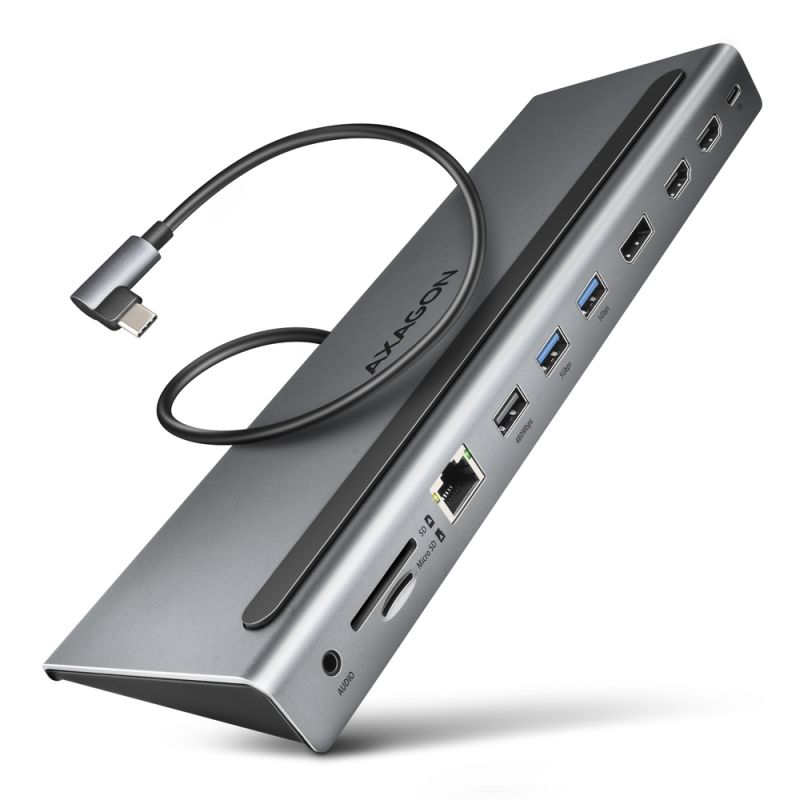
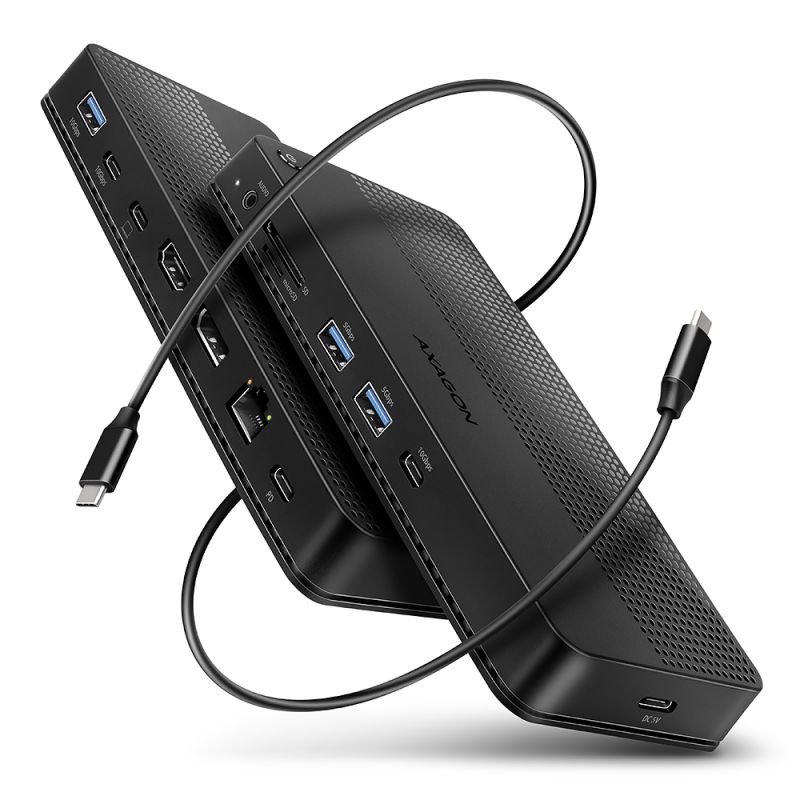
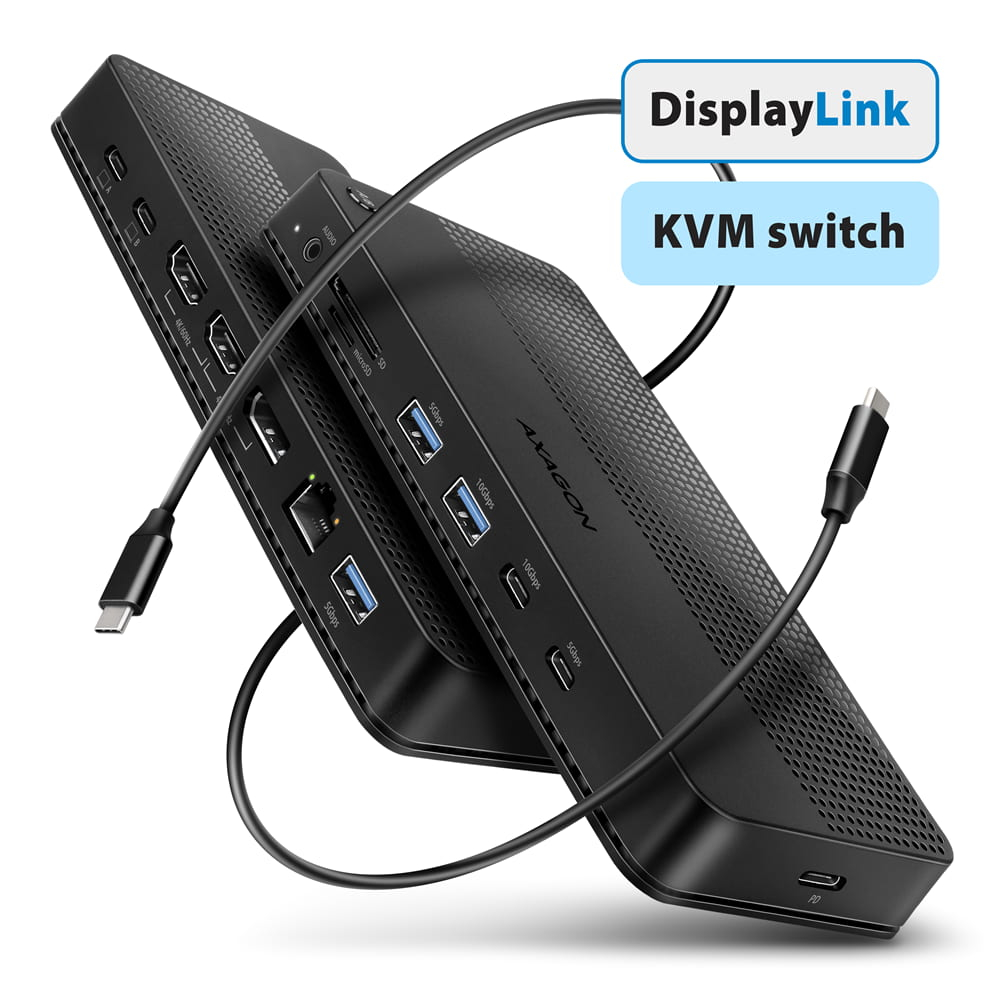
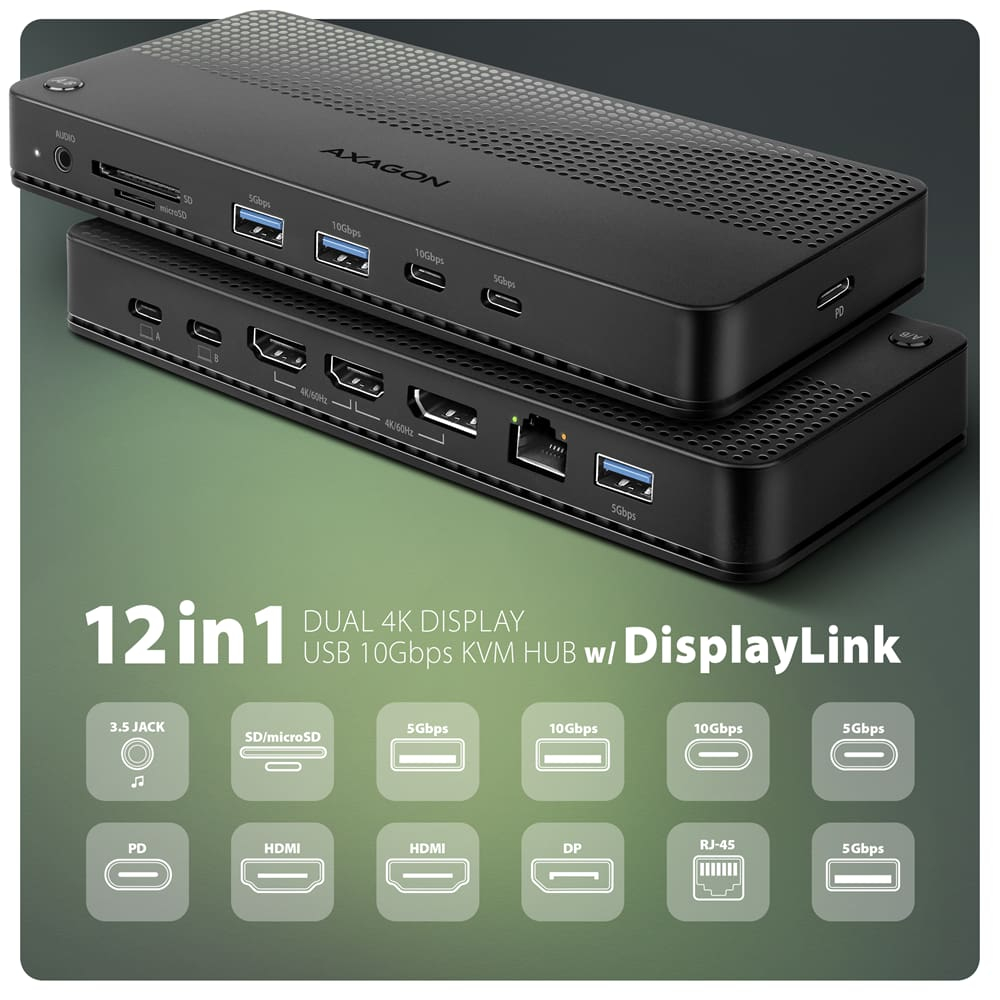
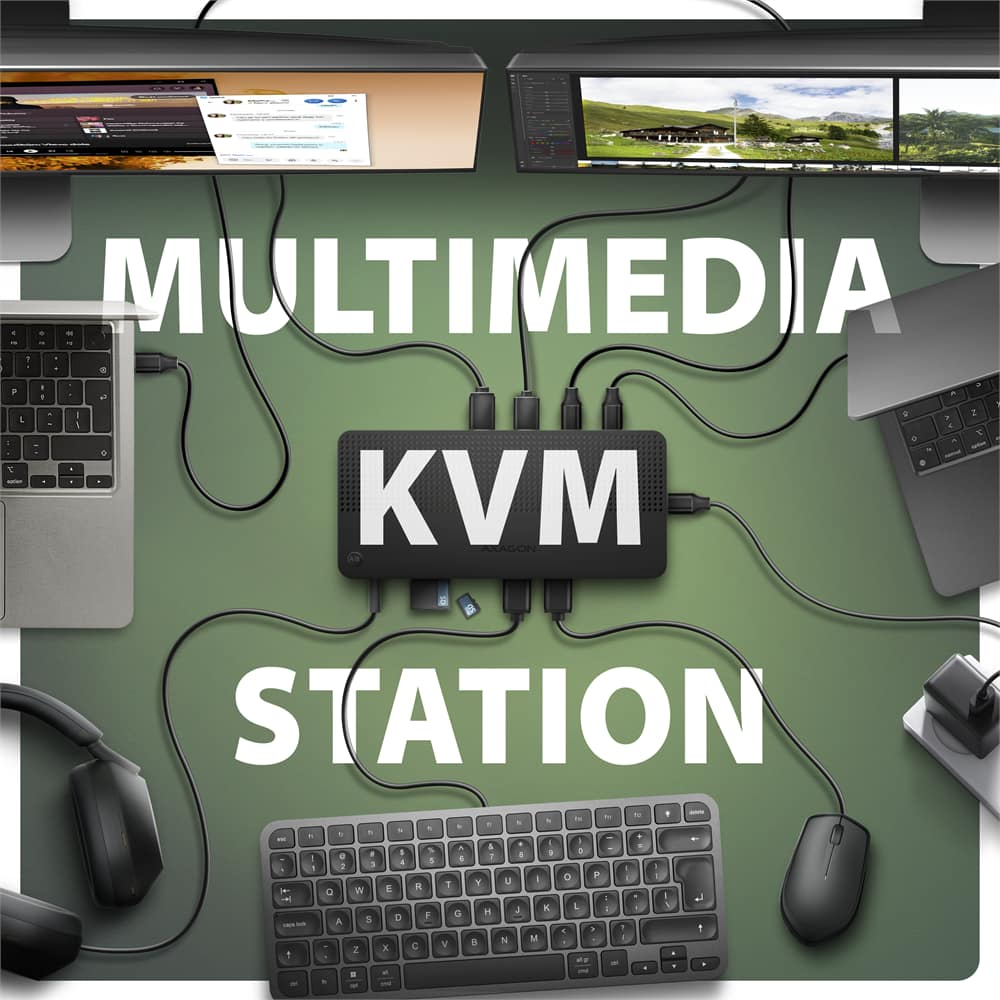
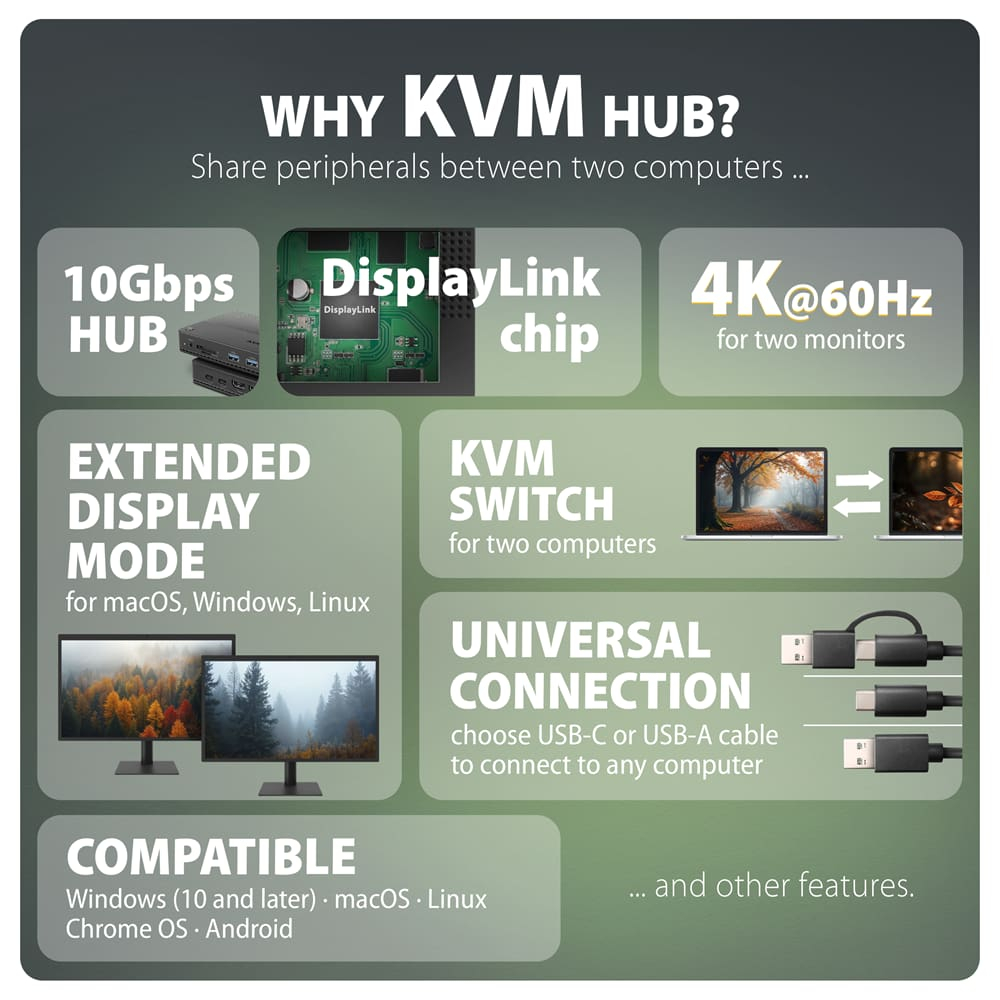
La station d’accueil multifonctionnelle AXAGON HMC-DL-KVM combine la technologie DisplayLink, le commutateur KVM et le hub USB-C 10Gbps en un seul appareil. Grâce à DisplayLink, il est possible de connecter deux écrans externes indépendants avec une résolution allant jusqu'à 4K/60Hz, même sur des MacBook qui ne prennent en charge qu’un seul écran externe nativement, ou sur des ordinateurs sans prise en charge du DisplayPort Alt Mode. Le commutateur KVM intégré permet de partager un poste de travail entre deux ordinateurs – par exemple un ordinateur portable professionnel et un personnel, deux ordinateurs portables d’entreprise ou un MacBook et un PC Windows. En appuyant sur un bouton, vous basculez entre les ordinateurs pour l’écran, le clavier, la souris, les périphériques USB et la connexion réseau sans avoir à débrancher les câbles. L’équipement est complété par une alimentation Power Delivery jusqu'à 100 W pour alimenter l’ordinateur portable connecté.
DisplayLink : Deux moniteurs 4K via un seul câble USB (même sans DP Alt Mode)
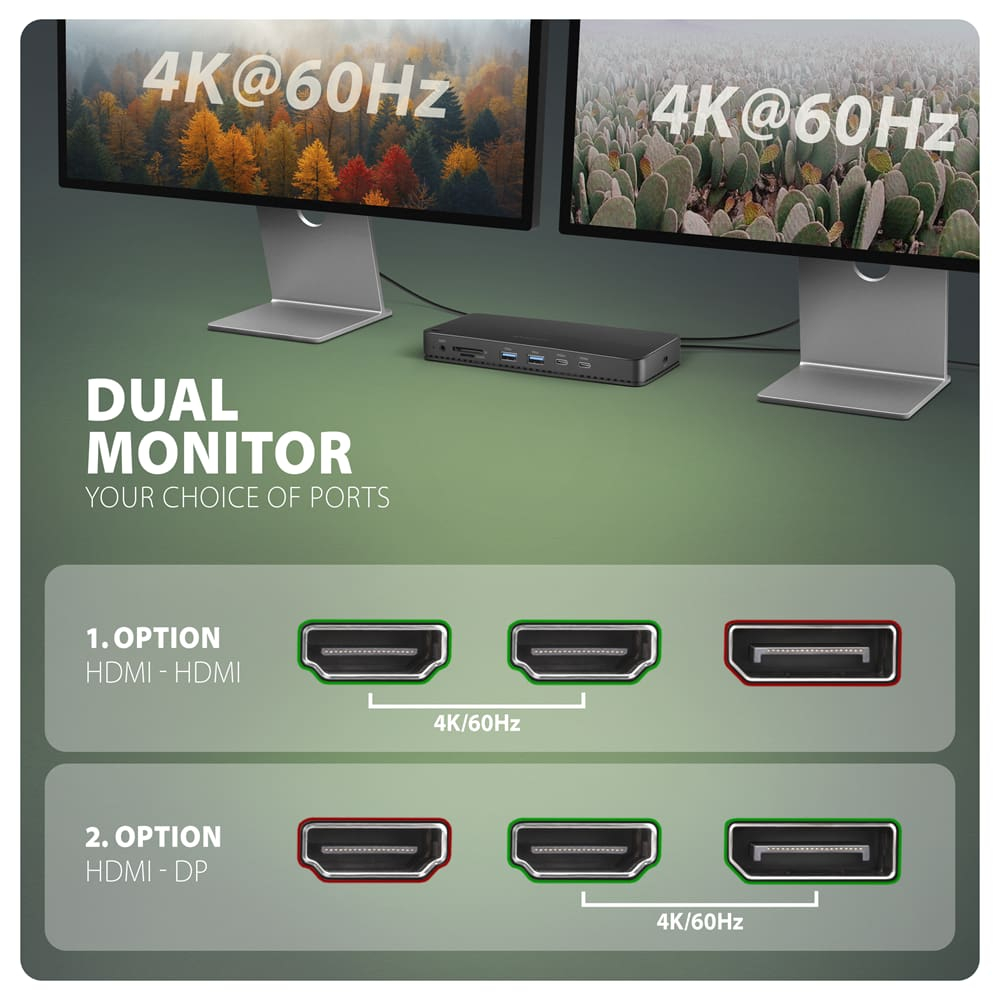
Vous devez connecter deux moniteurs externes, mais le port USB de votre ordinateur ne prend pas en charge la sortie vidéo via DisplayPort Alternate Mode ? La solution est la technologie DisplayLink, qui transmet l’image via la connexion de données USB – le DP Alt Mode n’est donc pas nécessaire pour connecter les moniteurs. Il suffit d’un câble USB C-C ou USB C-A entre l’ordinateur et la station d’accueil pour obtenir simultanément deux moniteurs externes avec une résolution jusqu’à 4K à 60 Hz. Deux prises HDMI et une prise DisplayPort sont disponibles, les moniteurs pouvant être combinés en HDMI + HDMI ou HDMI + DisplayPort. La sortie HDMI gauche est partagée avec la sortie DisplayPort et ne peut pas être utilisée simultanément.
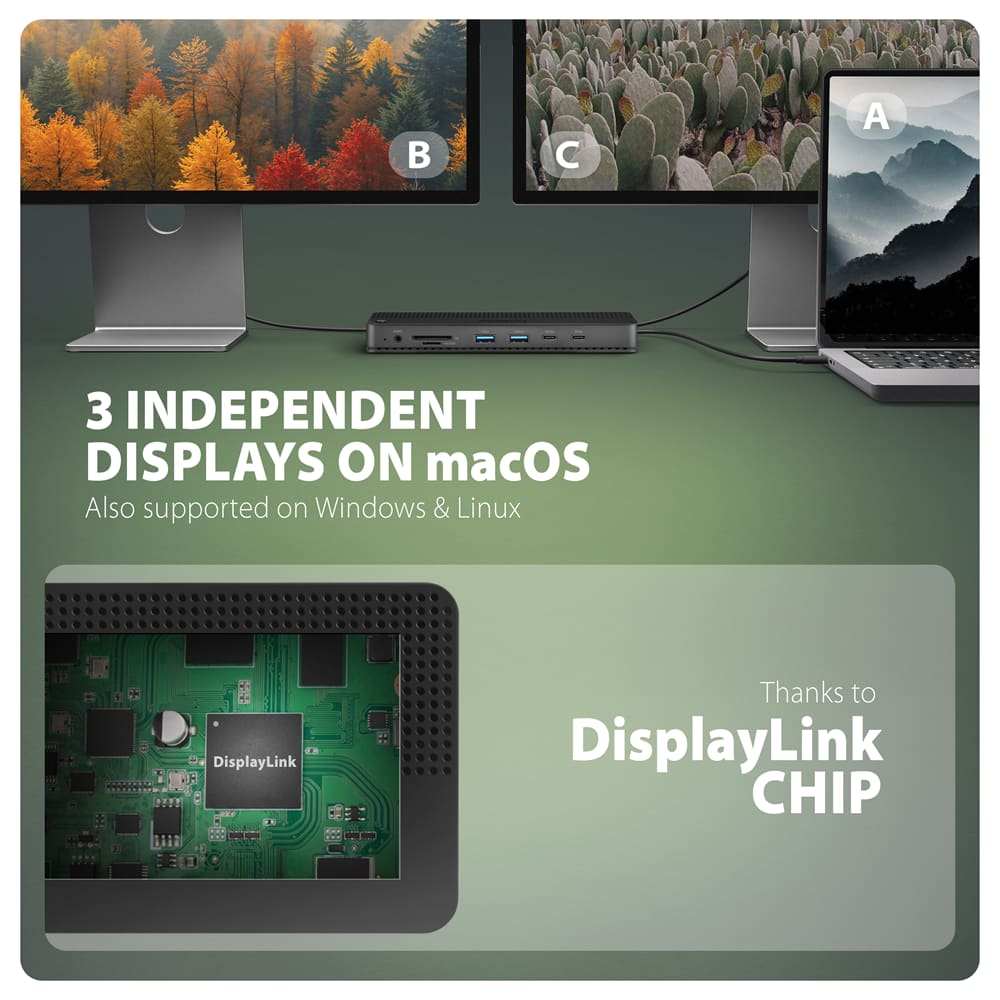
MacBook avec deux moniteurs externes indépendants
Vous souhaitez connecter deux écrans externes à un MacBook, mais votre modèle ne prend en charge qu’un seul écran externe nativement ? La technologie DisplayLink permet de connecter deux écrans externes indépendants avec une résolution jusqu’à 4K/60 Hz également aux MacBook compatibles dont la prise en charge native des écrans externes est limitée en charge externe limitée. Les moniteurs peuvent être utilisés en mode bureau étendu avec un contenu différent sur chaque écran. L’installation de l’application DisplayLink Manager est nécessaire pour utiliser les sorties vidéo DisplayLink.
Le commutateur KVM : ordinateur professionnel et personnel sans changer constamment de câbles
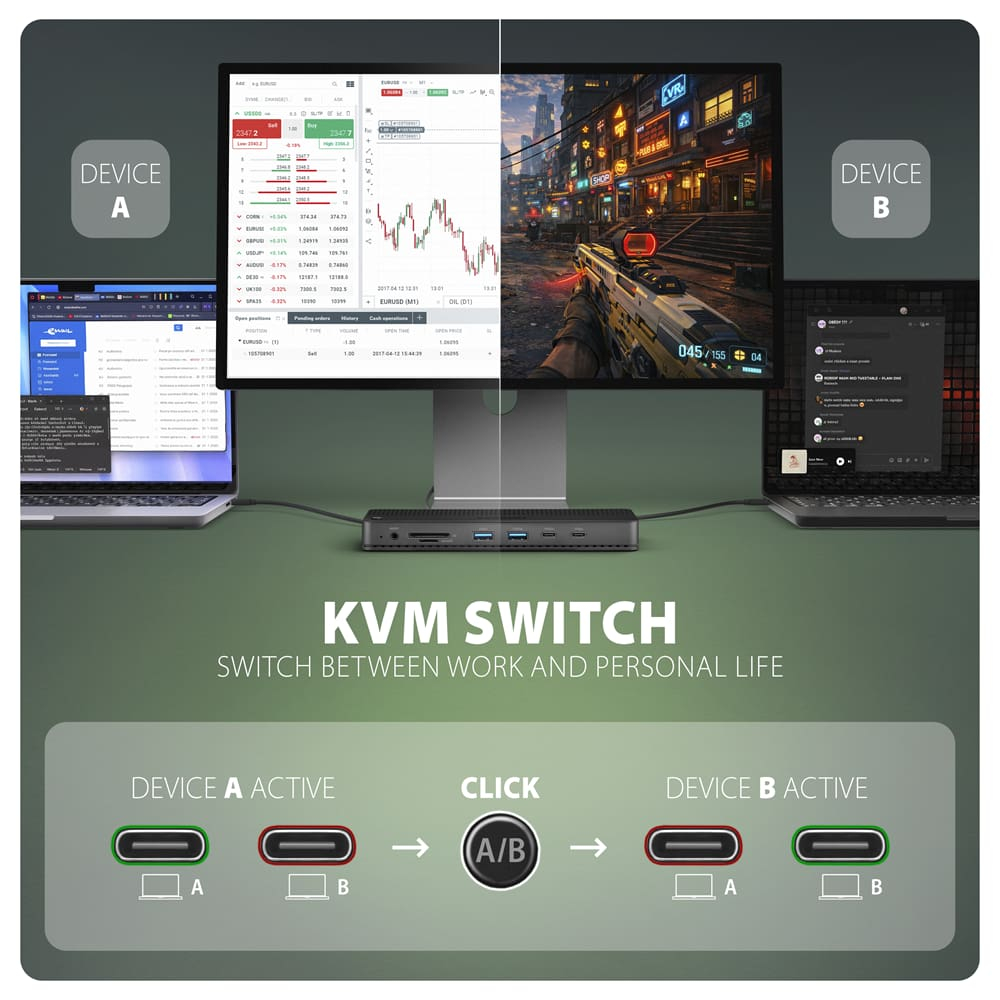
L’ordinateur portable professionnel, l’ordinateur domestique ou même deux ordinateurs portables d’entreprise n’ont plus besoin d’avoir leur propre écran et accessoires. Le commutateur KVM intégré (clavier-vidéo-souris) permet de contrôler deux ordinateurs avec un seul ensemble d’écrans, clavier et souris tout en partageant les périphériques USB connectés et autres accessoires. Il suffit d’appuyer sur le bouton A/B pour choisir quel ordinateur utilisera le poste de travail. Une simple pression suffit pour basculer tout le poste de travail d’un ordinateur à l’autresans débrancher ni rebrancher les câbles.
12 ports : USB 10Gbps, HDMI, DisplayPort, Gigabit Ethernet, lecteur de cartes, audio et alimentation 100W
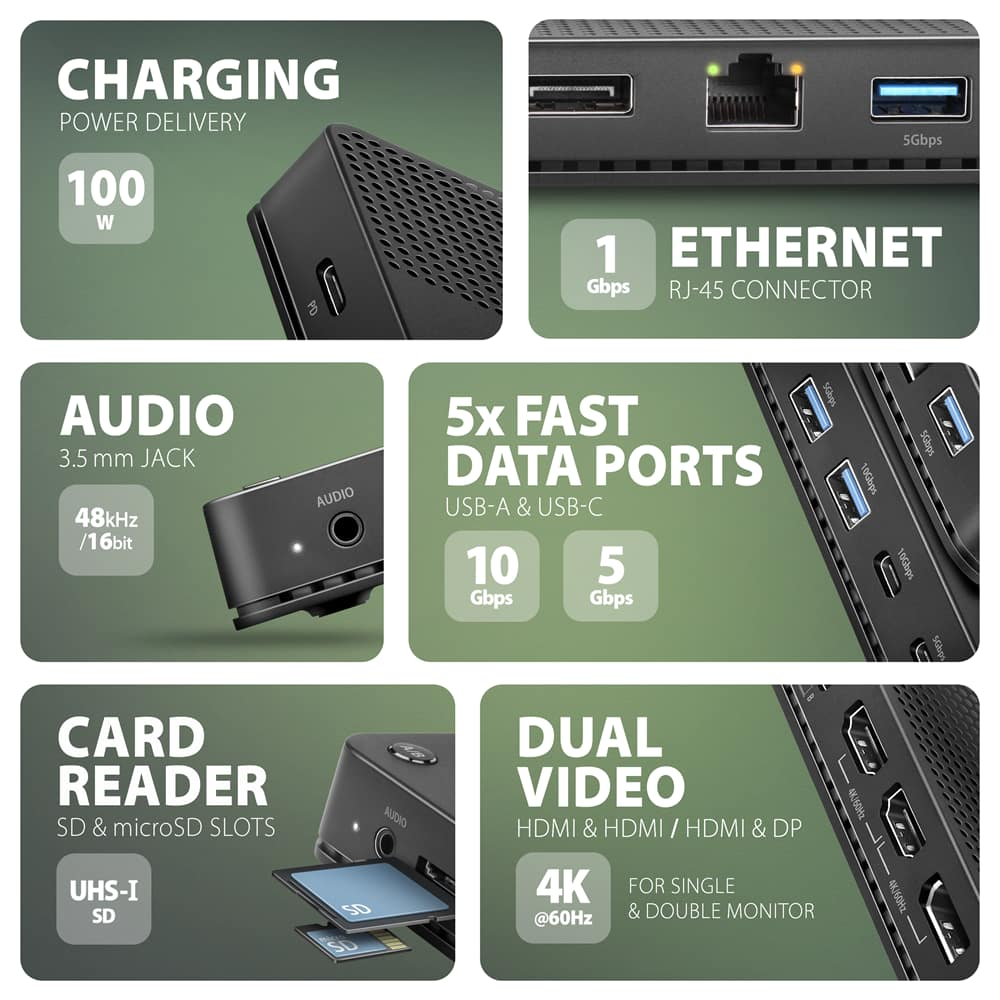
Au lieu de plusieurs adaptateurs, vous obtenez un point central unique pour connecter tout votre poste de travail. La station d’accueil offre 12 ports, y compris cinq ports USB-A et USB-C de données avec des vitesses jusqu’à 5 ou 10 Gb/s, un Gigabit Ethernet, un lecteur de cartes SD et microSD et une prise audio 3,5 mm. Grâce à l’entrée USB-C Power Delivery, l’ordinateur portable actif peut être alimenté simultanément avec une puissance pouvant atteindre 100 W. Les câbles fournis permettent de connecter les deux entrées hôte aux ordinateurs avec USB-C ou USB-A, ce qui permet de combiner des appareils avec des interfaces différentes.
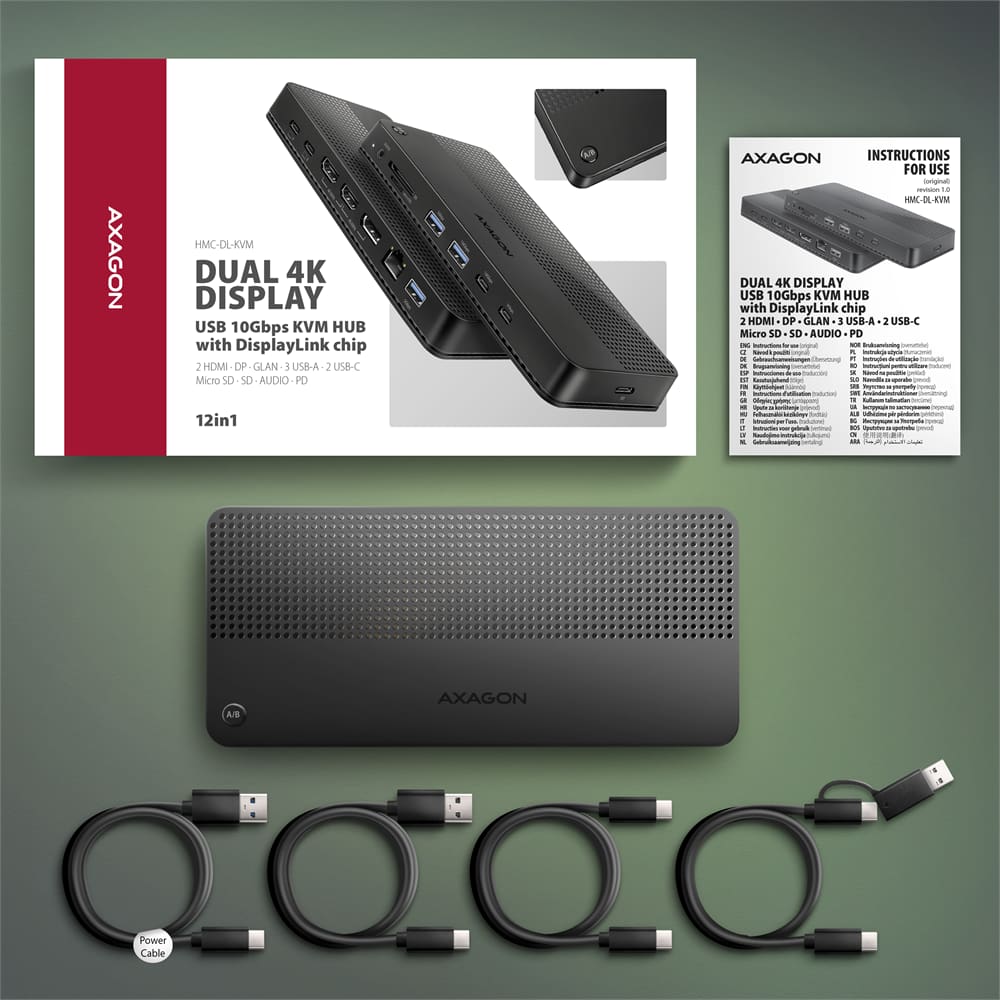
Contenu de l’emballage : tout ce dont vous avez besoin pour connecter deux ordinateurs
Le colis contient les câbles nécessaires pour différentes options de connexion de la station d’accueil aux ordinateurs avec USB-C et USB-A. Cela permet d’adapter la configuration KVM à la combinaison de deux ordinateurs portables modernes ou aux postes de travail où un ordinateur USB-C est utilisé avec un appareil plus ancien avec USB-A. Le paquet comprend également un câble d’alimentation pour assurer une alimentation autonome de la station d’accueil.
Tutoriel vidéo :
• Tutoriel vidéo sur le produit HMC-DL-KVM disponible sur www.axagon.eu
Entrée (connexion à l’ordinateur ou appareil mobile) :
• 2x USB 10Gbps (USB 3.2 Gen 2), connecteur USB-C male.
• Compatible avec USB 480Mbps, USB 5Gbps, USB 20Gbps, USB 40Gbps, Thunderbolt 3 / 4 / 5.
Entrée (alimentation) :
• 1x USB-C (alimentation combinée), connecteur female.
• La station d’accueil doit être alimentée pour fonctionner.
1. Alimentation via USB bus power :
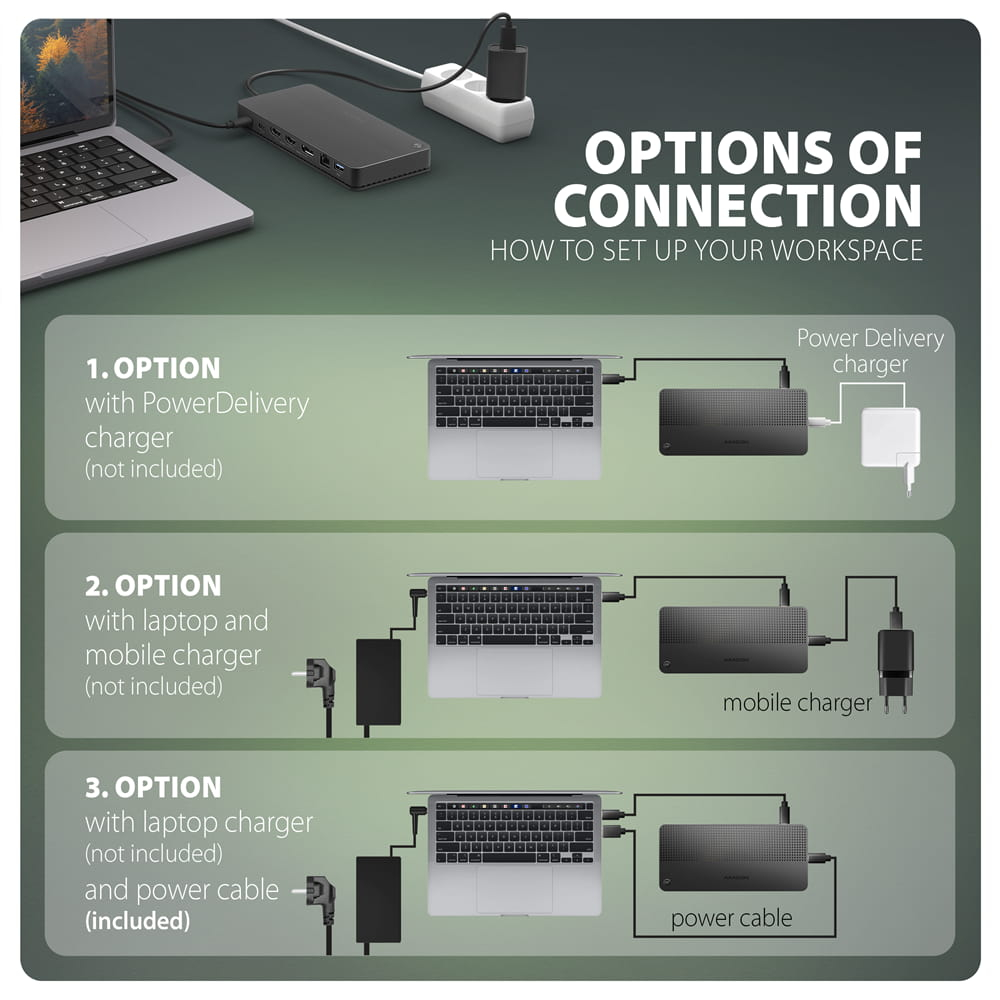
• Via le câble d’alimentation et le port USB de l’ordinateur (le câble « Power Cable » est inclus).
• Via un chargeur mobile (non inclus).
2. Alimentation via USB Power Delivery :
• Port PD 3.0 - 100 W
• Via un chargeur/adaptateur PD (non inclus).
• L’alimentation PD doit être prise en charge par l’ordinateur portable (tablette, téléphone), le câble et le chargeur secteur.
Avertissement :
La station d’accueil ne fonctionne pas sans alimentation connectée. En plus de la connexion de données à l’ordinateur, une des possibilités d’alimentation (voir ci-dessus) doit être connectée à l’entrée USB-C d’alimentation. La simple connexion avec un câble de données à l’ordinateur ne suffit pas.
Sorties USB :
• 2x port USB 5Gbps, connecteur USB-A female.
• 1x port USB 5Gbps, connecteur USB-C female.
• 1x port USB 10Gbps, connecteur USB-A female.
• 1x port USB 10Gbps, connecteur USB-C female.
• La station USB-C peut gérer la connexion simultanée de plusieurs disques externes.
Sorties vidéo :
• 2x ports HDMI, connecteur HDMI A female.
• 1x port DP, connecteur DisplayPort female.
• Le HDMI gauche et le DisplayPort sont partagés, cette combinaison ne peut donc pas être utilisée.
• L’installation de l’application DisplayLink Manager est nécessaire pour activer les sorties vidéo.
Chipset DisplayLink pour la transmission d’image via USB :
• Chipset DisplayLink DL-6950-N.
• Prise en charge de la sortie vidéo via USB-A et USB-C.
• Prise en charge de la connexion jusqu’à deux moniteurs externes en mode bureau étendu sur macOS.
• Prise en charge de la connexion jusqu’à deux moniteurs externes en mode bureau étendu sur Windows / Linux.
Résolution maximale prise en charge :
• 1 moniteur (HDMI) - jusqu’à 4K/60Hz Ultra HD, 2K/144Hz Quad HD, 1080p/240Hz Full HD
• 1 moniteur (DisplayPort) - jusqu’à 4K/60Hz Ultra HD, 2K/144Hz Quad HD, 1080p/240Hz Full HD
• 2 moniteurs (HDMI + HDMI) - jusqu’à 4K/60Hz Ultra HD, 2K/144Hz Quad HD, 1080p/240Hz Full HD
• 2 moniteurs (HDMI + DisplayPort) - jusqu’à 4K/60Hz Ultra HD, 2K/144Hz Quad HD, 1080p/240Hz Full HD
• La fréquence de rafraîchissement réalisable dépend des spécifications du moniteur et de sa compatibilité avec la station d’accueil. La fluidité de l’image peut également être affectée par la bande passante USB disponible, la charge des autres périphériques connectés à la station et la performance de l’ordinateur.
Caractéristiques vidéo :
• Sur les appareils Apple avec macOS, la fréquence de rafraîchissement maximale est généralement limitée à 60Hz.
• Prise en charge HPD (Hot-Plug-Detect).
• Prise en charge TMDS (Transition Minimized Differential Signaling).
• Prise en charge de la fréquence d’échantillonnage jusqu’à 48 kHz et du son stéréo 16 bits – dépend de l’appareil source et destination, c.-à-d. ordinateur portable/téléphone et TV/moniteur/récepteur AV.
Lecteur de cartes - deux slots :
• Slot microSD : microSD, microSDHC, microSDXC, TransFlash.
• Slot SD : SD, SDHC, SDXC, MMC, MMC mobile, RS-MMC.
• Prise en charge SD/microSD UHS-I. Vitesse jusqu’à 104 Mo/s.
• Compatible SD 1.0 à SD 3.0 (SDXC - Secure Digital eXtended Capacity, jusqu’à 2 To).
• Prise en charge matérielle de la fonction CRC.
• 2 LUN – le lecteur est reconnu comme deux unités disque. Possibilité de copier d’une carte à l’autre.
• Chipset Realtek RTS5306.
Sortie / entrée audio :
• 1x jack 3,5 mm 4 broches pour casque, écouteurs ou haut-parleurs actifs,
• Sortie stéréo analogique 2 canaux 48 kHz @ 16 bits pour lecture,
• Entrée microphone analogique 48 kHz @ 16 bits pour enregistrement.
Sortie RJ-45 :
• Interface Gigabit Ethernet avec connecteur RJ-45 pour connexion par câble UTP ou STP.
• Vitesses de transmission Ethernet prises en charge : 10/100/1000 Mb/s.
• Normes prises en charge IEEE 802.3i 10Base-T, IEEE 802.3u 100Base-TX, IEEE 802.3ab 1000Base-T.
• Auto-détection 10/100/1000 Mb/s.
• Chipset Realtek RTL8211F.
Commutateur KVM :
• Permet de contrôler deux ordinateurs avec un seul ensemble d’écrans, clavier et souris tout en partageant les périphériques USB connectés et autres accessoires.
• La commutation entre les ordinateurs se fait par le bouton A/B.
Autres caractéristiques :
• Connexion à chaud grâce à la prise en charge Hot Plug.
• Prise en charge du mode économie d’énergie.
• LED indiquant en permanence la connexion du dock à l’ordinateur.
Autres informations :
• Dimensions de la station d’accueil 180 × 80 × 20 mm (L × P × H).
• Poids de la station d’accueil 170 g (sans câble).
Systèmes d’exploitation pris en charge :
• Windows 10 / 11, macOS, Ubuntu / Linux, ChromeOS et Android.
• La compatibilité dépend du système d’exploitation utilisé et de la prise en charge du fabricant.
• Les pilotes pour le chipset DisplayLink peuvent également affecter le bon fonctionnement du produit. Il est recommandé de télécharger la dernière version des pilotes.
Contenu de l’emballage :
• Station d’accueil USB-C KVM,
• câble (données) USB-C / USB-C longueur 100 cm,
• câble (données) USB-C / USB-C longueur 30 cm avec adaptateur USB-C / USB-A,
• câble (données) USB-C / USB-A longueur 100 cm,
• câble (alimentation) USB-C / USB-A longueur 150 cm,
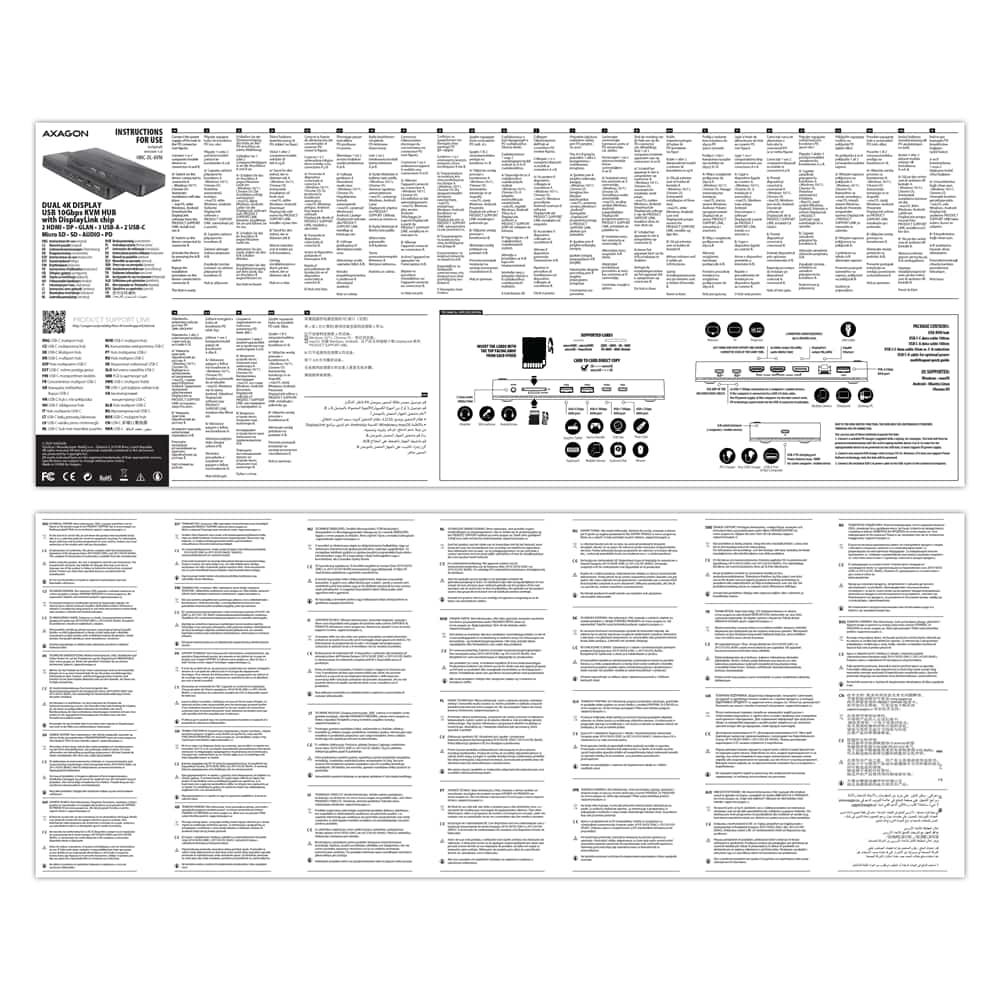
• manuel multilingue CZ / DE / DK / ENG / ESP / EST / FIN / FR / GR / HR / HU / IT / LT / LV / NL / NOR / PL / PT / RO / SK / SLO / SRB / SWE / TR / UA / ALB / BG / BOS / CN / ARA,
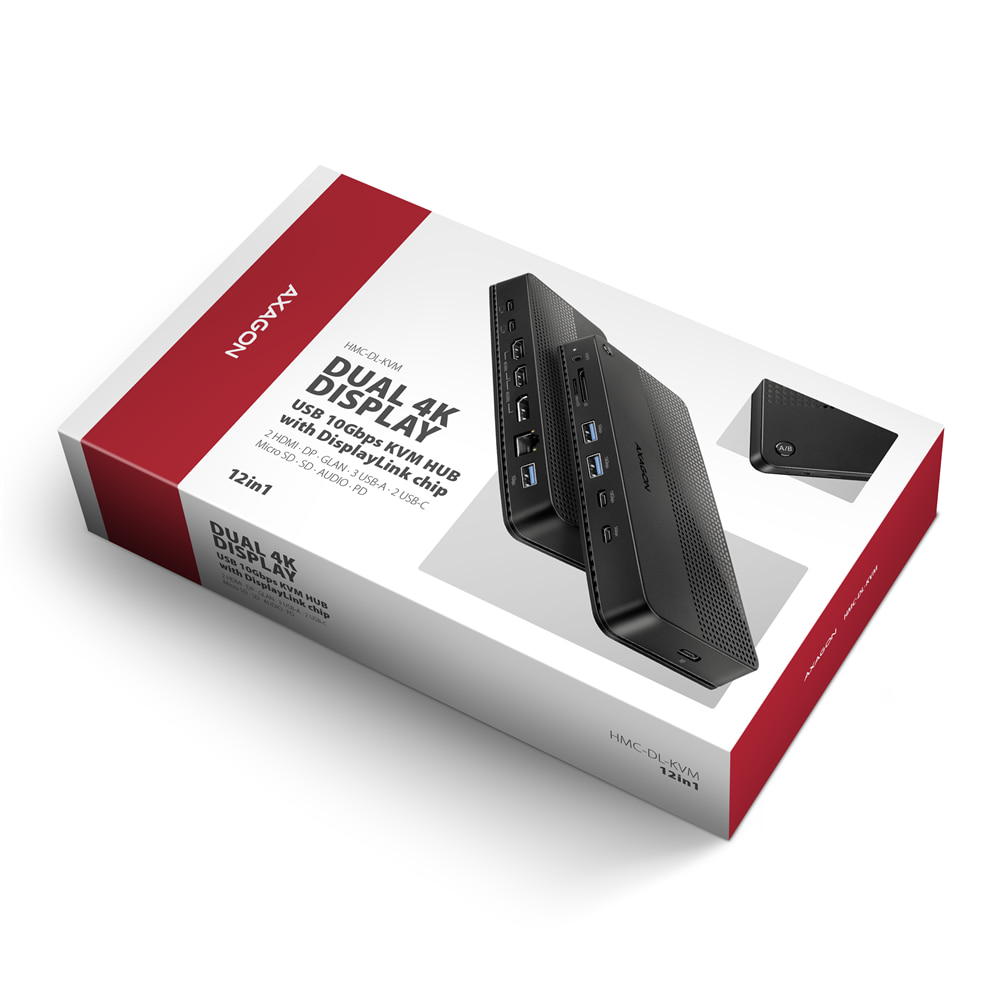
• emballé dans une boîte en carton.



 français
 tchèque
 slovaque
 anglais
 allemand
 hongrois
 polonais

 + 6 autres photos