


 English
 Czech
Czech
 Slovak
 German
 Hungarian
 Polish
How to initialize a new disk
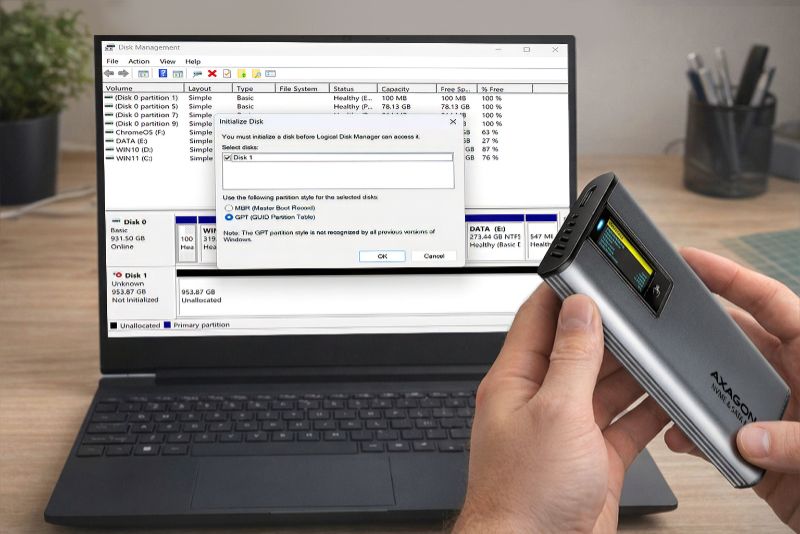
You bought a new disk – great. You inserted it into an external box, connected it to your computer, but nothing happens. The system does not see it at all. Don’t worry – there is no reason to panic or immediately return the disk. The disk is not defective, it just needs to be initialized. In this article, we will guide you step by step through the process.
What is disk initialization?
Initialization is the first step that must be performed on a new disk before you can start working with it. During initialization, you inform the operating system that the disk exists and prepare it for creating partitions and subsequent formatting. Without this step, the disk remains “invisible” to the operating system.
The advantage of using an external box
You can install the disk directly into a computer. However, if you have multiple disks, you can choose a simple and fast solution in the form of an external box. This allows you to connect the disk easily via USB. This option is also ideal for notebooks or devices without the possibility of replacing internal storage.
How to initialize a disk (Windows)
1. Insert the disk into an external box
Choose the appropriate external box model according to the disk type (e.g. 2.5" SATA, M.2 NVMe, etc.), insert the disk into the external box and connect it to the computer via USB. Selecting the correct disk type is essential. If you insert a SATA disk into an NVMe box, the disk will not appear in the system. If you manage to insert an NVMe disk into a SATA box, you may damage the disk.
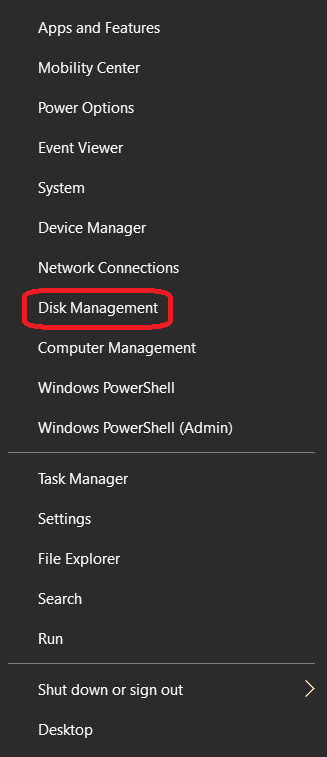
2. Open Disk Management
Press Win + X and select Disk Management.
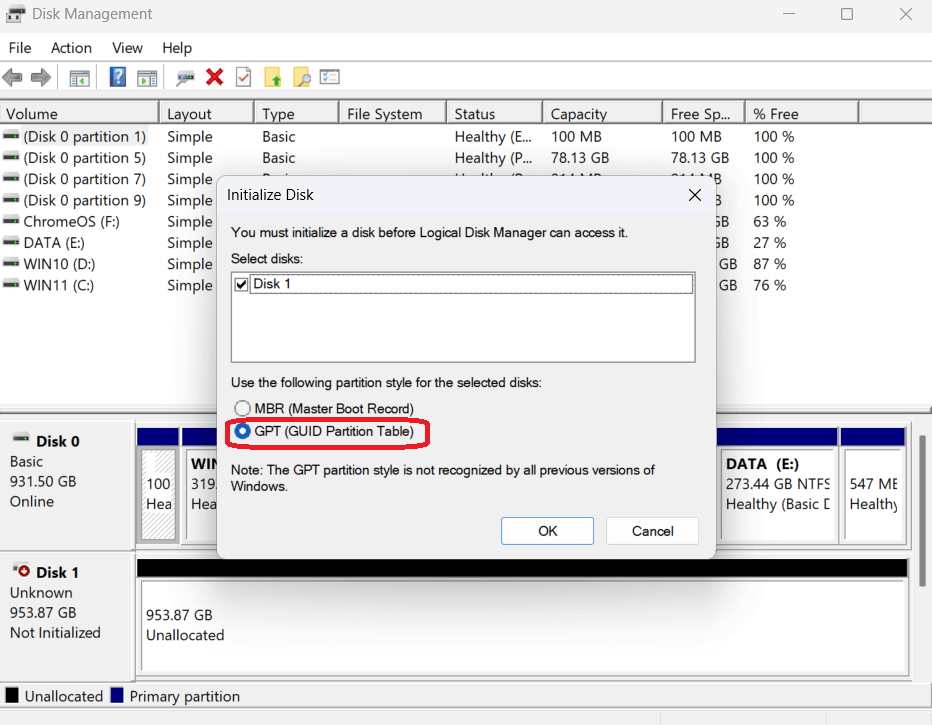
3. The system will automatically prompt you to initialize the disk
Choose whether to use the MBR partition style (for disks up to 2 TB) or GPT (for disks larger than 2 TB). For modern computers, we recommend using GPT.
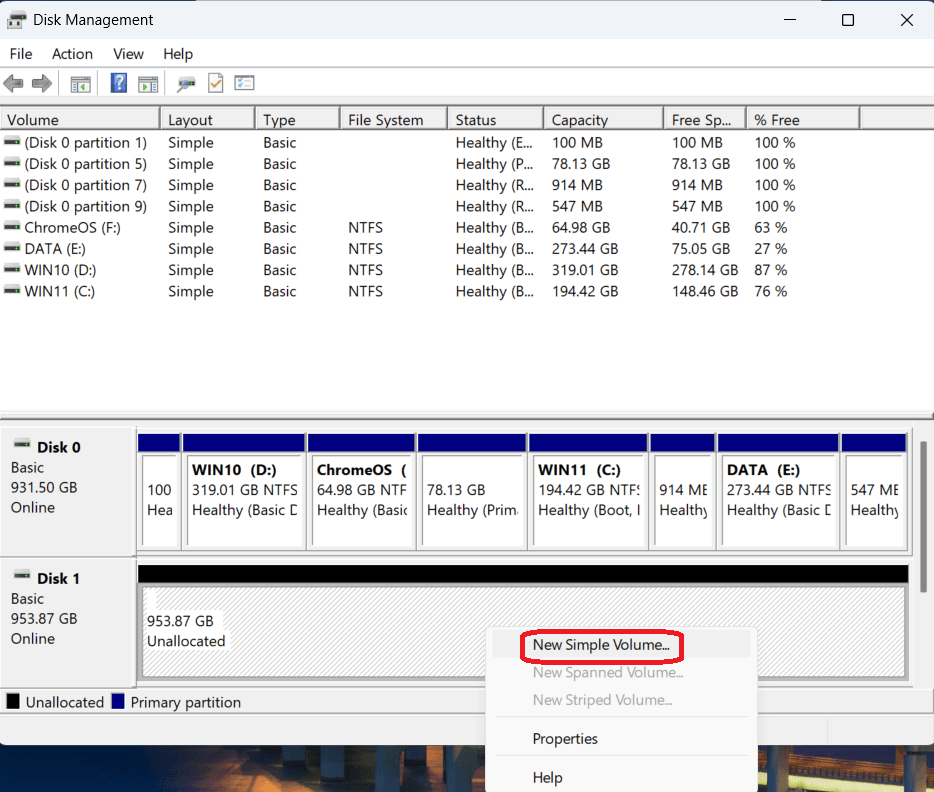
4. Create a new volume and format the disk
Right-click on the unallocated space of the disk and select New Simple Volume. The wizard will guide you through the remaining steps.
5. Done – the disk is ready to use
After the formatting process is completed, you can start using the disk just like any other external or internal disk.

Tip: AXAGON external boxes are more than just a simple enclosure
AXAGON products, such as AXAGON EE25-SL for 2.5" SATA disks or AXAGON EEM2-SD2 for M.2 SSDs, provide not only quality construction and reliability, but also features such as:
• disk status monitoring (S.M.A.R.T.)
• support for high-speed data transfer
• easy disk replacement without screws
• universal compatibility with Windows, macOS and Linux
• and more.
An external box can therefore be used not only for the initial disk initialization, but also long-term as a fast portable storage device or backup solution.
Follow!