


 English
 Čeština
 Slovenčina
 Deutsch
 Magyar
 Polski
 Français
Software RAID in Windows and how to set up Storage Spaces without using BIOS
Software RAID (SW RAID) is a straightforward way to create safer storage without complex configuration. It lets you build a protected storage setup using tools included in Windows. This guide explains how Storage Spaces work and how to configure them without changing settings in BIOS (UEFI). Apple users can find a similar guide in our article Software RAID in macOS How to Set Up RAID with Disk Utility
- What RAID Stands For
- How Software RAID Is Used and Why It Is Now Configured in Applications
- How Storage Spaces Works in Windows
- Storage Spaces Resiliency Types and When to Use Them
- Advantages and Disadvantages of Software RAID
- How to Create a Storage Space in Windows 11
- How to Create Storage Spaces in Windows 10 and 8.1
- Removing an Existing Storage Space in Windows
- How to Remove an Existing Storage Space in Windows 11
- How to Remove an Existing Storage Space in Windows 10 and 8.1
What RAID stands for
Pokémon fans may associate the word RAID with a battle over a legendary character. In storage terminology, however, RAID stands for Redundant Array of Independent Disks.
- Redundant - protection against failure
- Array - multiple drives combined
- Independent Disks - separate drives (HDDs or SSDs)
Put together, the term describes multiple drives working as a single unit.
How Software RAID is used and why it is now configured in applications
Software RAID combines multiple drives into one logical storage system to improve performance, data protection, or capacity without requiring dedicated hardware. In the past, disk arrays had to be configured in BIOS or with advanced system tools, which required specialist knowledge.
Modern operating systems such as Windows and macOS include graphical tools that make software RAID relatively easy to configure. This avoids complex setup and does not require advanced technical knowledge.
How Storage Spaces works in Windows
Storage Spaces is a tool built into Windows that combines multiple drives into one logical storage space.
Storage Spaces resiliency types and when to use them
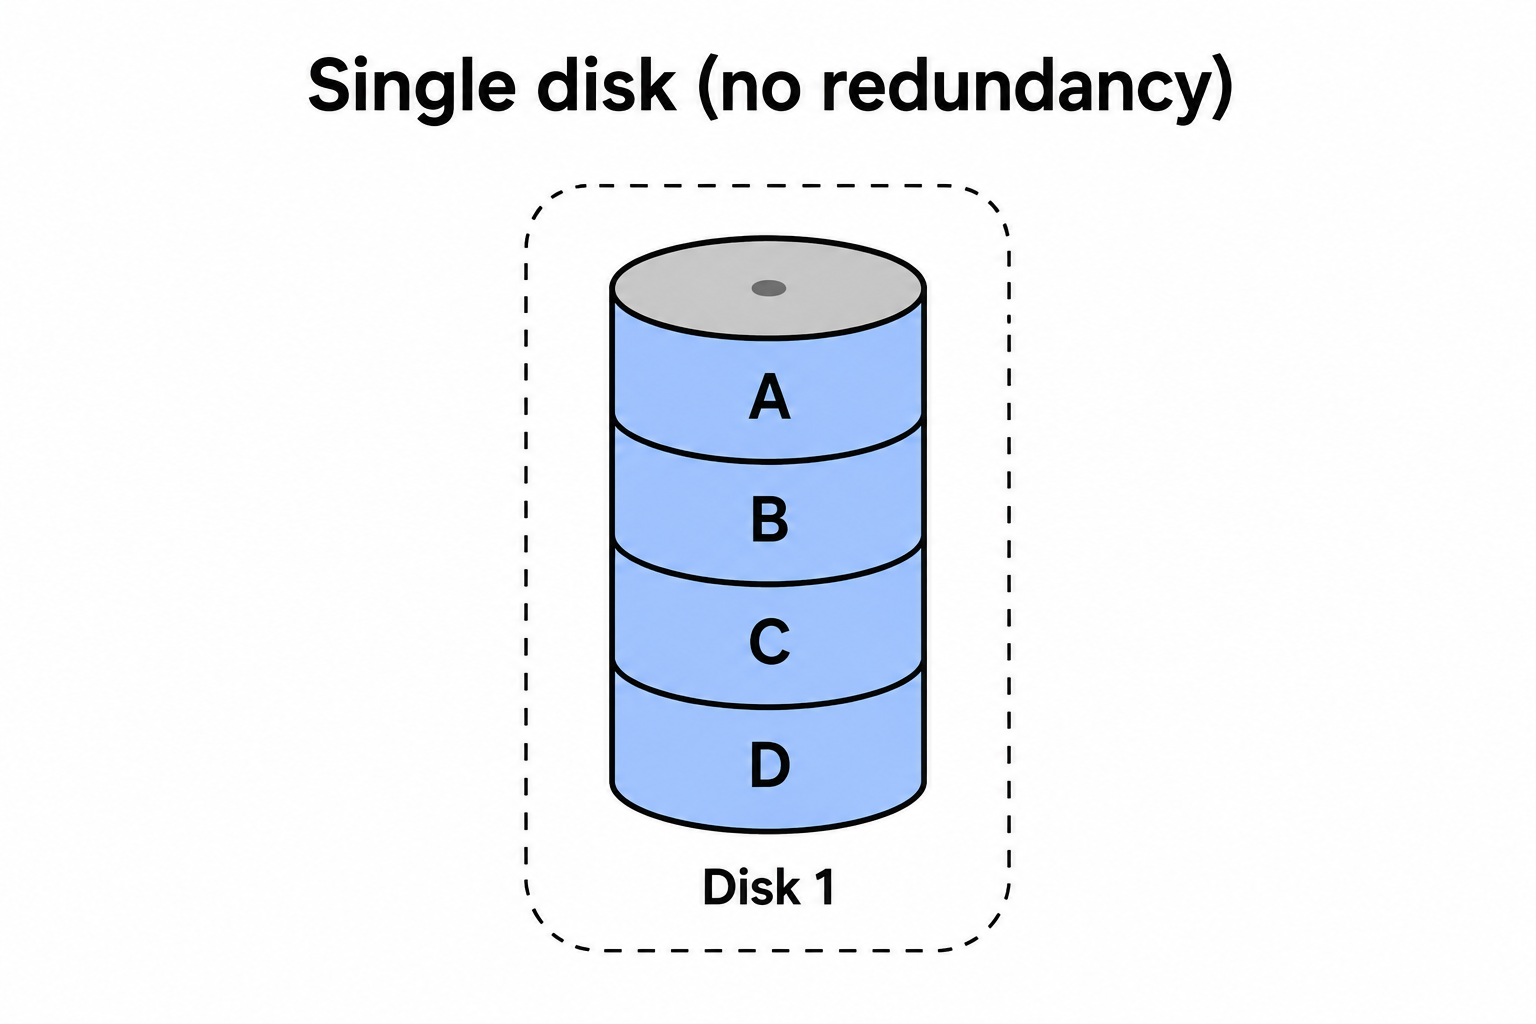
Simple without resiliency
- requires at least one drive
- stores one copy of the data
- does not protect against drive failure
- if the drive fails, the data is lost
When to use: When data protection is not required and a drive failure would not be critical.
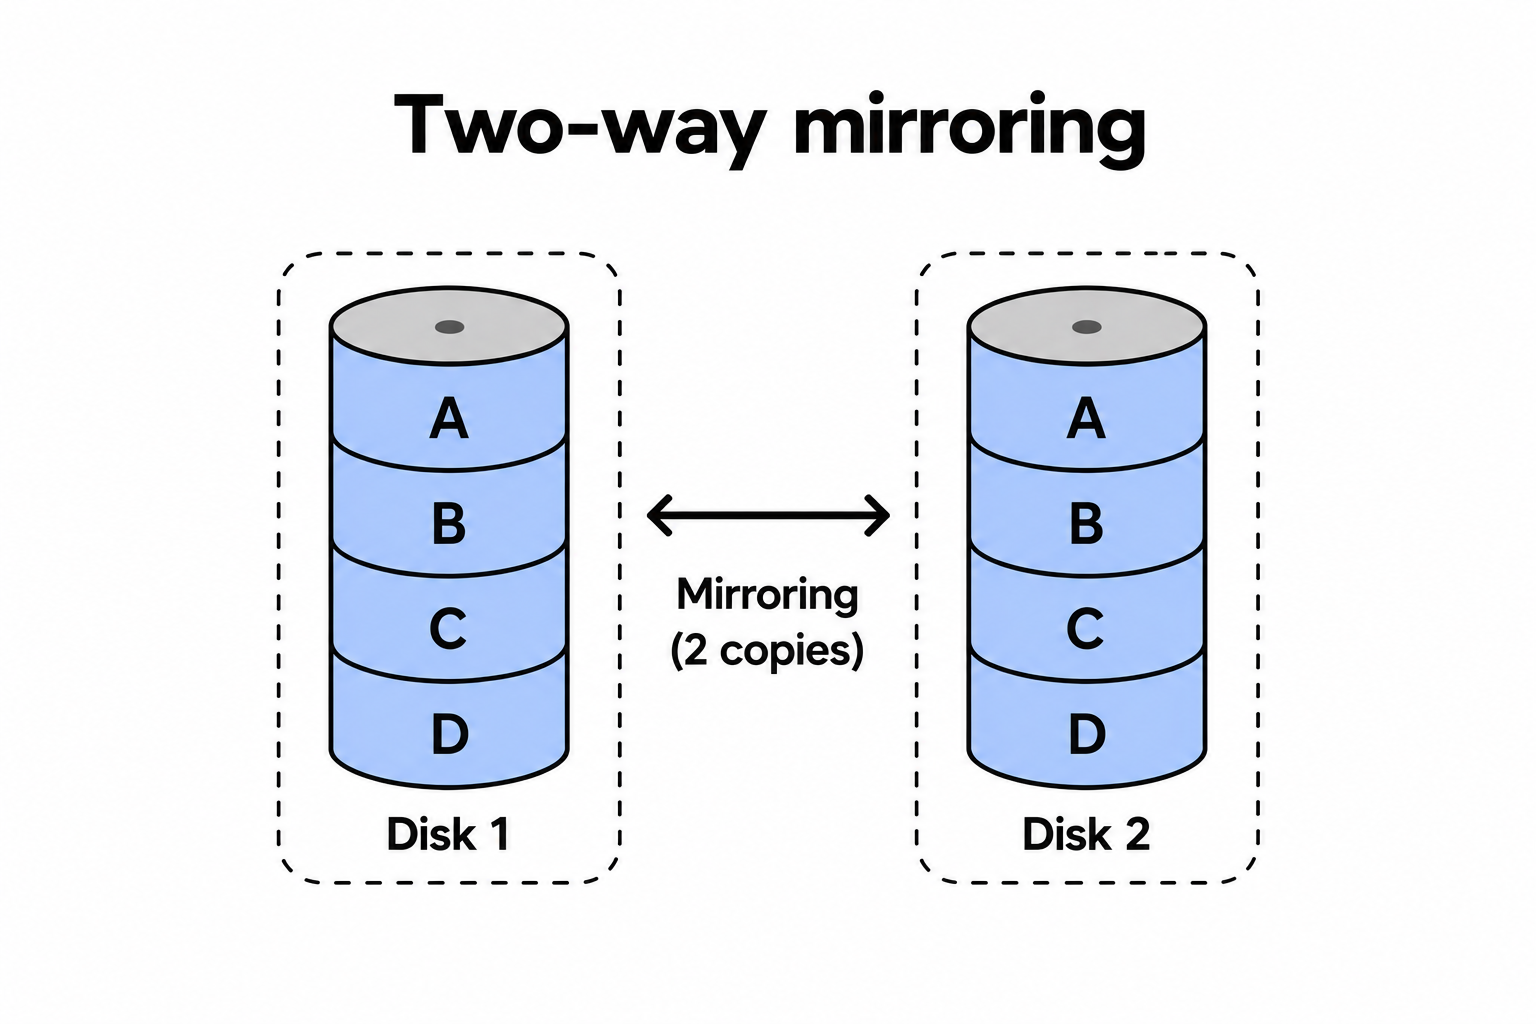
Two way mirror
- requires at least two drives
- stores two copies of the data
- protects against the failure of one drive
- If one drive fails, the data remains available on the second drive
When to use: When you need high data availability and protection against a single drive failure, for example for databases
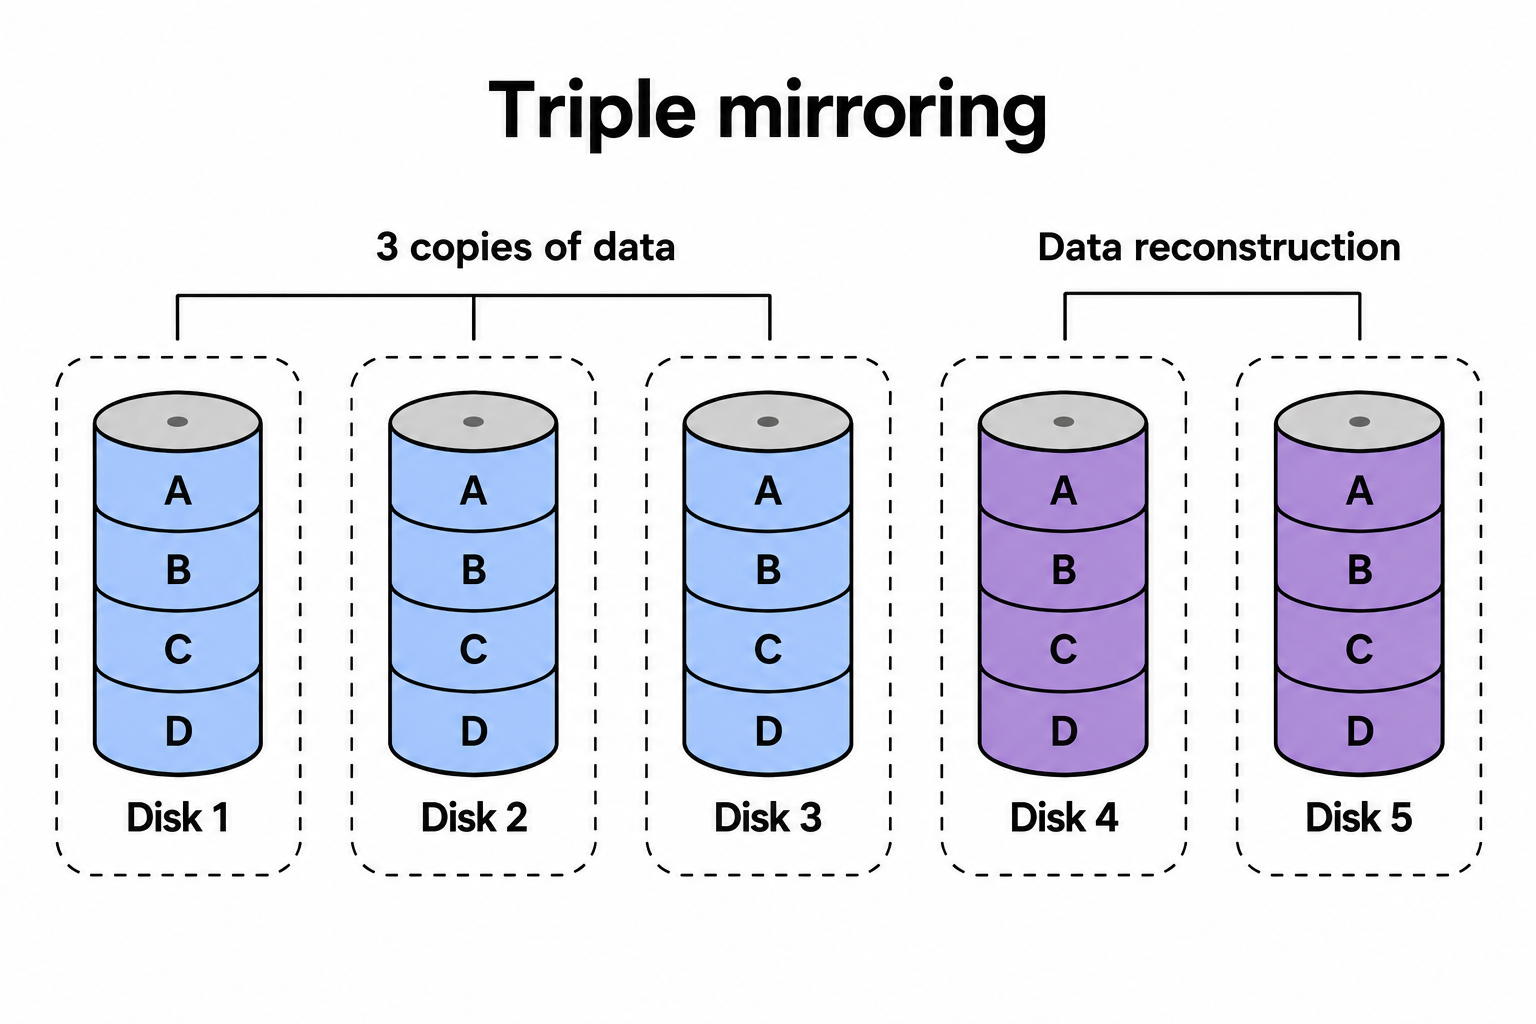
Three way mirror
- requires at least five drives
- stores three copies of the data
- protects against the failure of two drives
- the remaining two drives retain the information needed for data recovery
- if drives fail, the data remains available and can be restored using the recovery information
When to use: When you need maximum data protection and high availability, for example for critical applications or a NAS
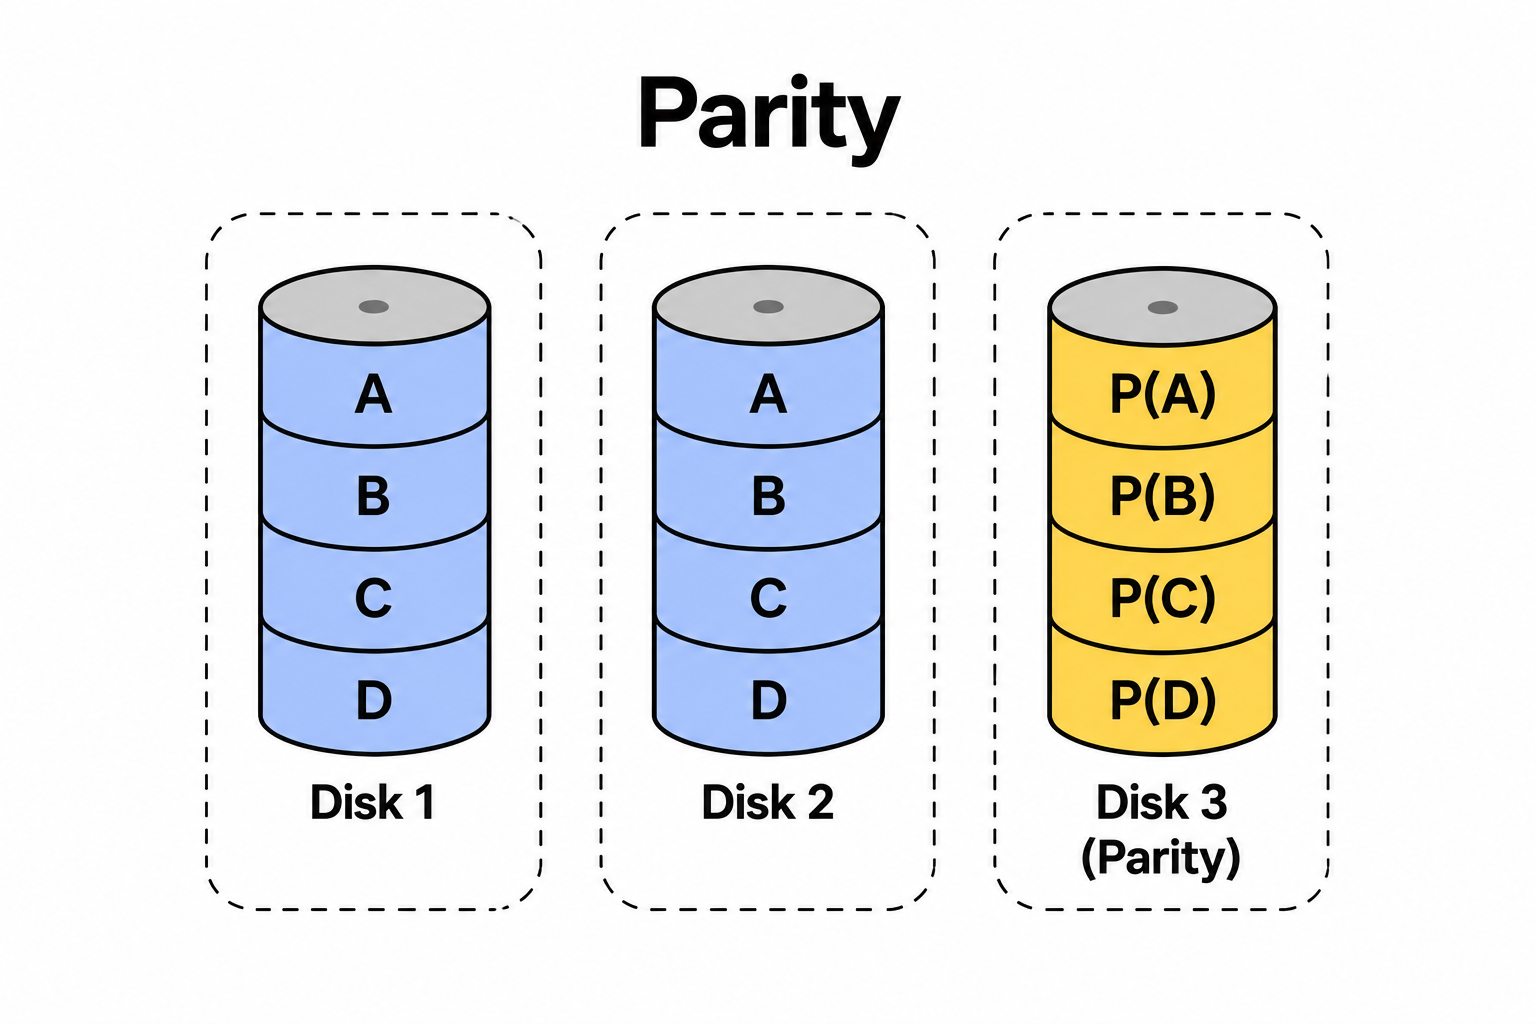
Parity
- requires at least three drives
- stores parity information that can be used to recover data if one drive fails
When to use: When you need a balance between data protection and usable capacity, for example for file servers or backups.
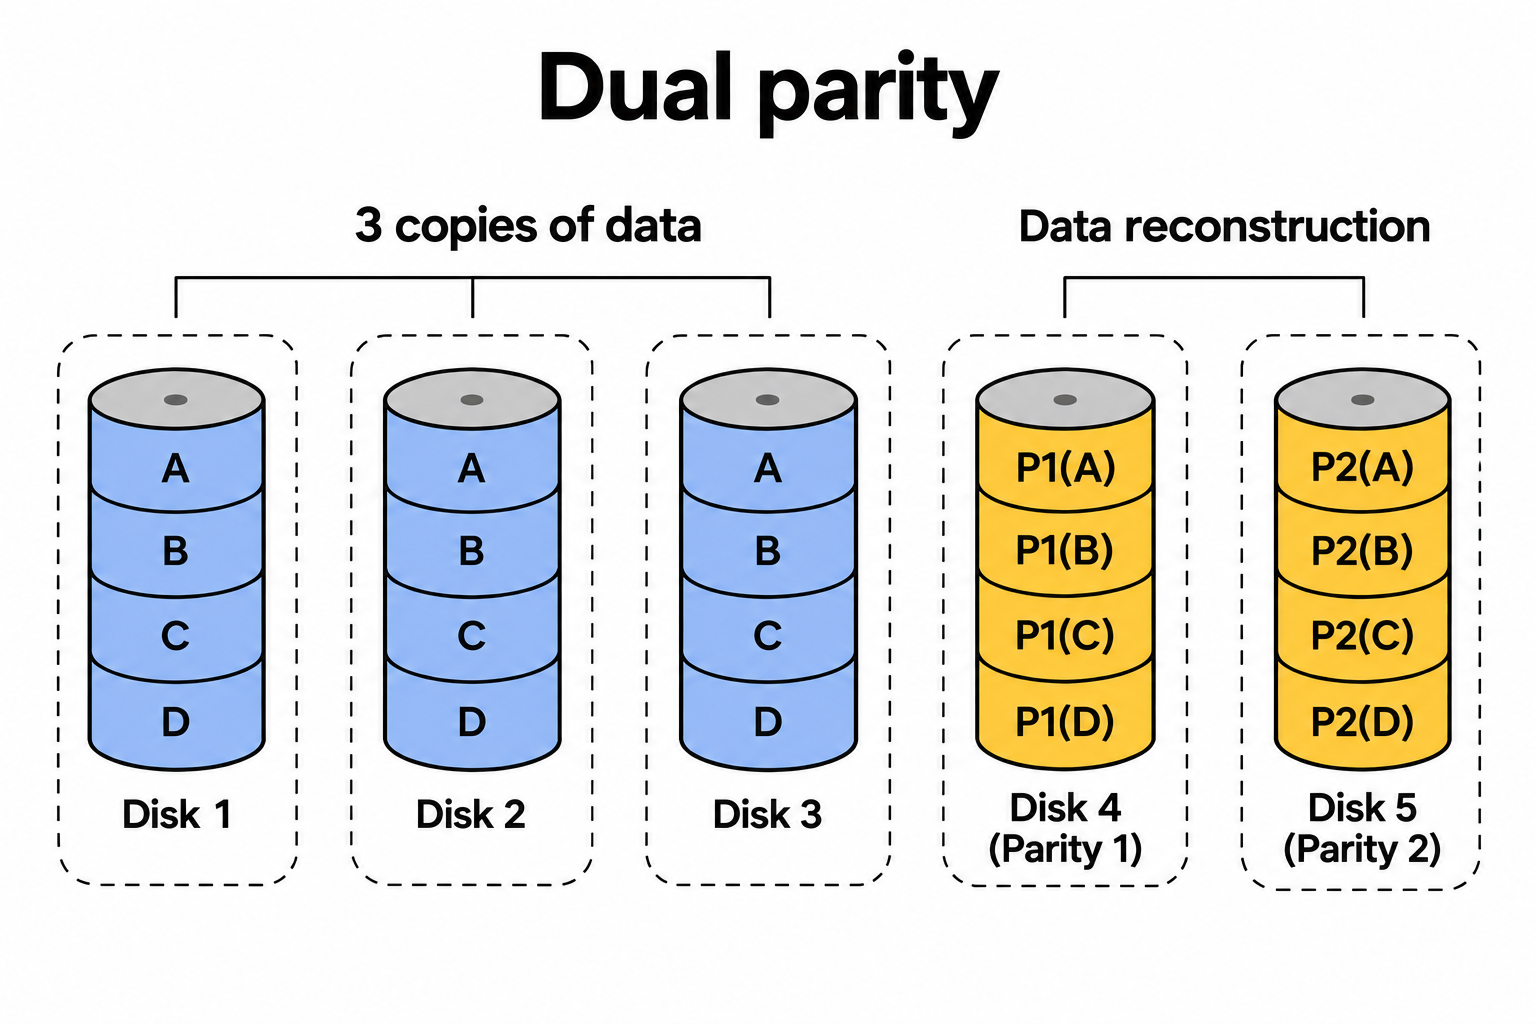
Dual parity
- requires at least five drives
- stores parity information across two drives
- protects against the failure of two drives
When to use: When you need a high level of data protection with a larger number of drives, for example for large storage systems or archives.
Using external drives
A major advantage is that Storage Spaces also works with external drives and docking stations for HDDs and SSDs.
Advantages and disadvantages of Software RAID
Advantages:
- Higher performance without a large investment.
- Larger and more flexible storage by combining drives into one unit and adding more drives when needed.
- Straightforward setup.
- No dedicated hardware is required.
- You can reuse external drives you already have, which helps keep costs low.
Disadvantages:
- It does not replace a backup, so it will not protect you from deleted files or viruses.
- It depends on the operating system in which it was created, such as Windows or macOS.
- Performance is limited by the slowest drive.
How to create a Storage Space in Windows 11
Connect the drives you want to use for the RAID array, following the manufacturer's instructions.
BACK UP ALL DATA ON THE CONNECTED DRIVES. THE DRIVES WILL BE FORMATTED IN THE NEXT STEP.
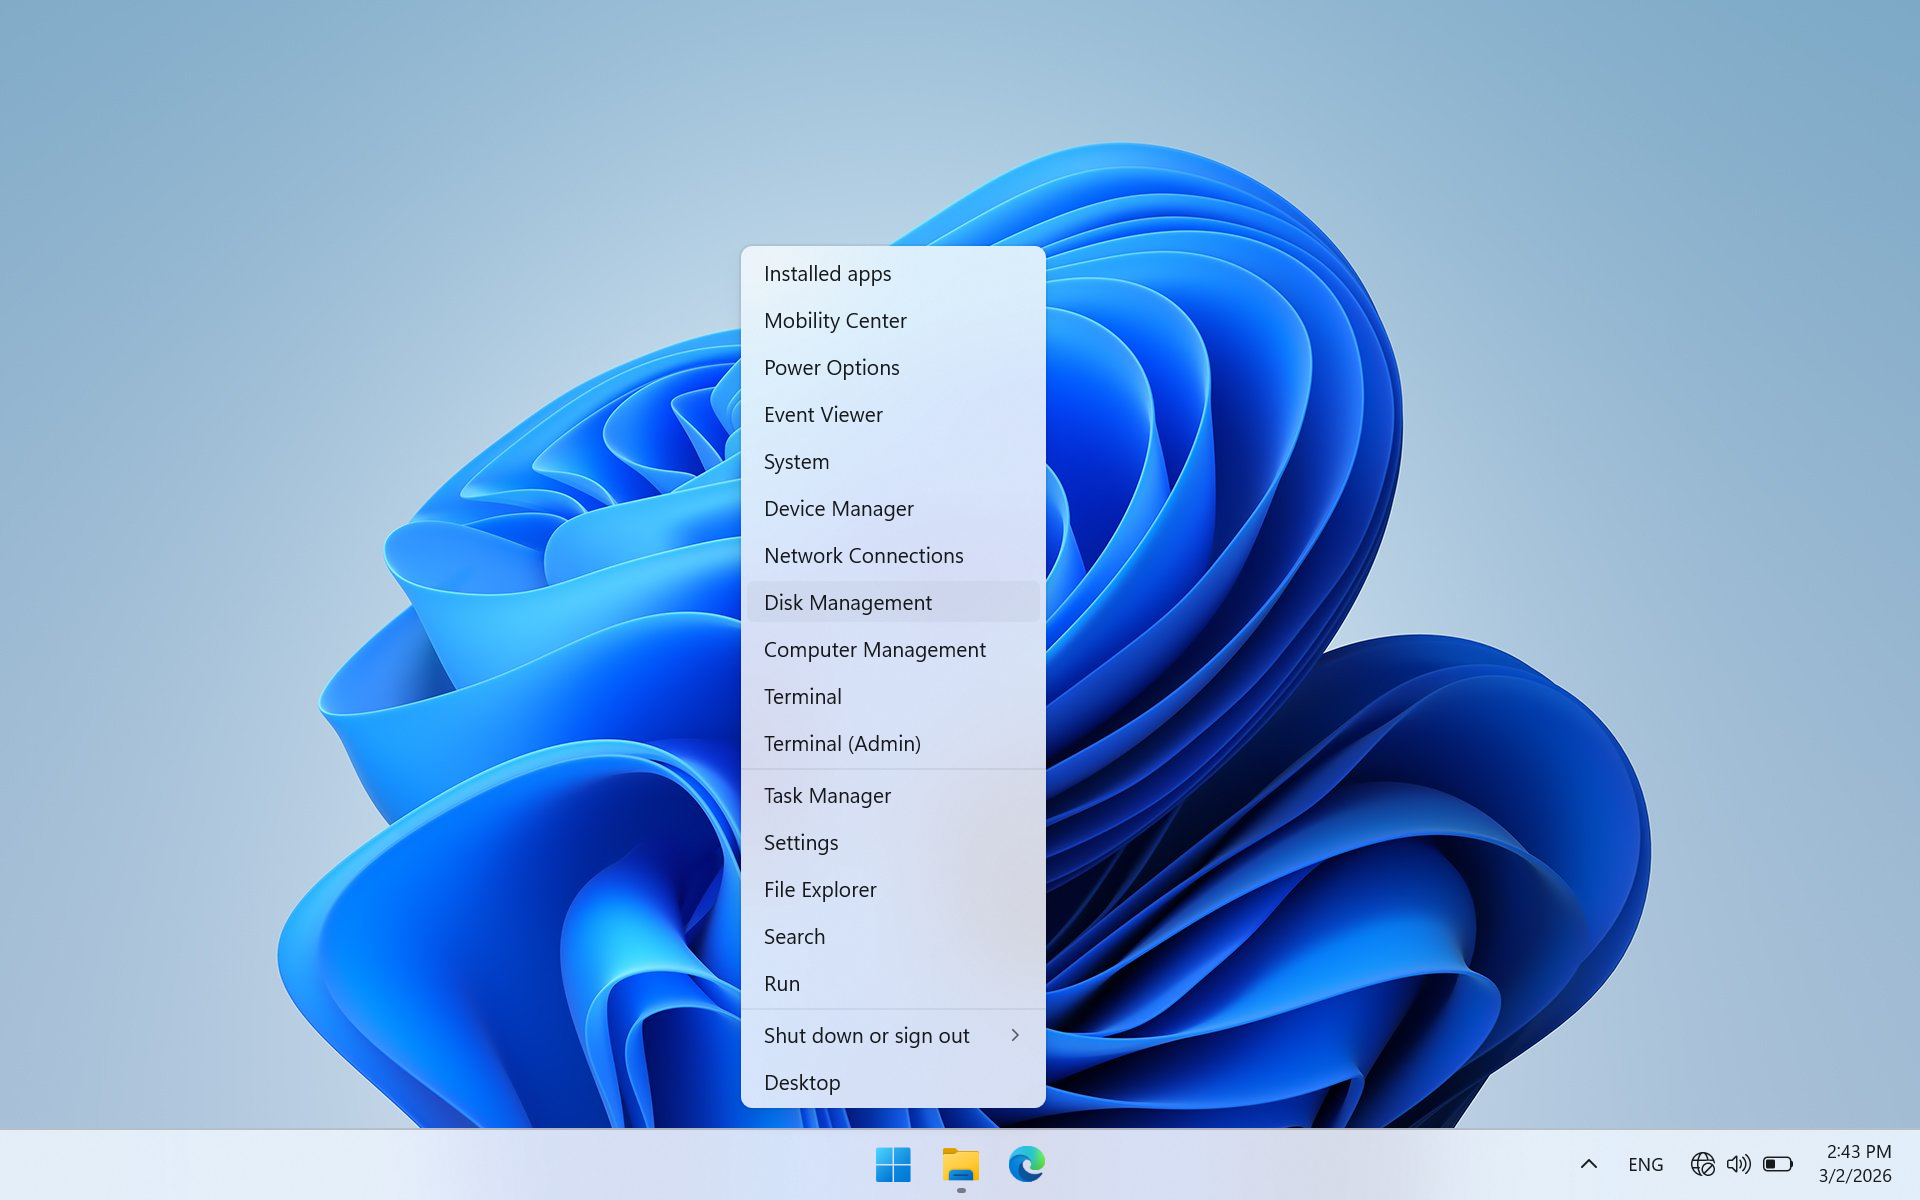
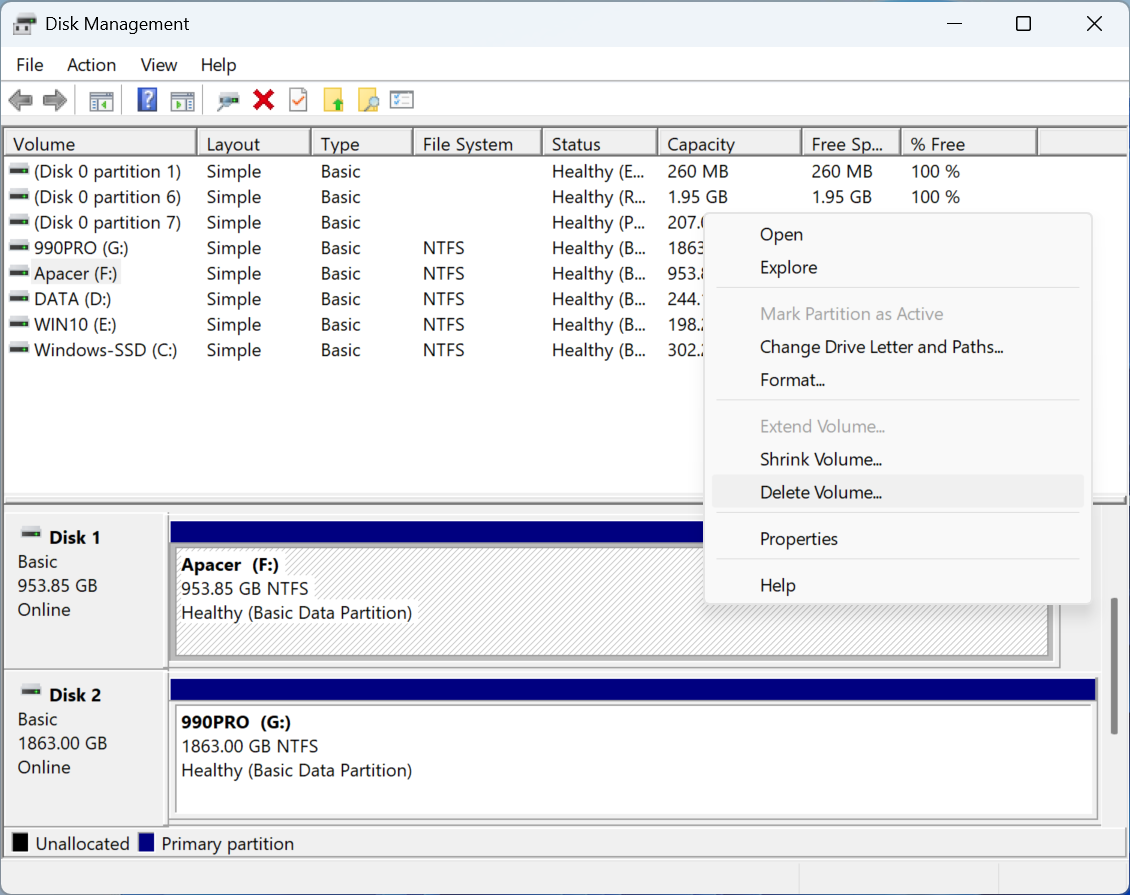
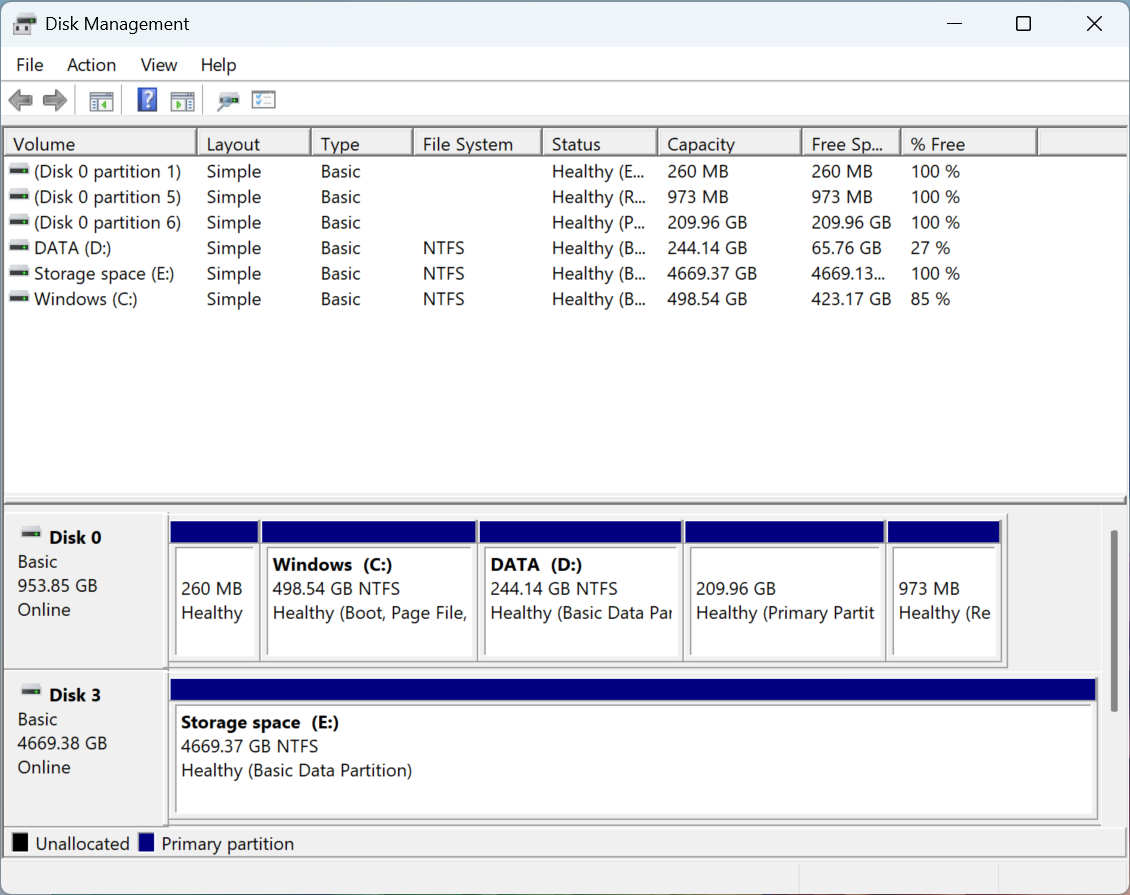
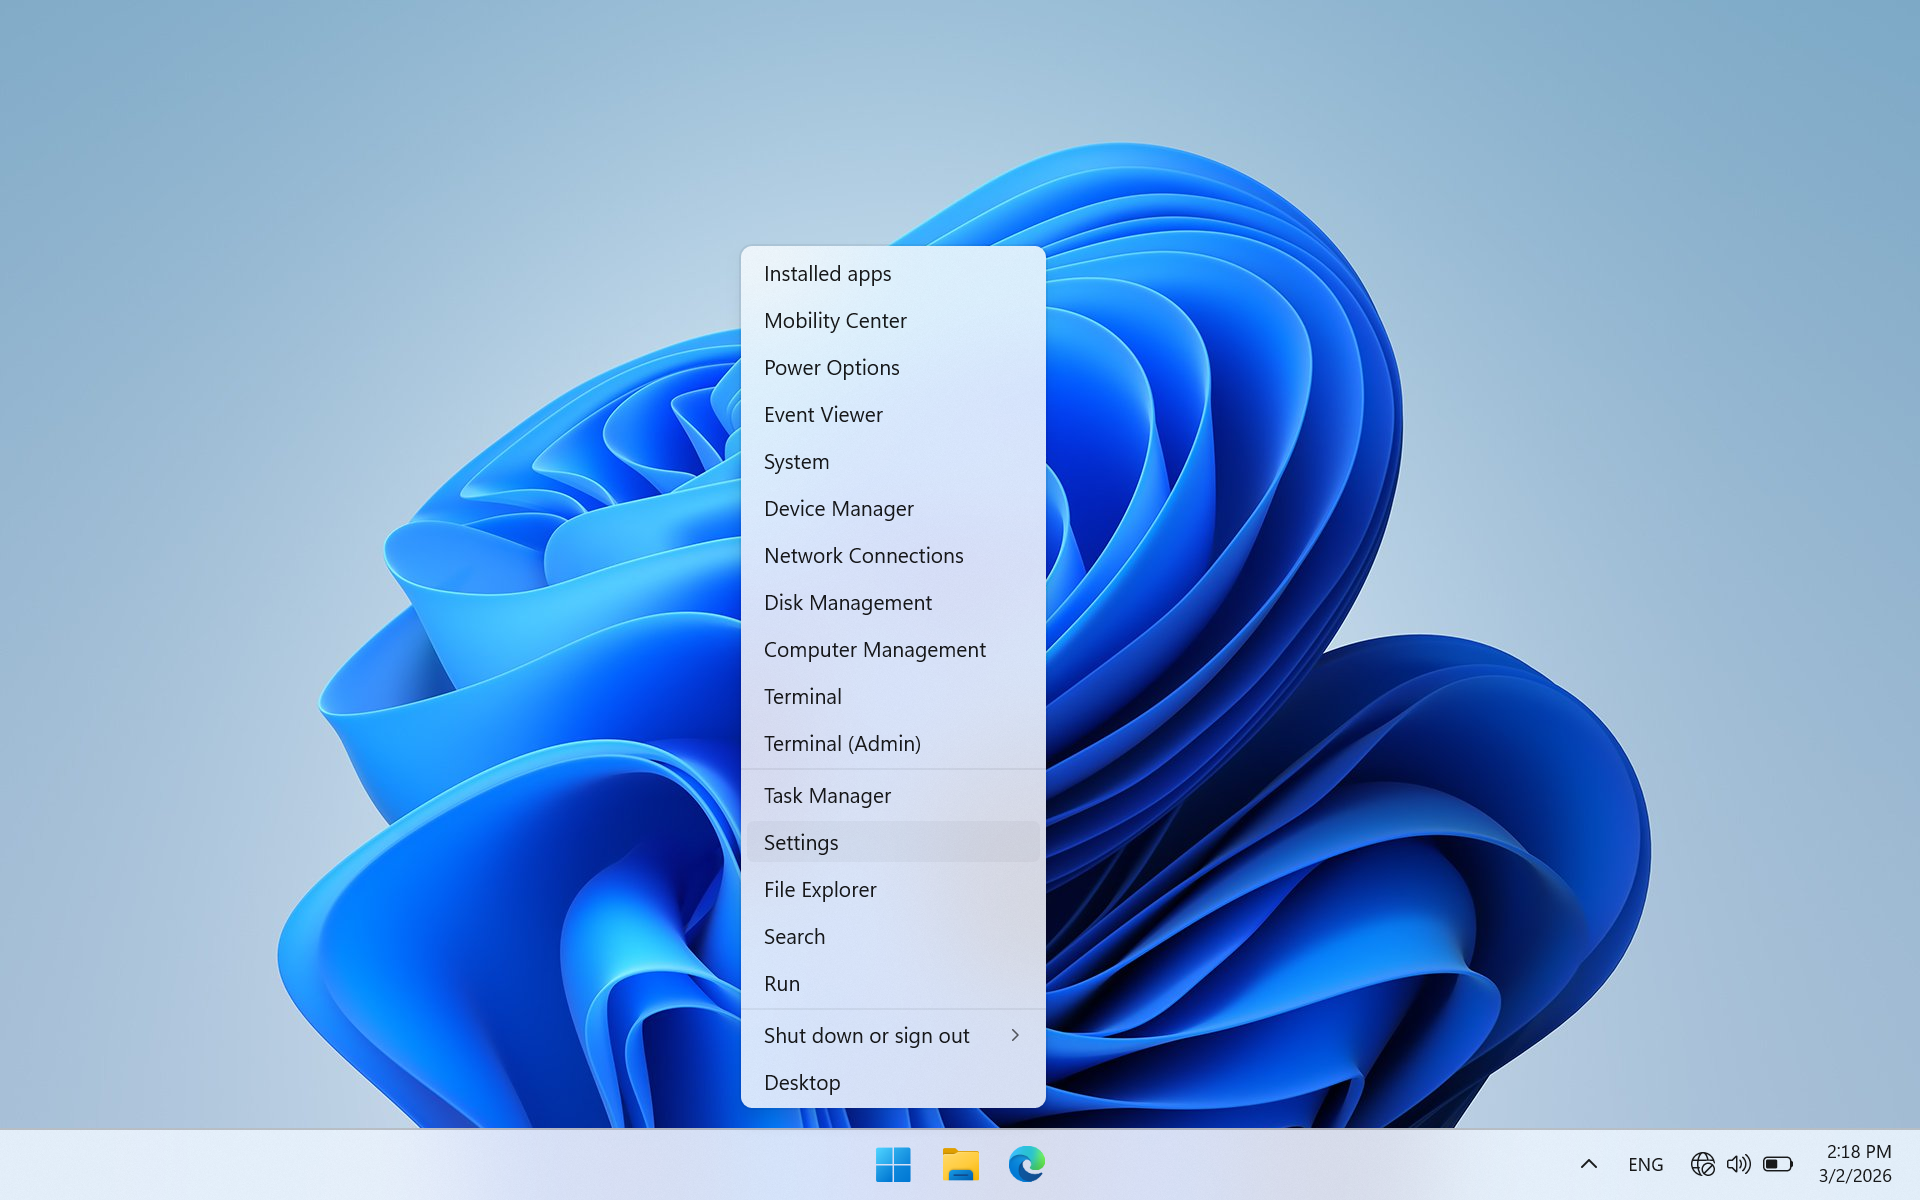
Right-click Start and select Disk Management from the context menu. Select a connected drive, right-click it, and choose Delete Volume. Repeat this for every drive that will be included in the storage pool.
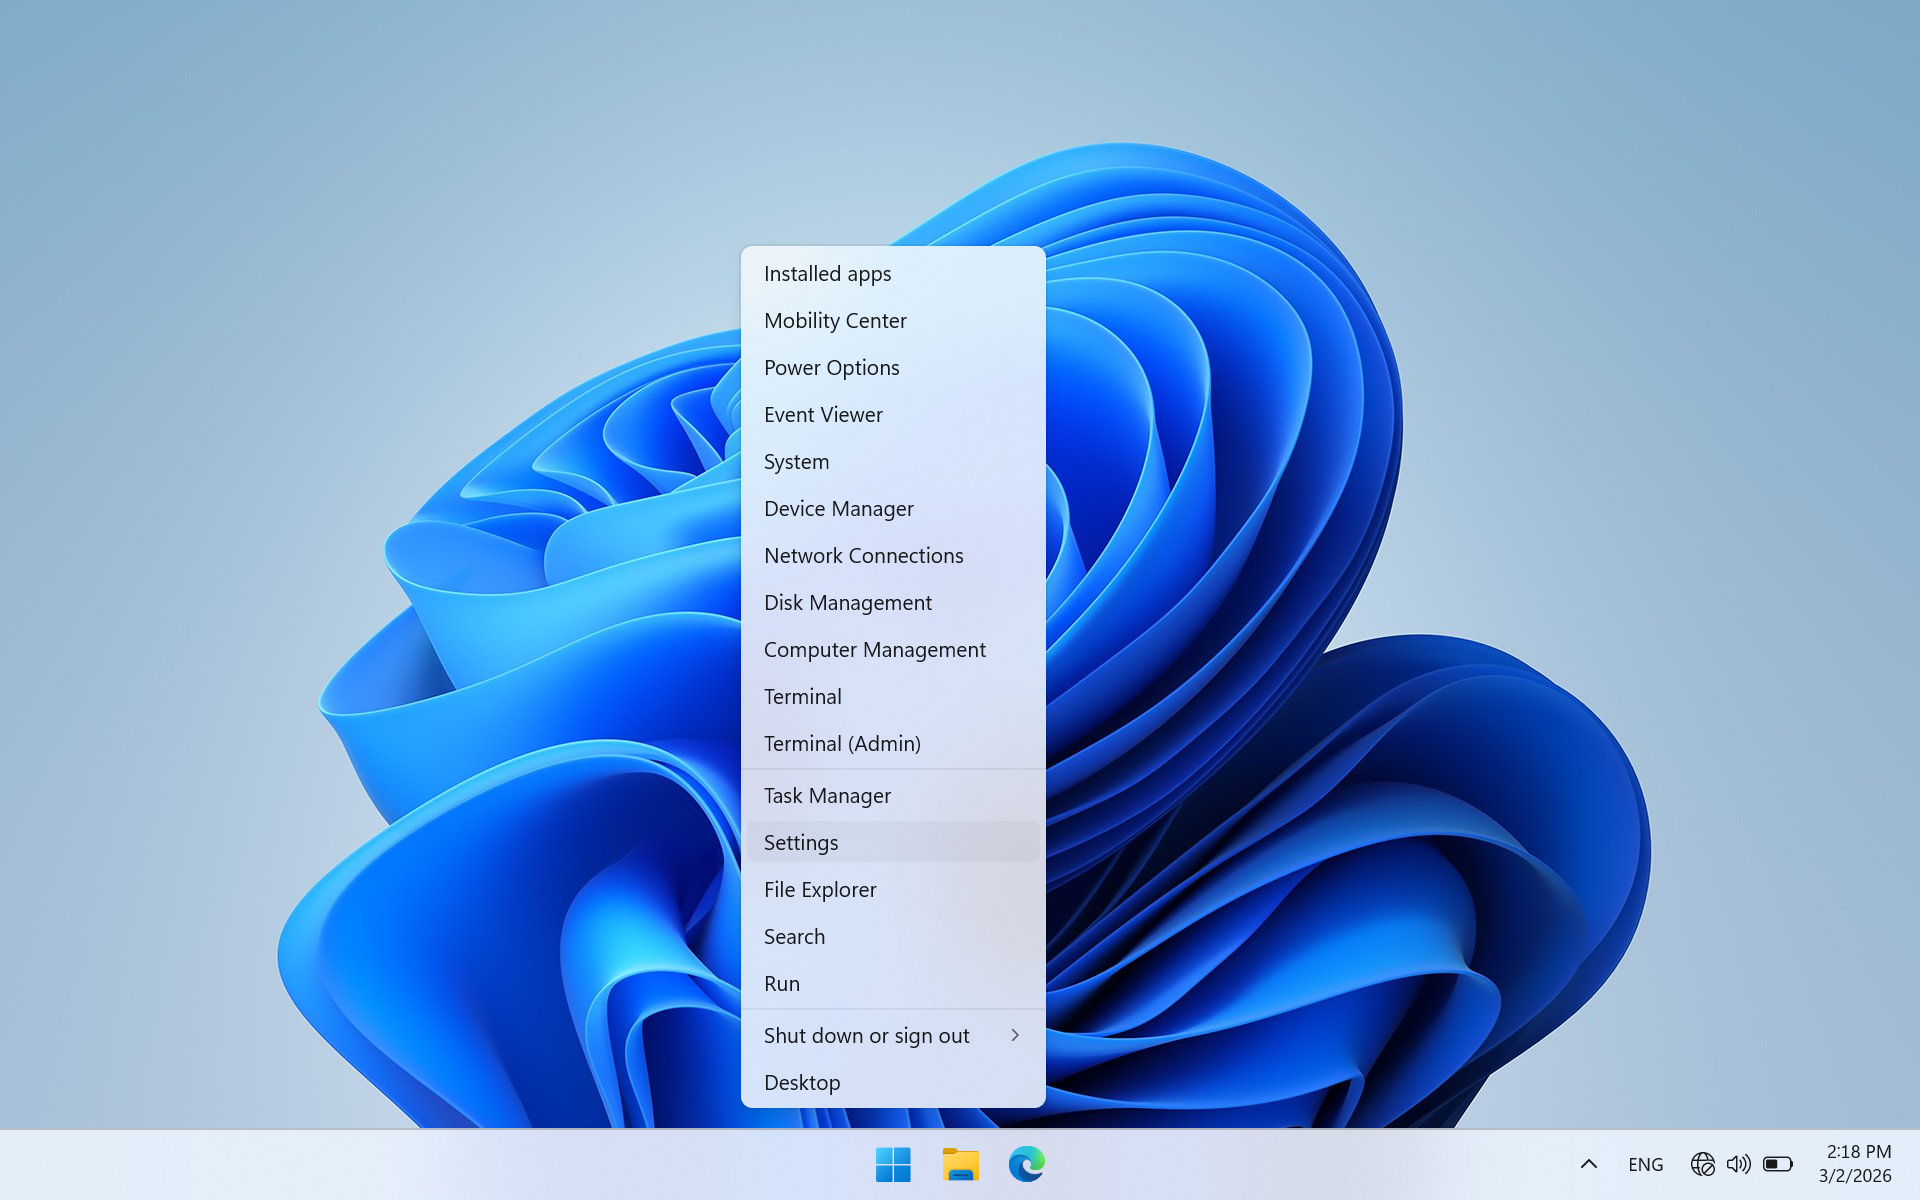
Right-click Start, then select Settings > System > Storage > Advanced storage settings > Storage Spaces.
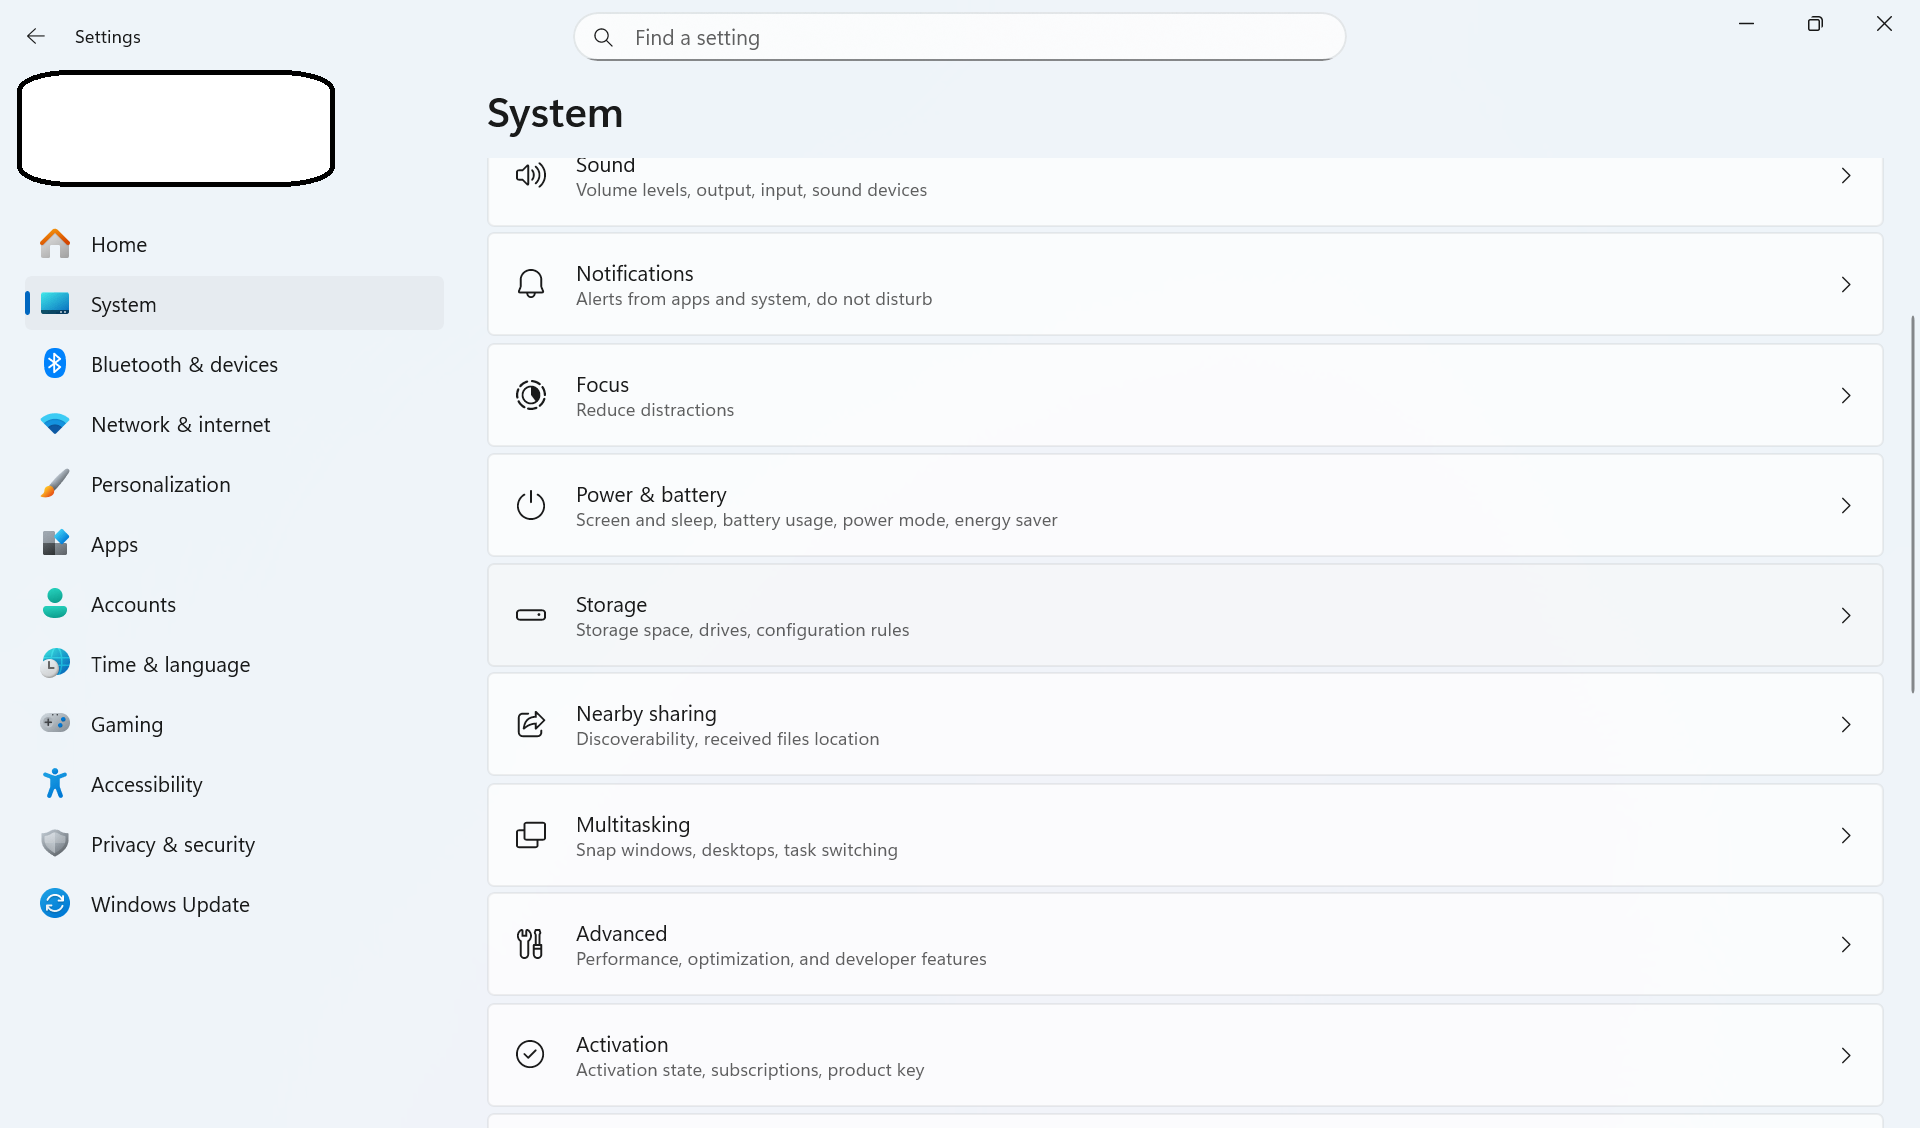
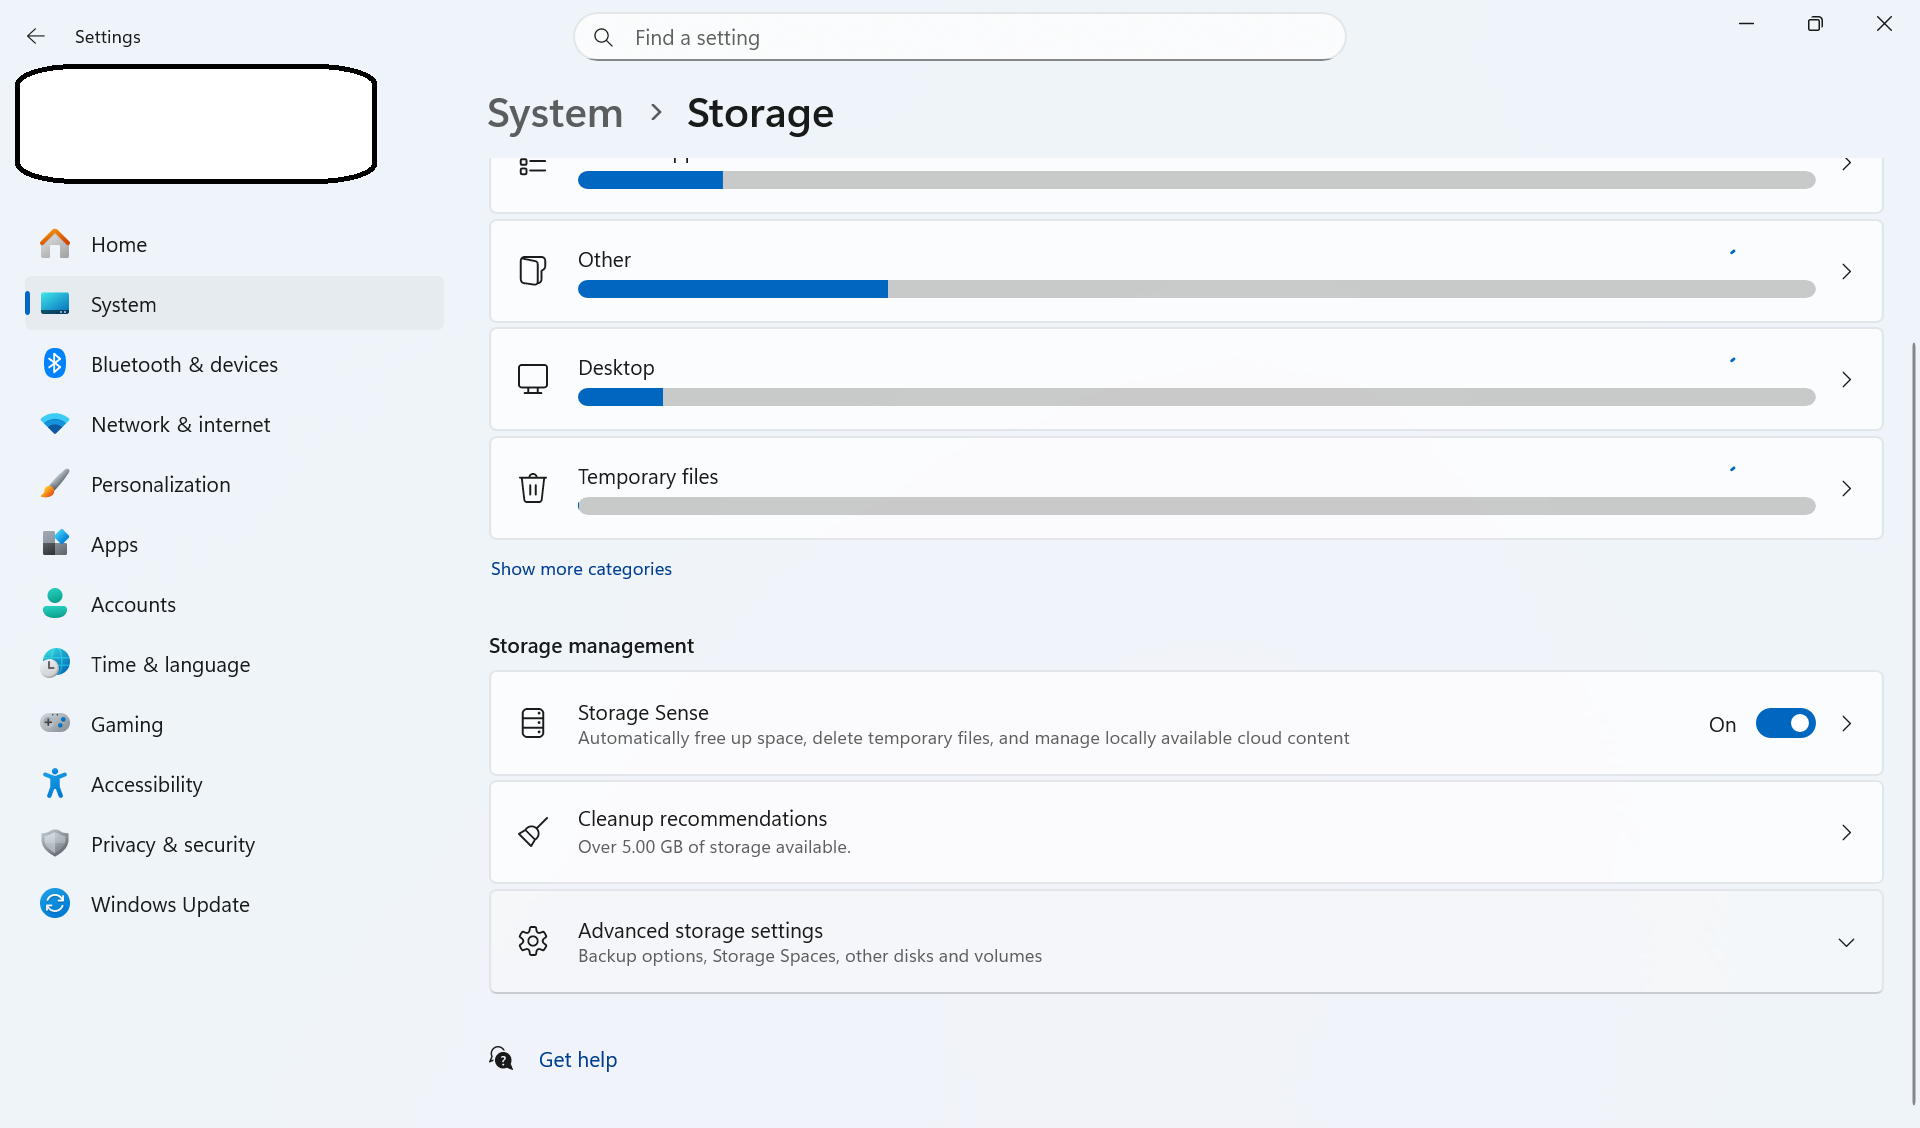
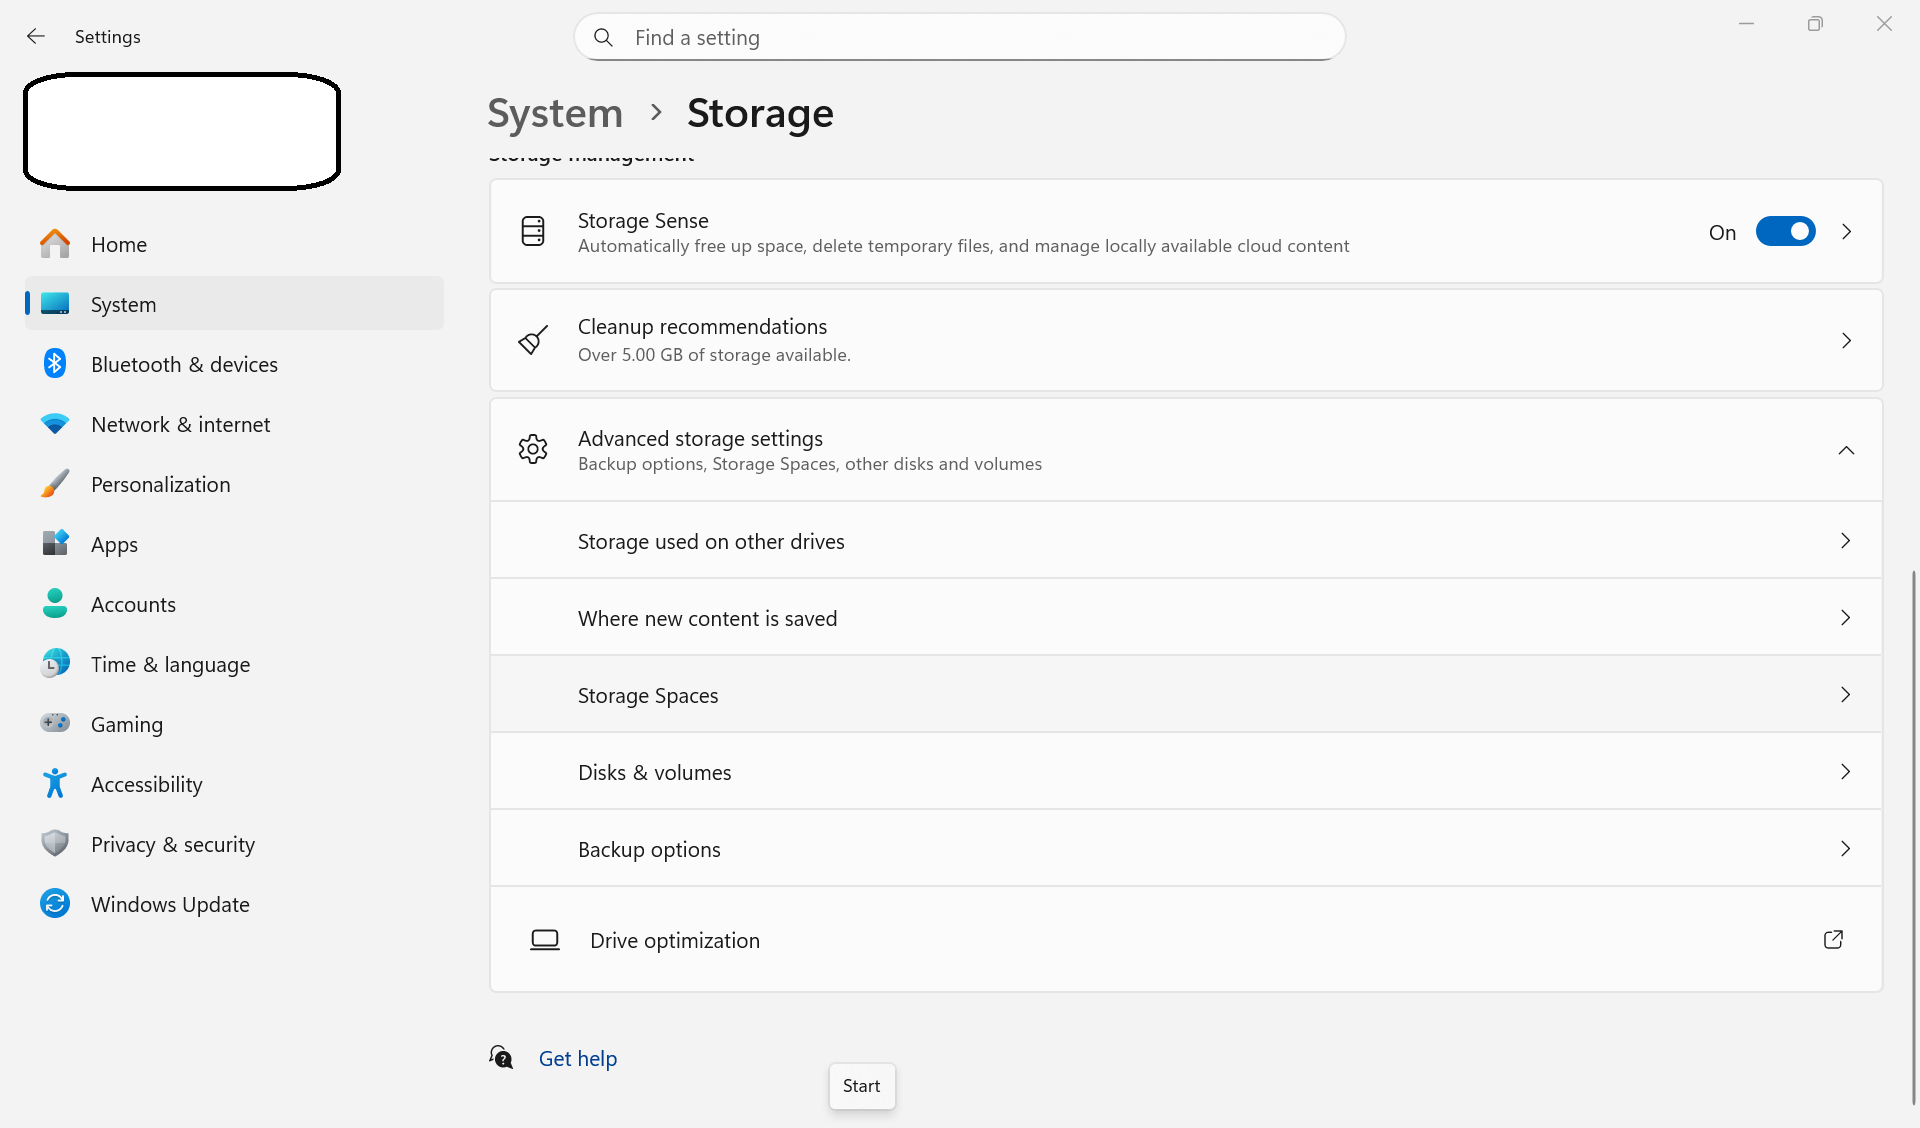
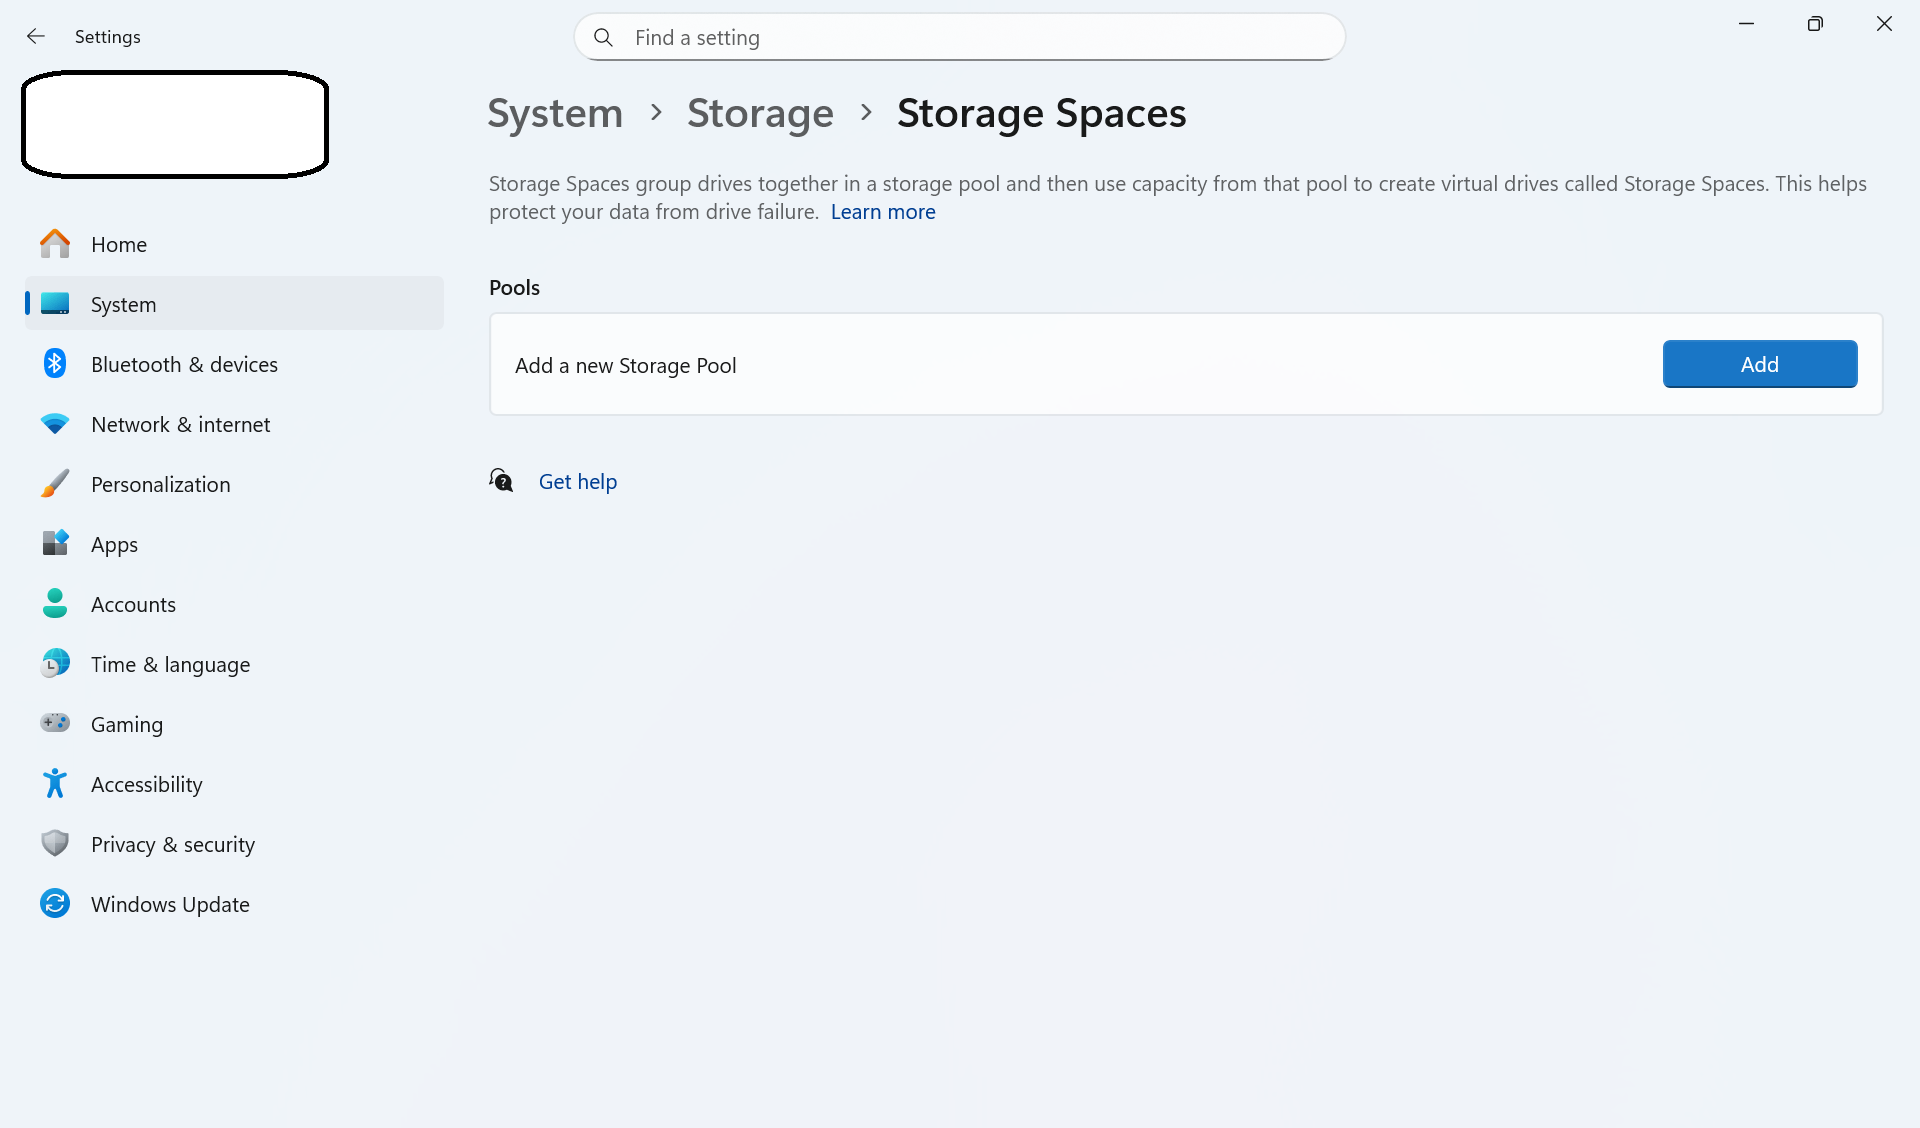
Under pools, select Add next to Add a new storage pool.
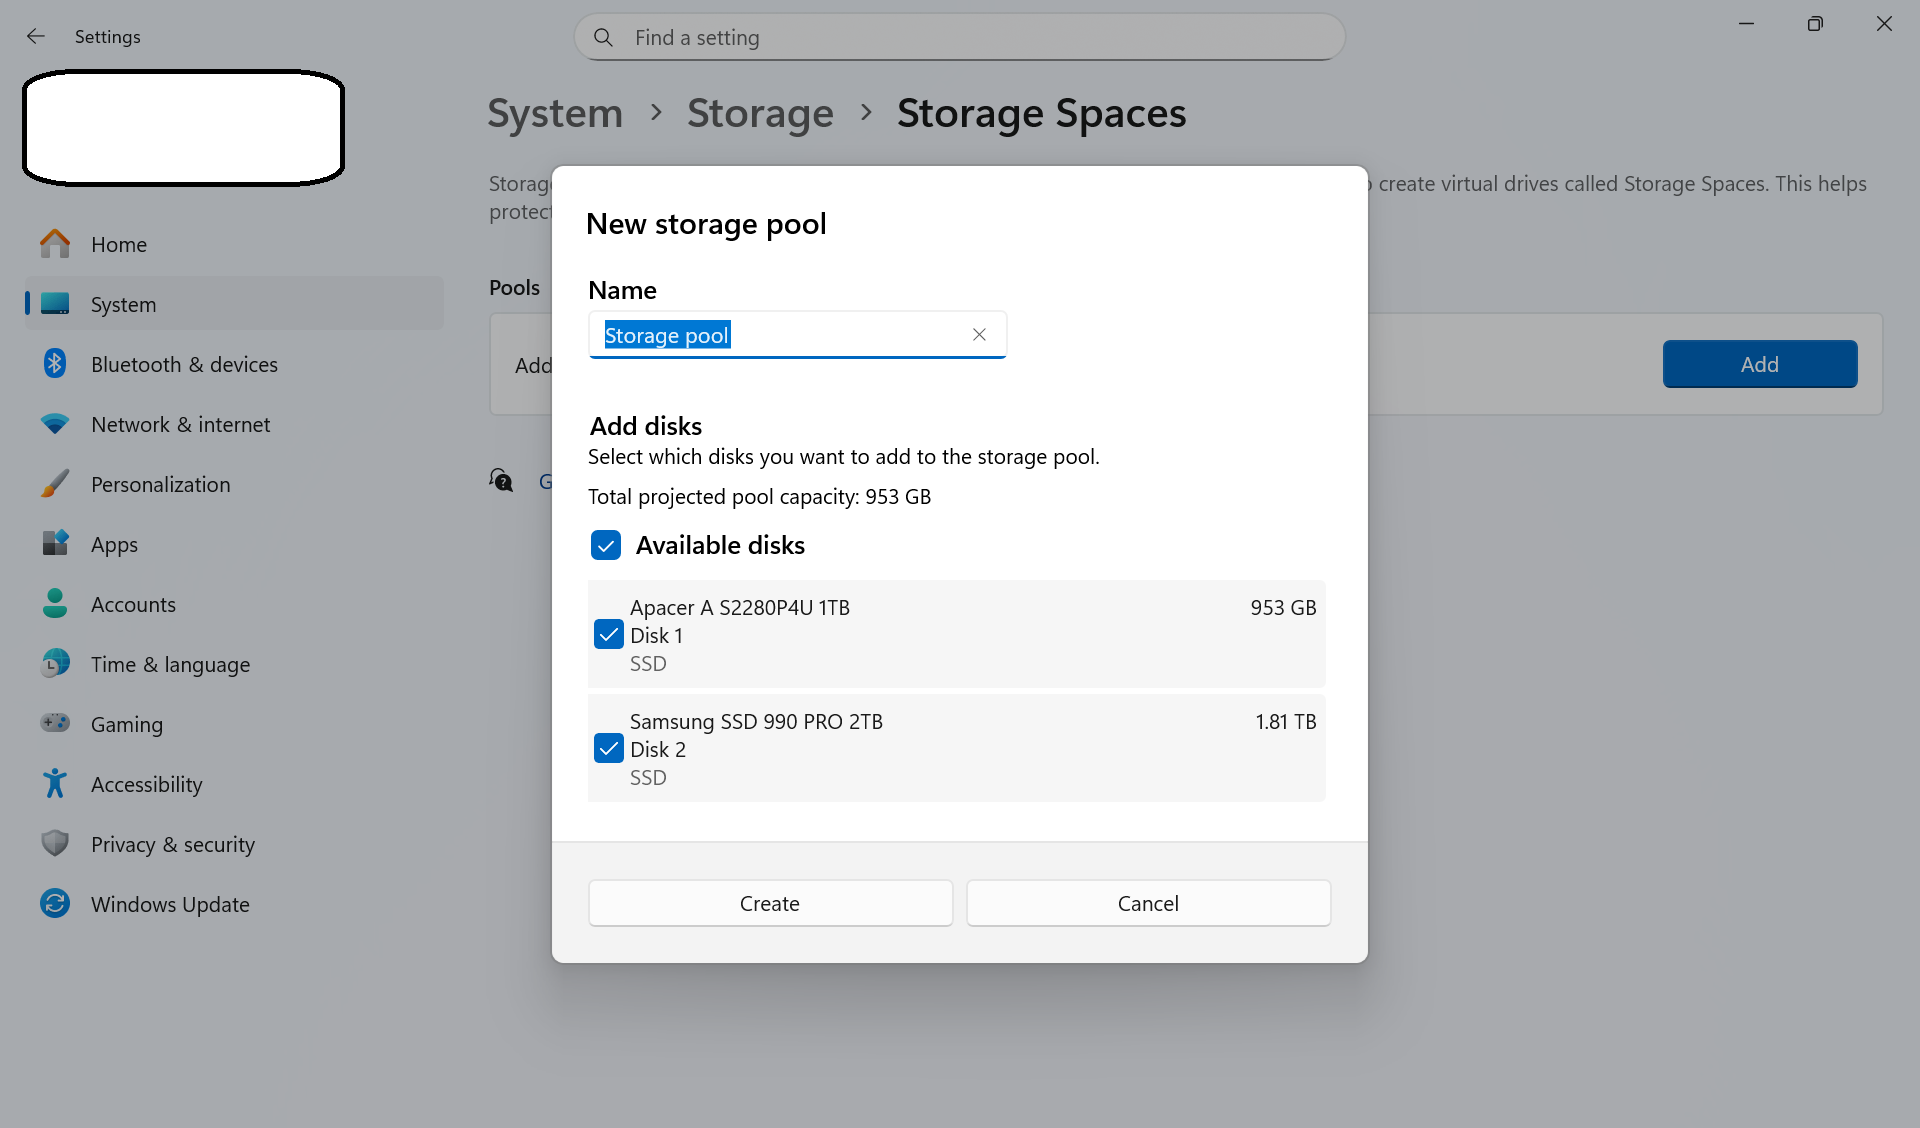
Enter a name for the Pool and select the drives to include. Click Create and confirm the action.
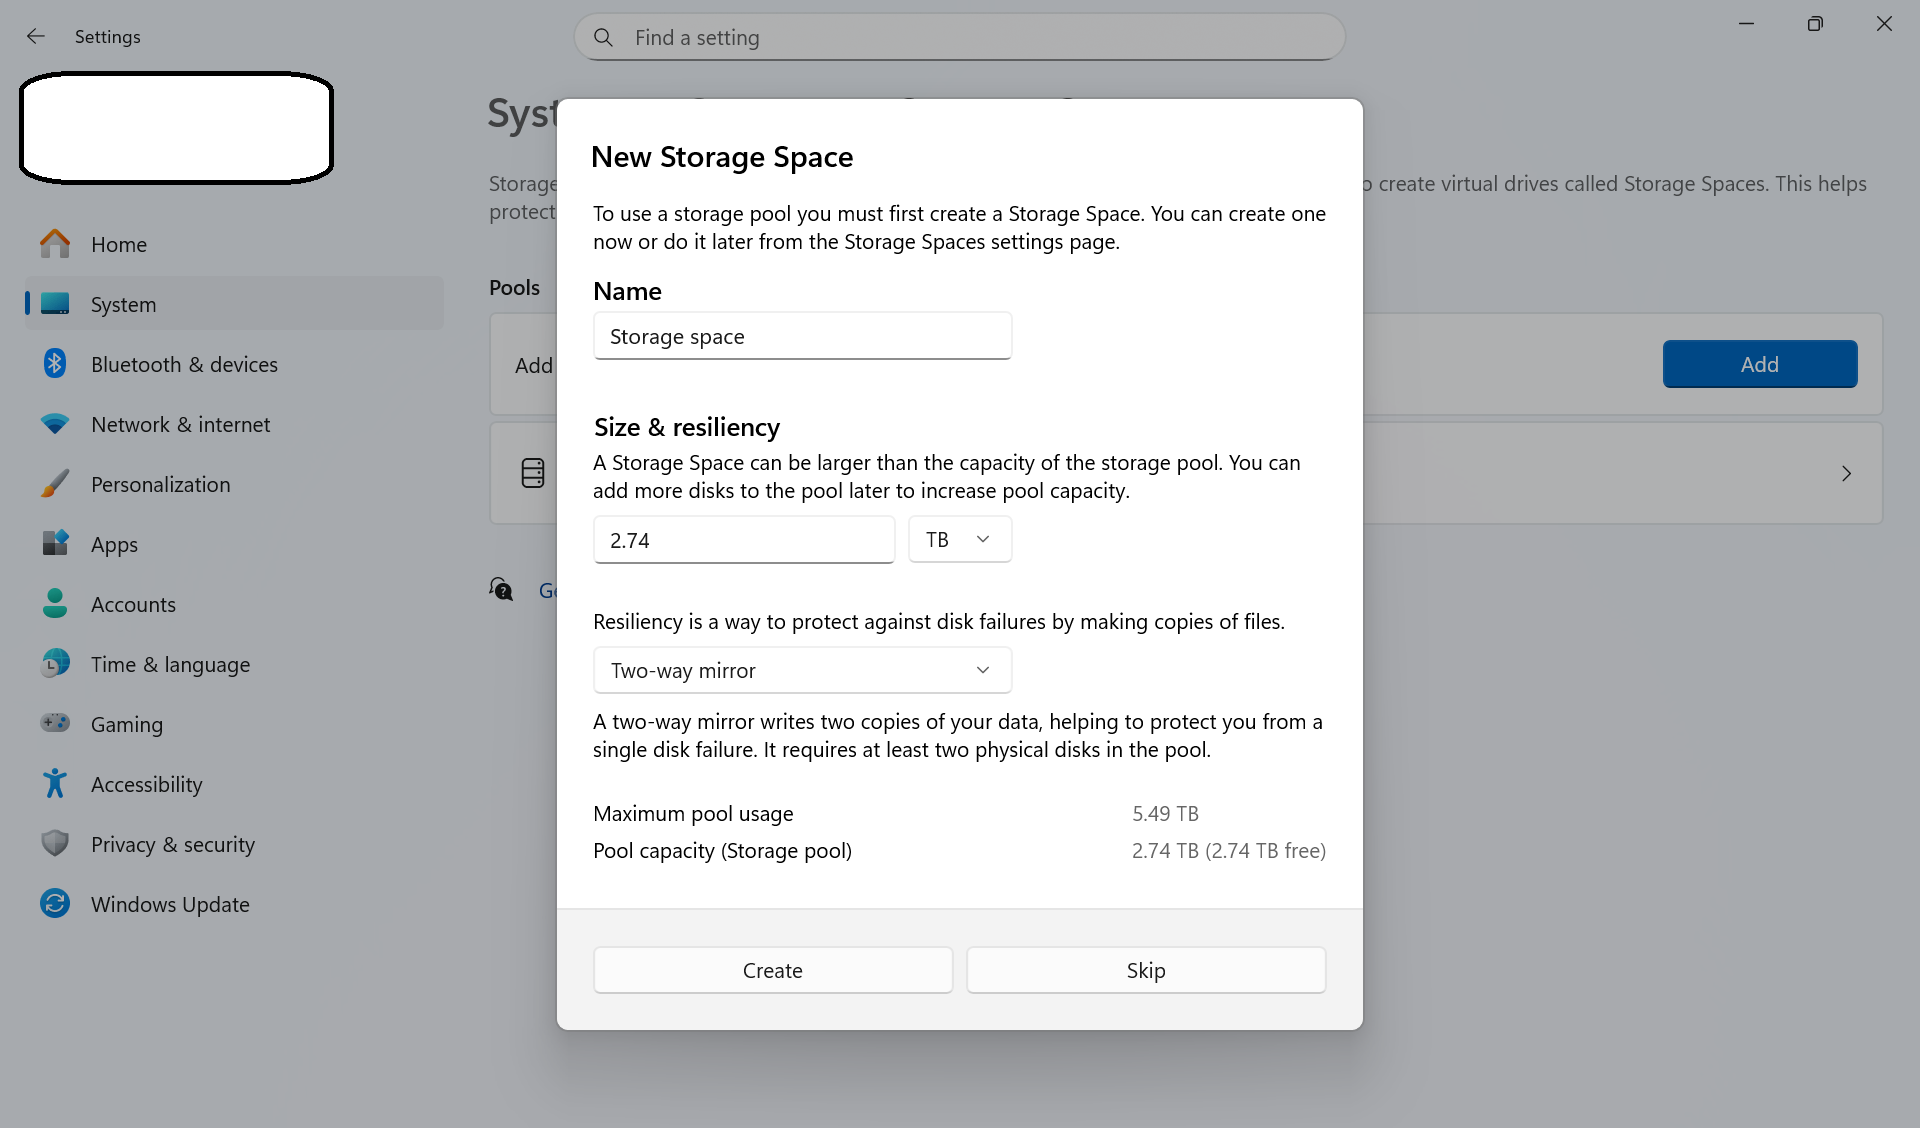
Enter a name for the new storage space, set its size and resiliency, then click Create and confirm.
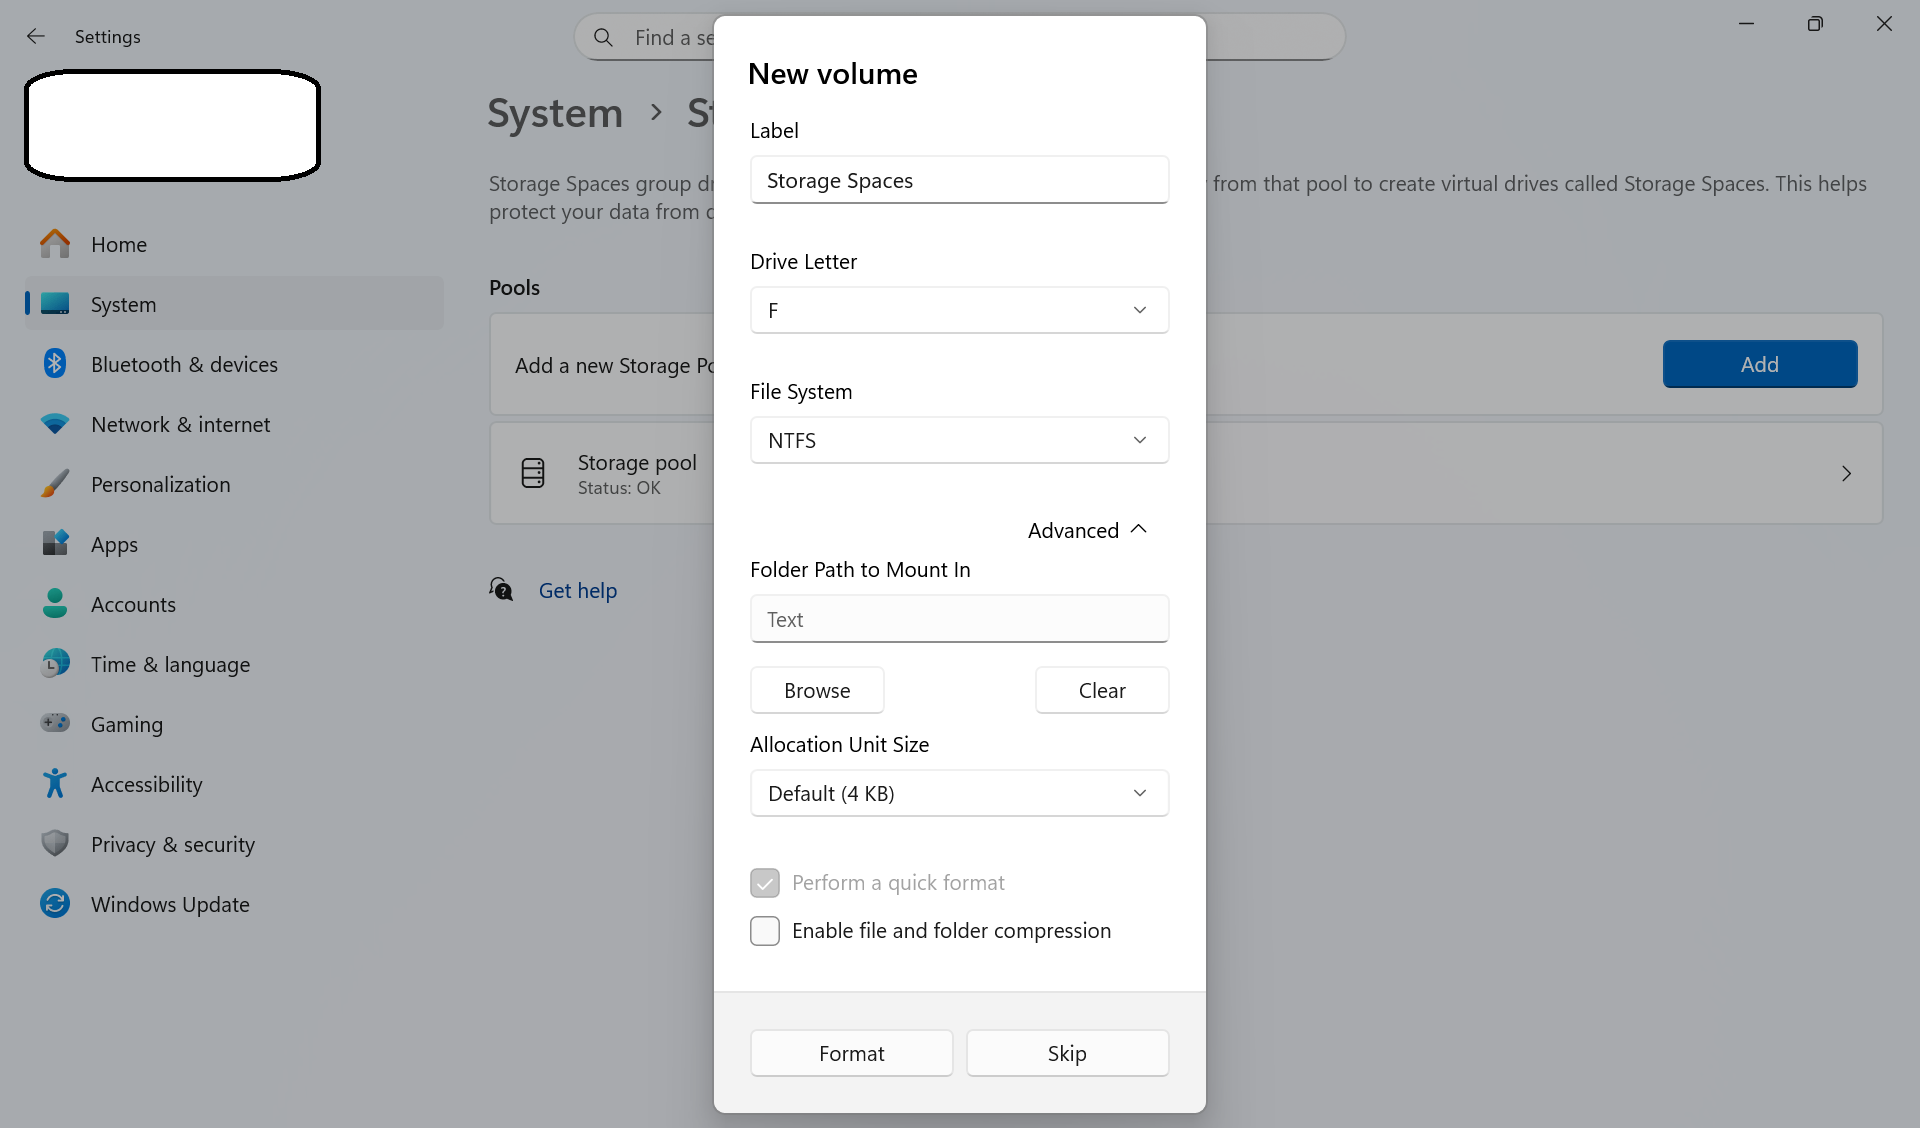
Enter a volume label, choose a drive letter, file system, and allocation unit size as required, then click Format and confirm.
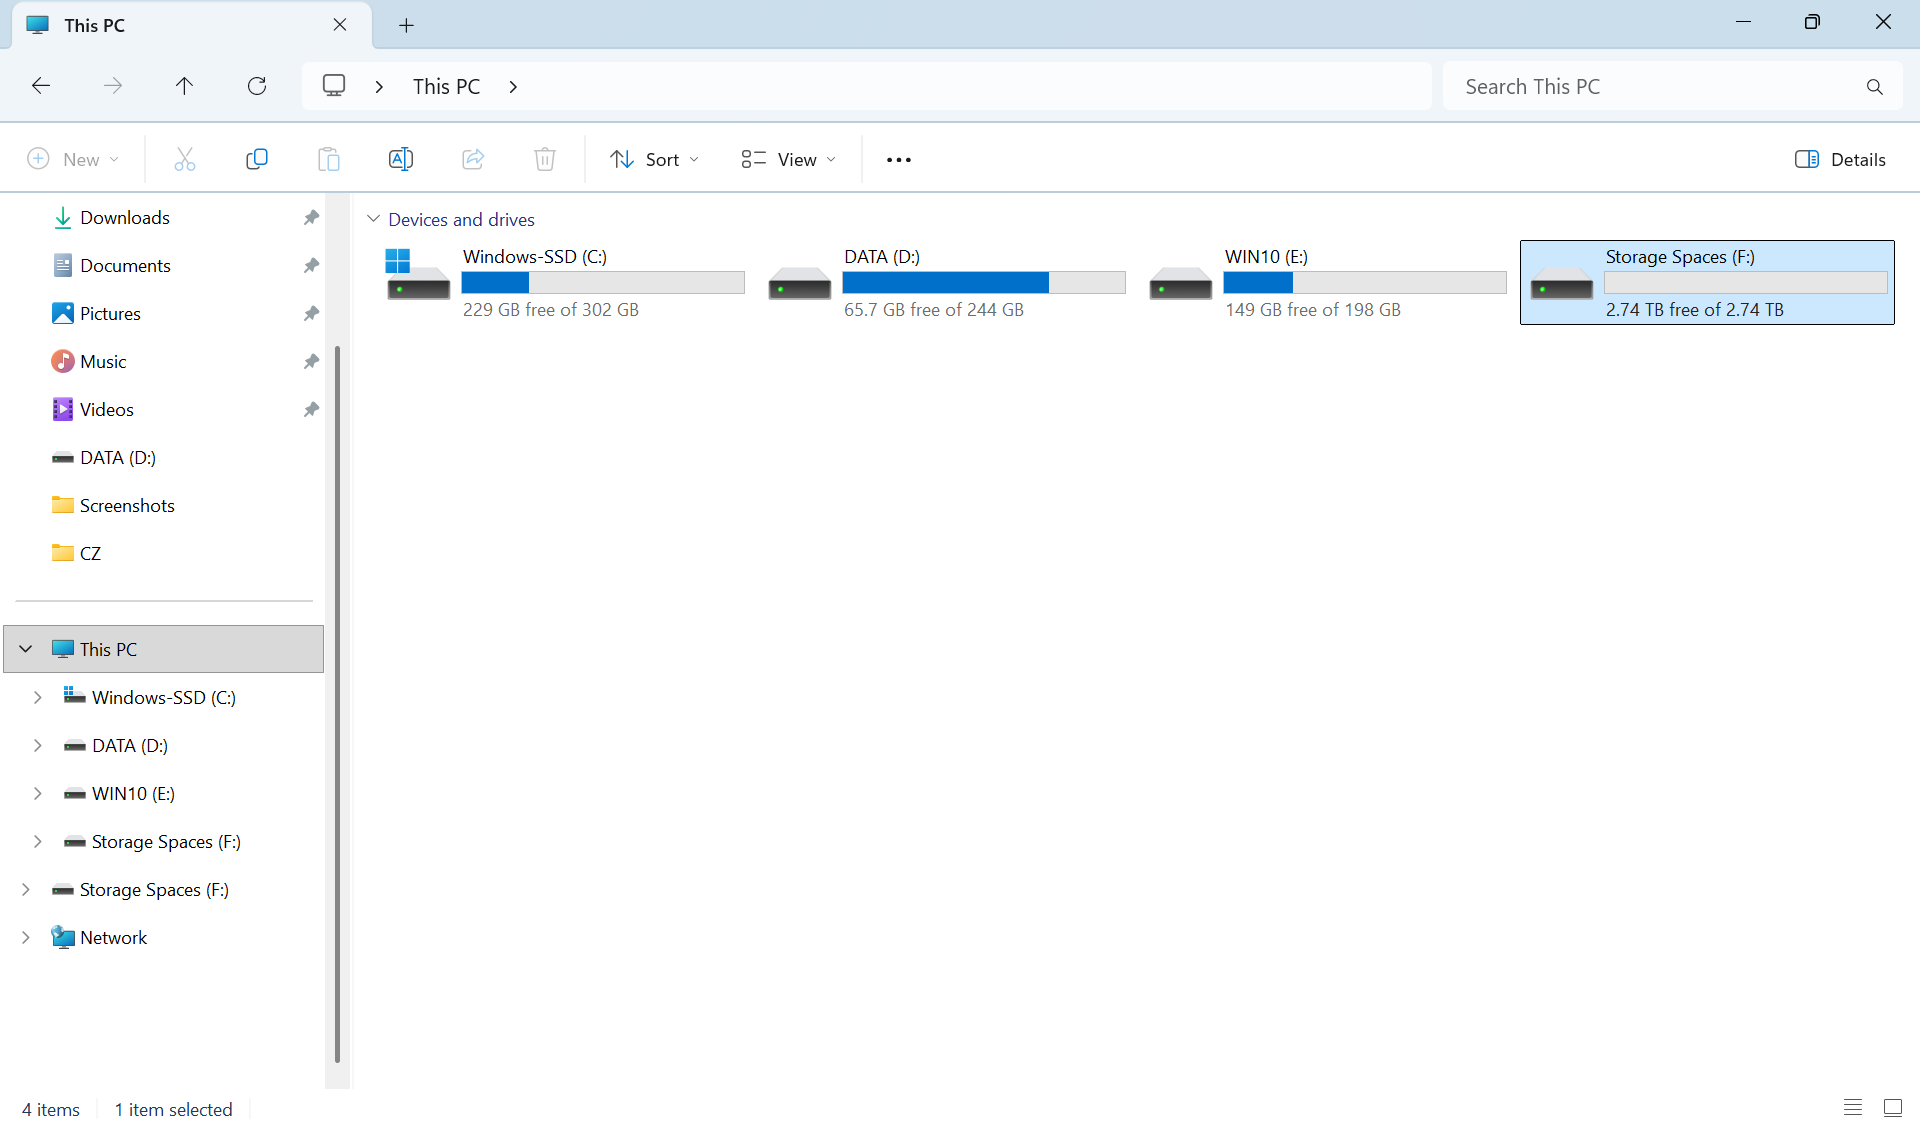
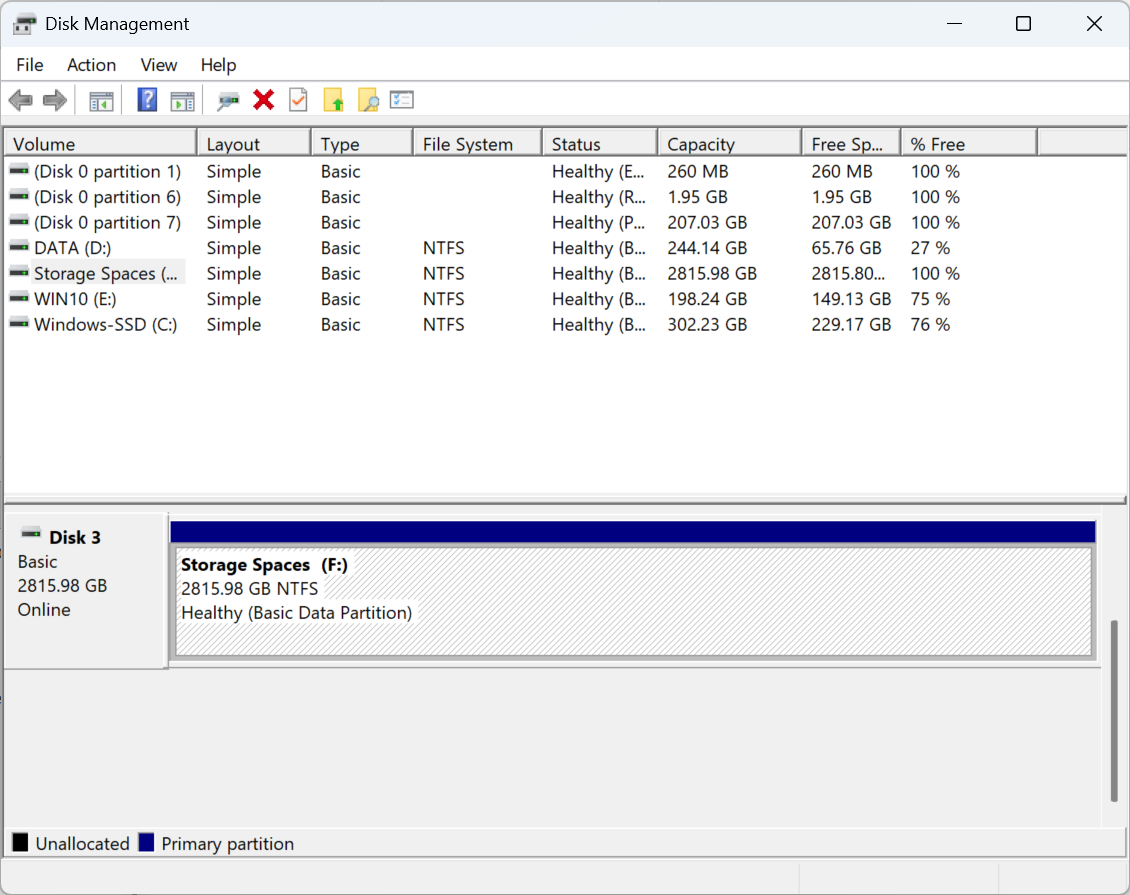
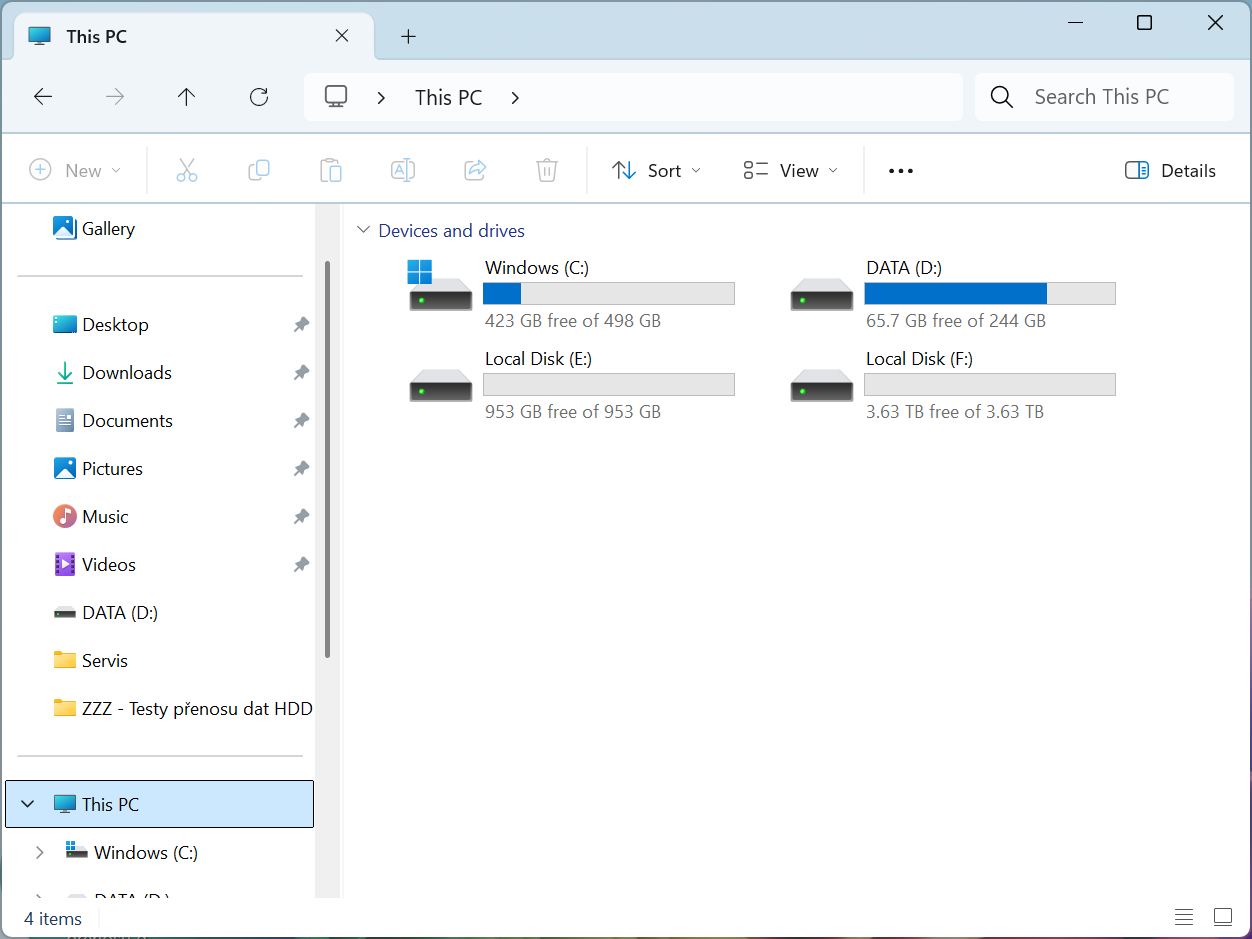
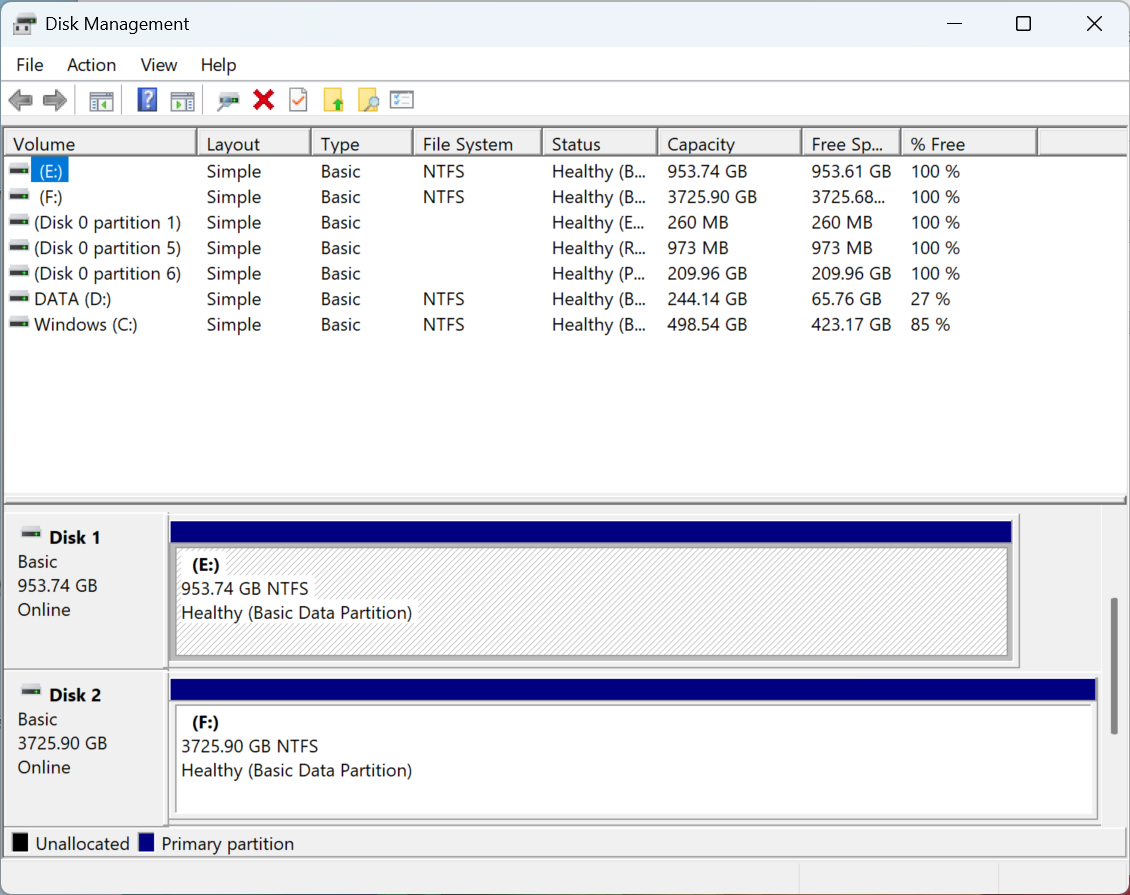
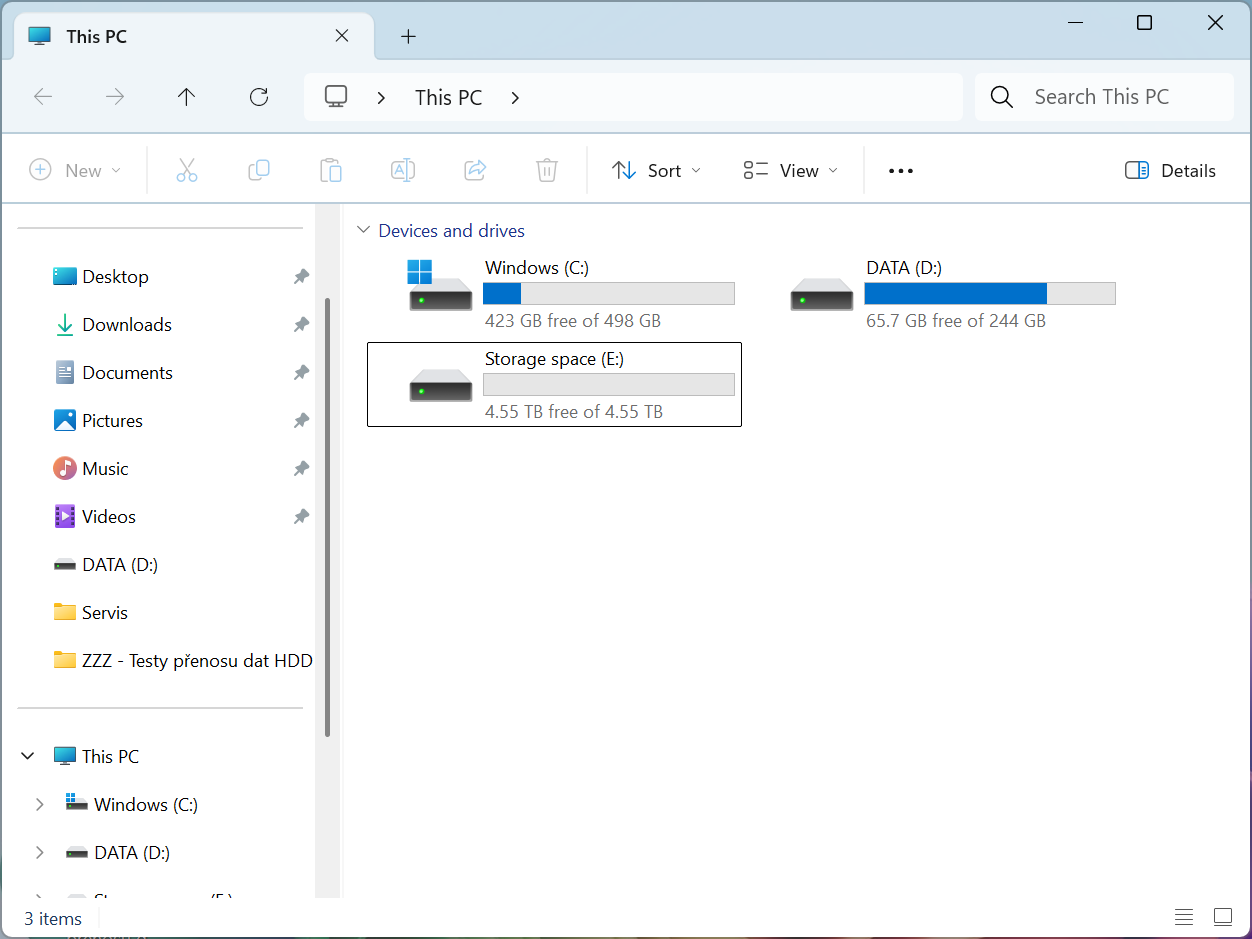
The storage space is now created, and a new drive appears in This PC and Disk Management.
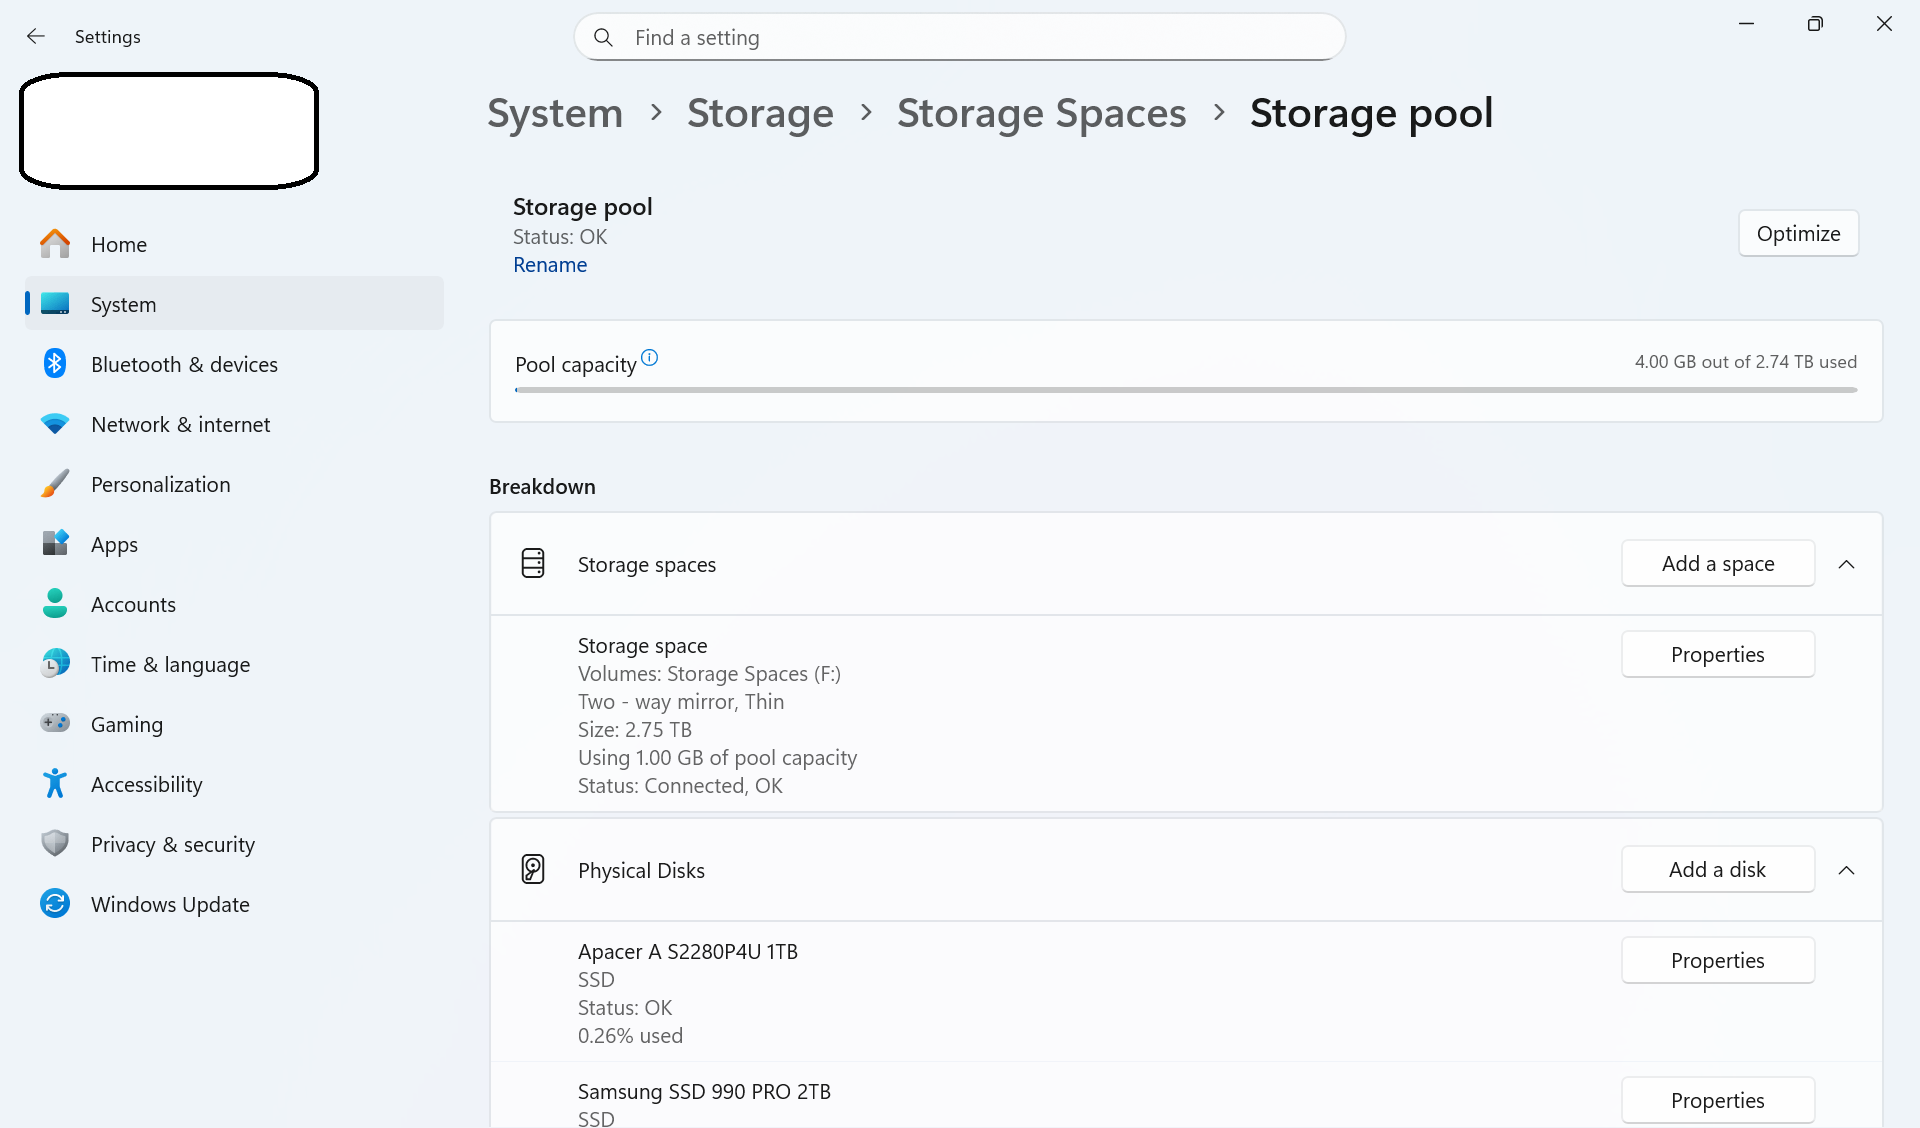
You can manage the storage space under Storage Spaces in the new storage pool.
How to create Storage Spaces in Windows 10 and 8.1
If you use Windows 10 or Windows 8.1, follow these steps to create software RAID:
- Connect the drives you want to use for the RAID array, following the manufacturer's instructions.
- BACK UP ALL DATA ON THE CONNECTED DRIVES. THE DRIVES WILL BE FORMATTED DURING THE FOLLOWING STEPS.
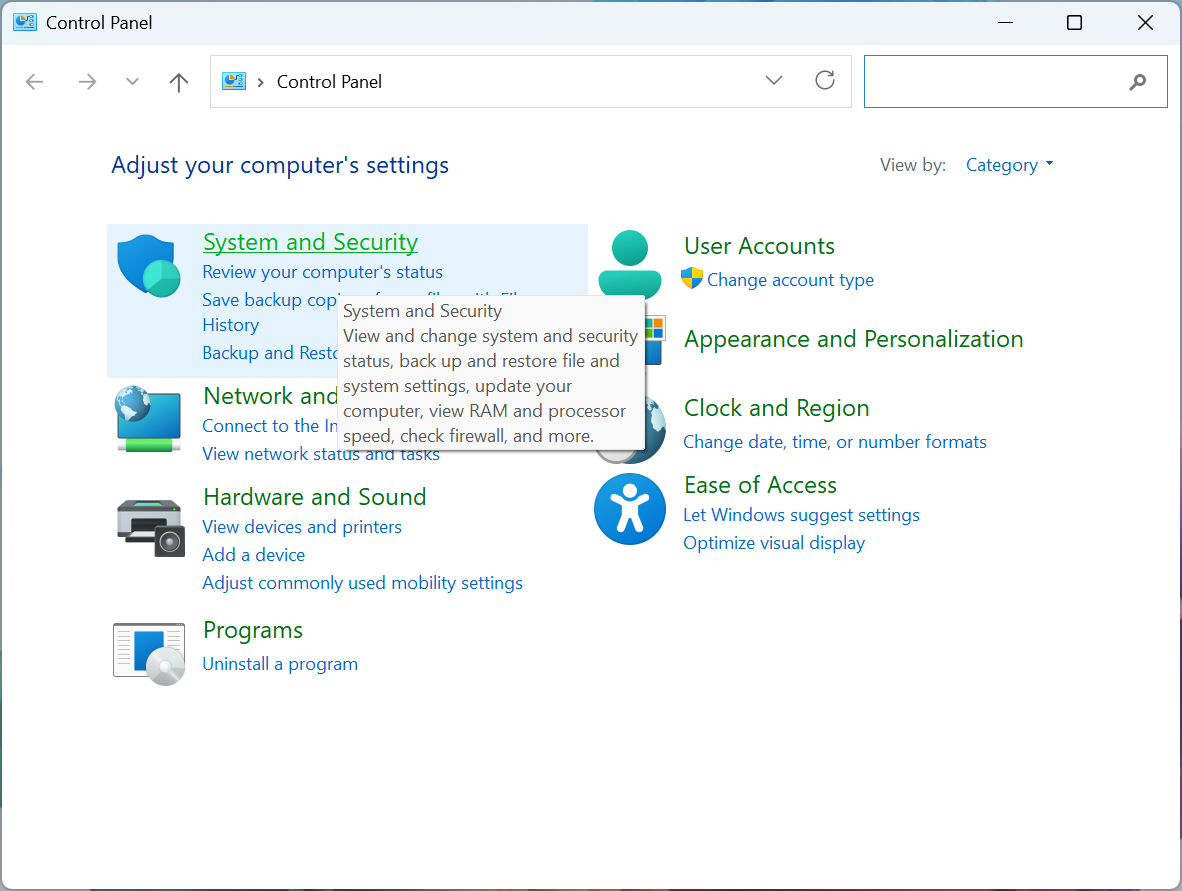
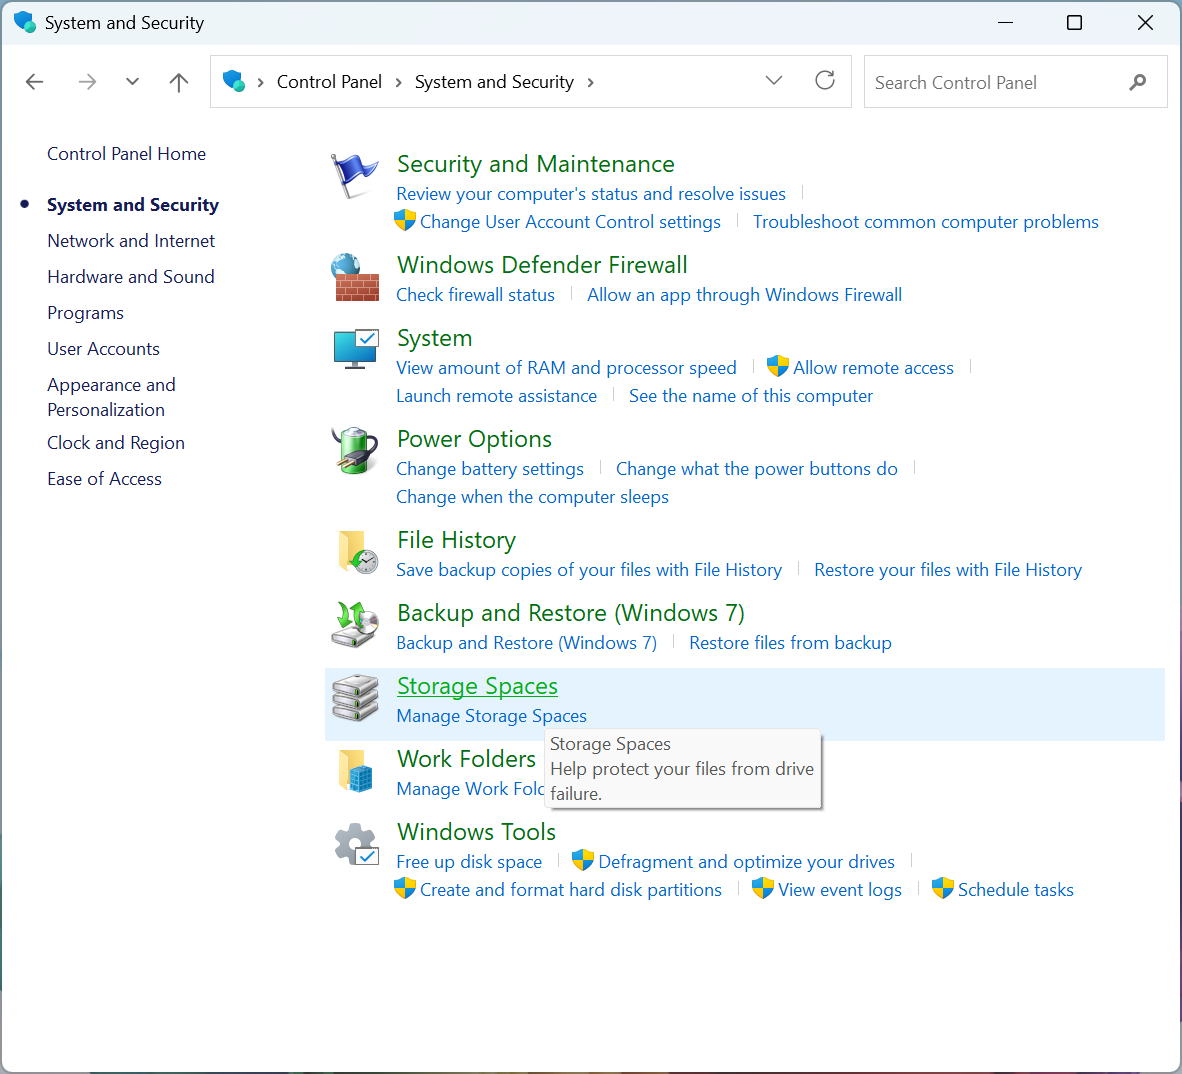
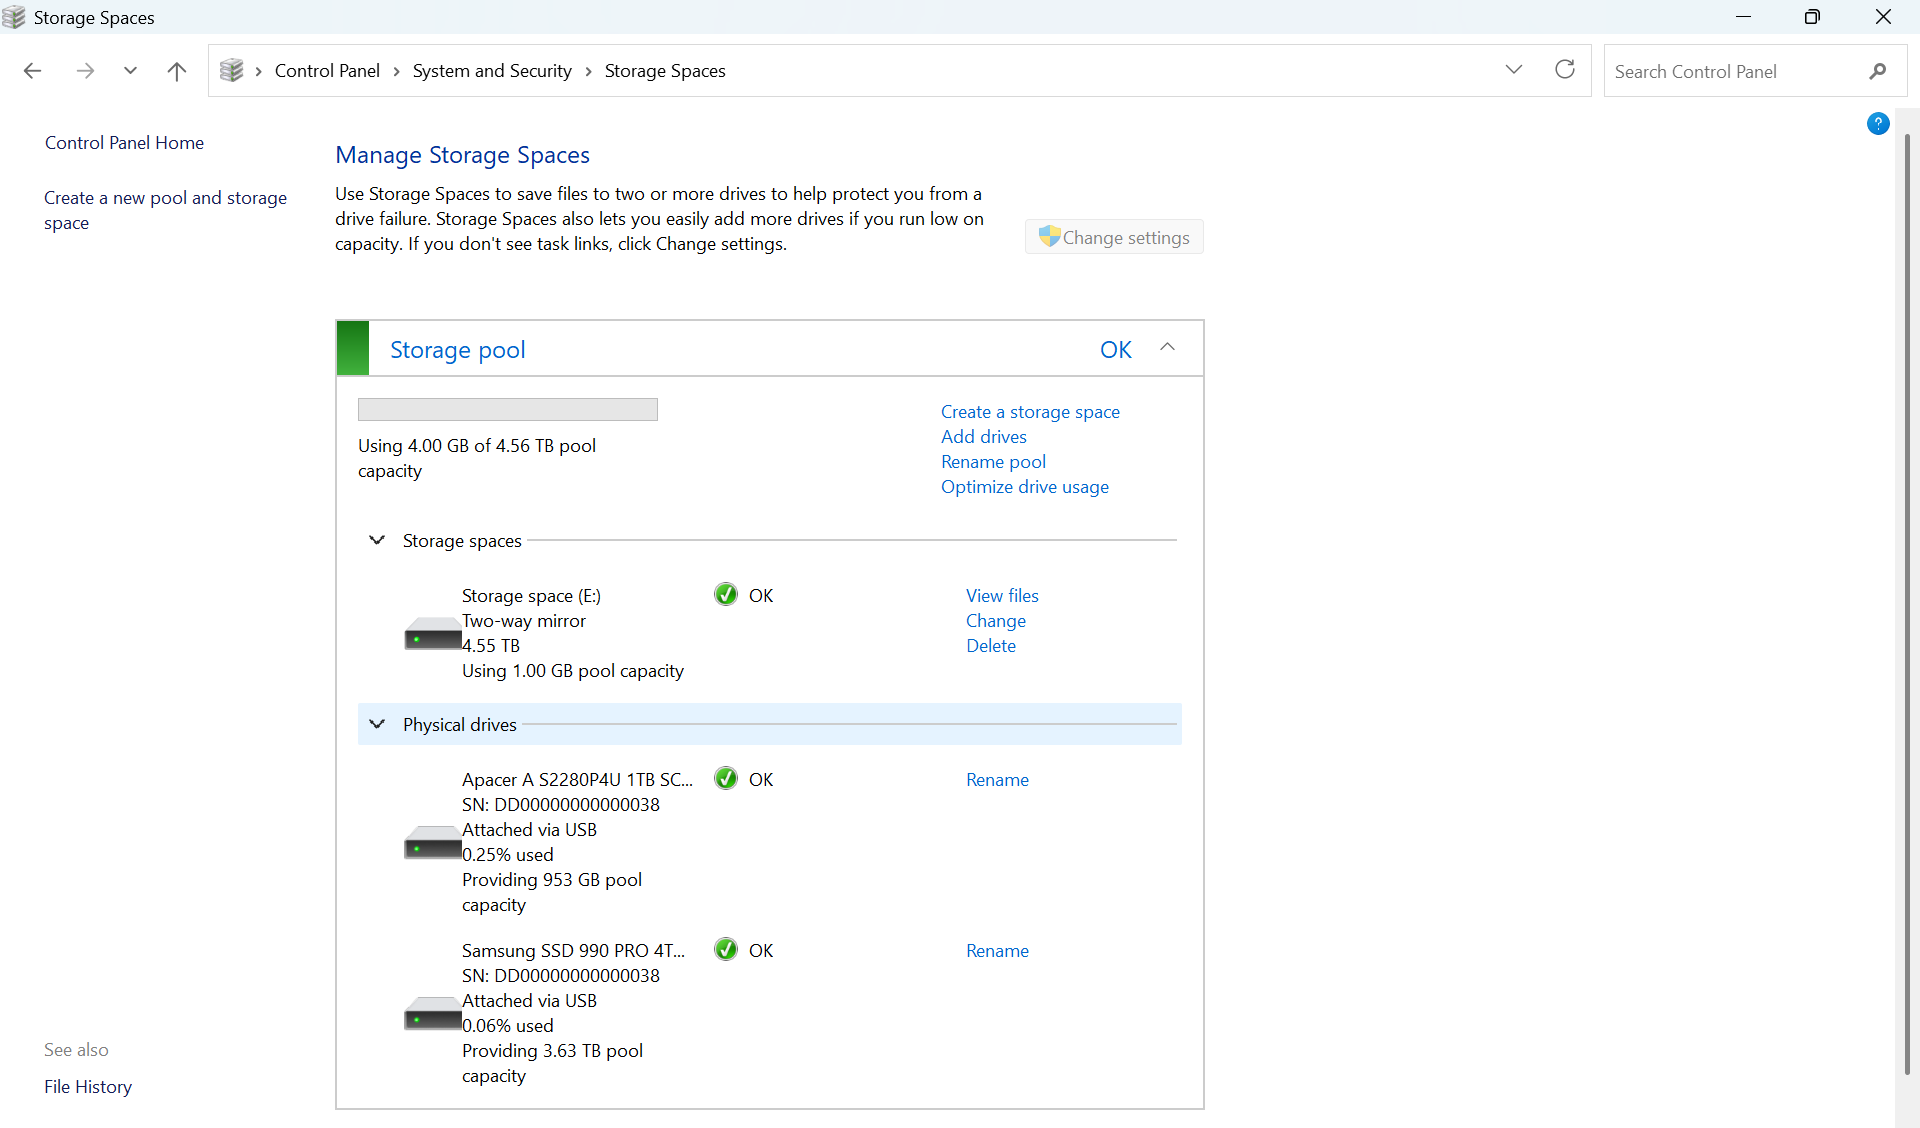
Open Control Panel > System and Security > Storage Spaces.
Click Create a new pool and storage space.
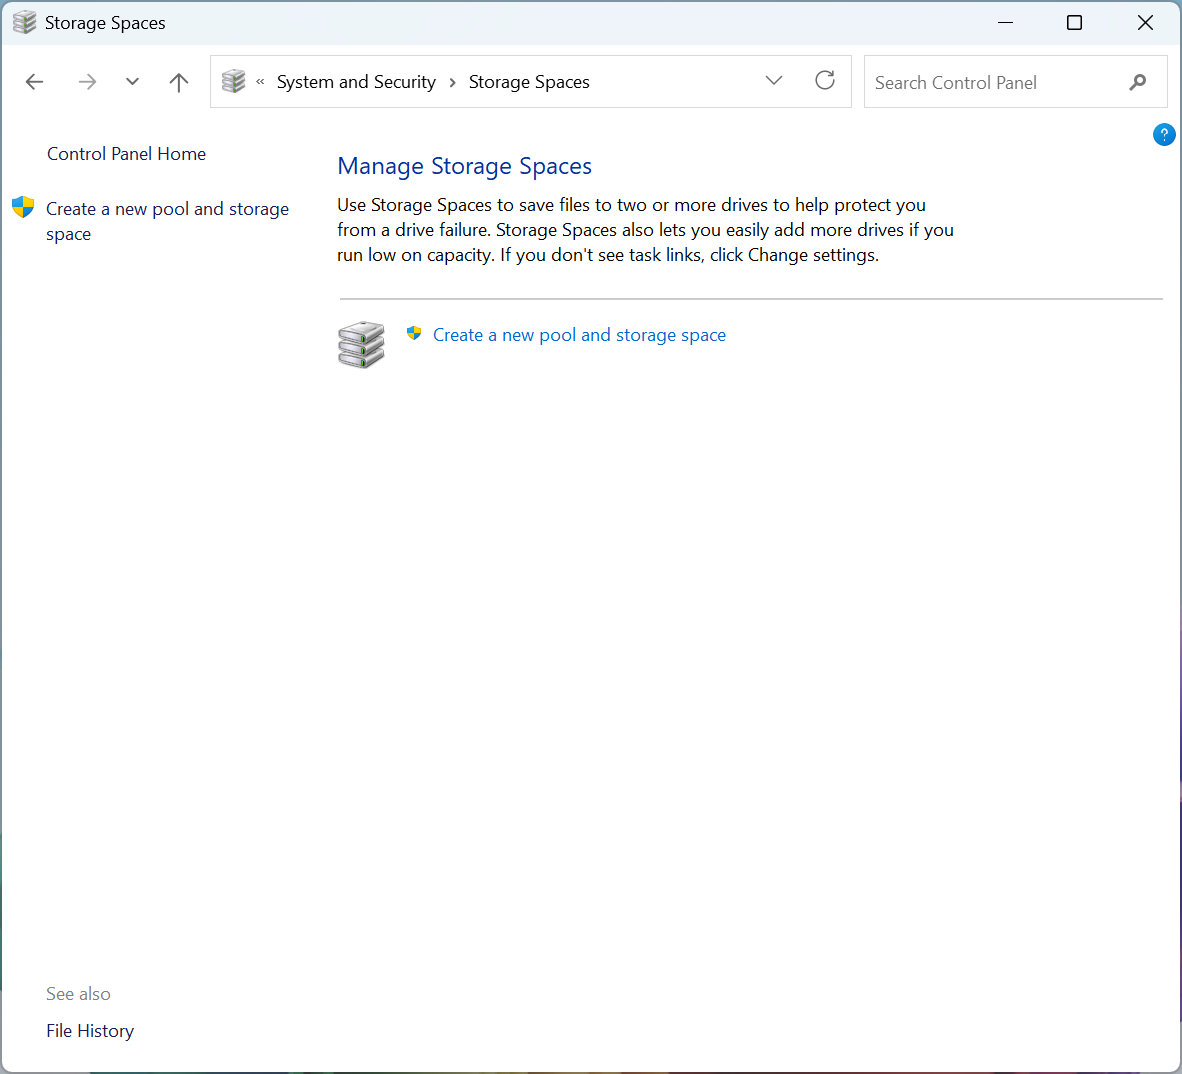
Select the drives to include in the storage pool. Depending on whether the drives are formatted, one of the following statuses will be displayed.
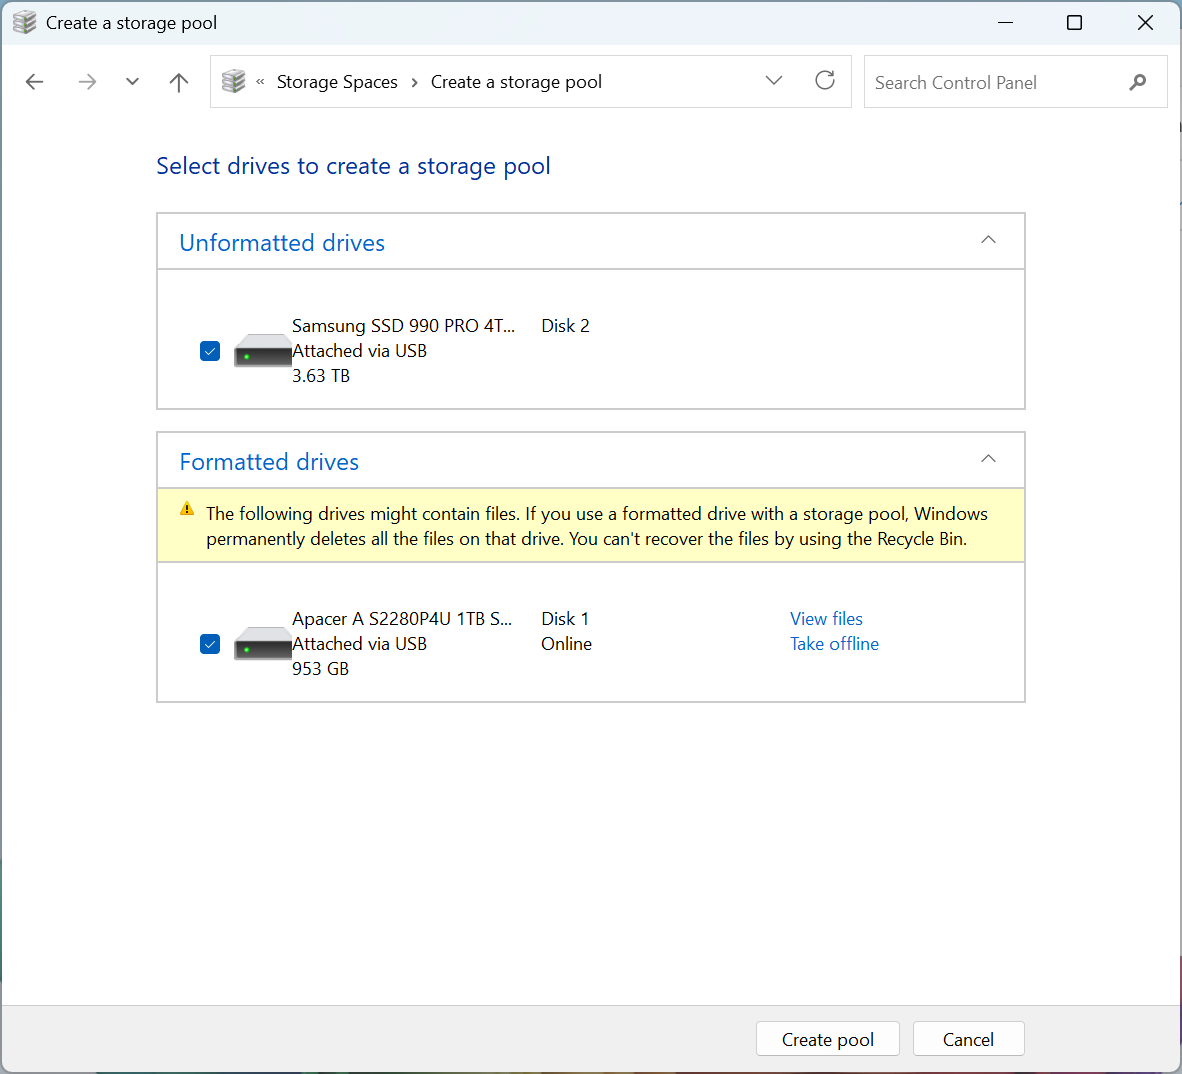
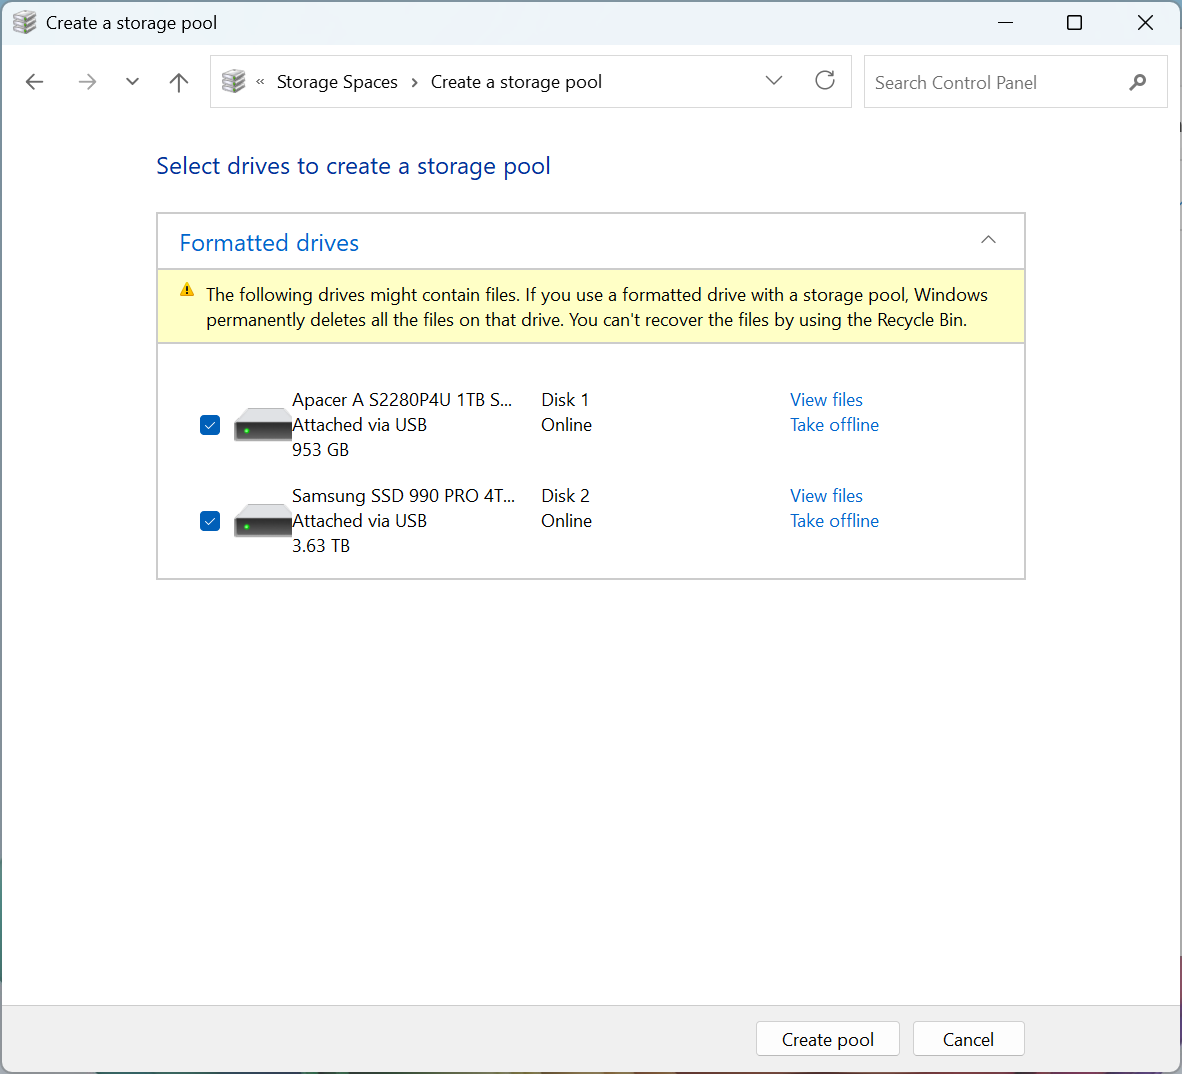
- After selecting the drives to include in the storage pool, click Create pool.
Enter a name and drive letter, select the file system, resiliency type, and size, then click Create storage space.
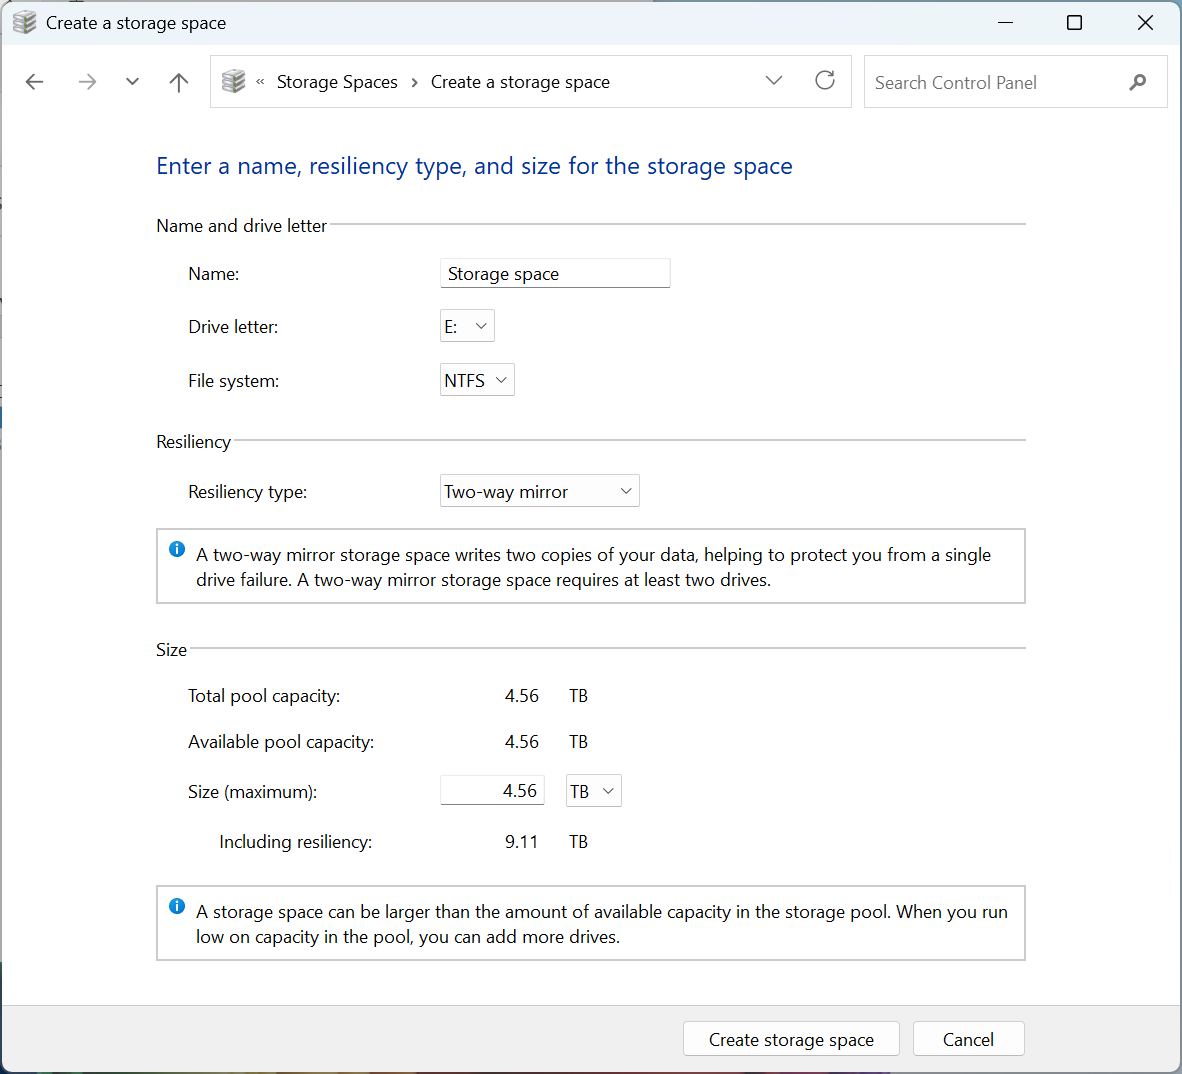
The storage space is now created. You can view it in Manage Storage Spaces, Disk Management, and This PC.
Removing an existing Storage Space in Windows
You may need to remove a software RAID configuration when changing hardware or configuration, such as when adding a new drive or changing the number of connected drives, when the RAID is no longer needed, or before reinstalling the operating system. Follow the appropriate procedure below.
How to remove an existing Storage space in Windows 11
- Connect the drives that belong to the storage space.
- THE FOLLOWING STEPS WILL FORMAT EVERY DRIVE IN THIS STORAGE SPACE. BACK UP YOUR DATA FIRST.
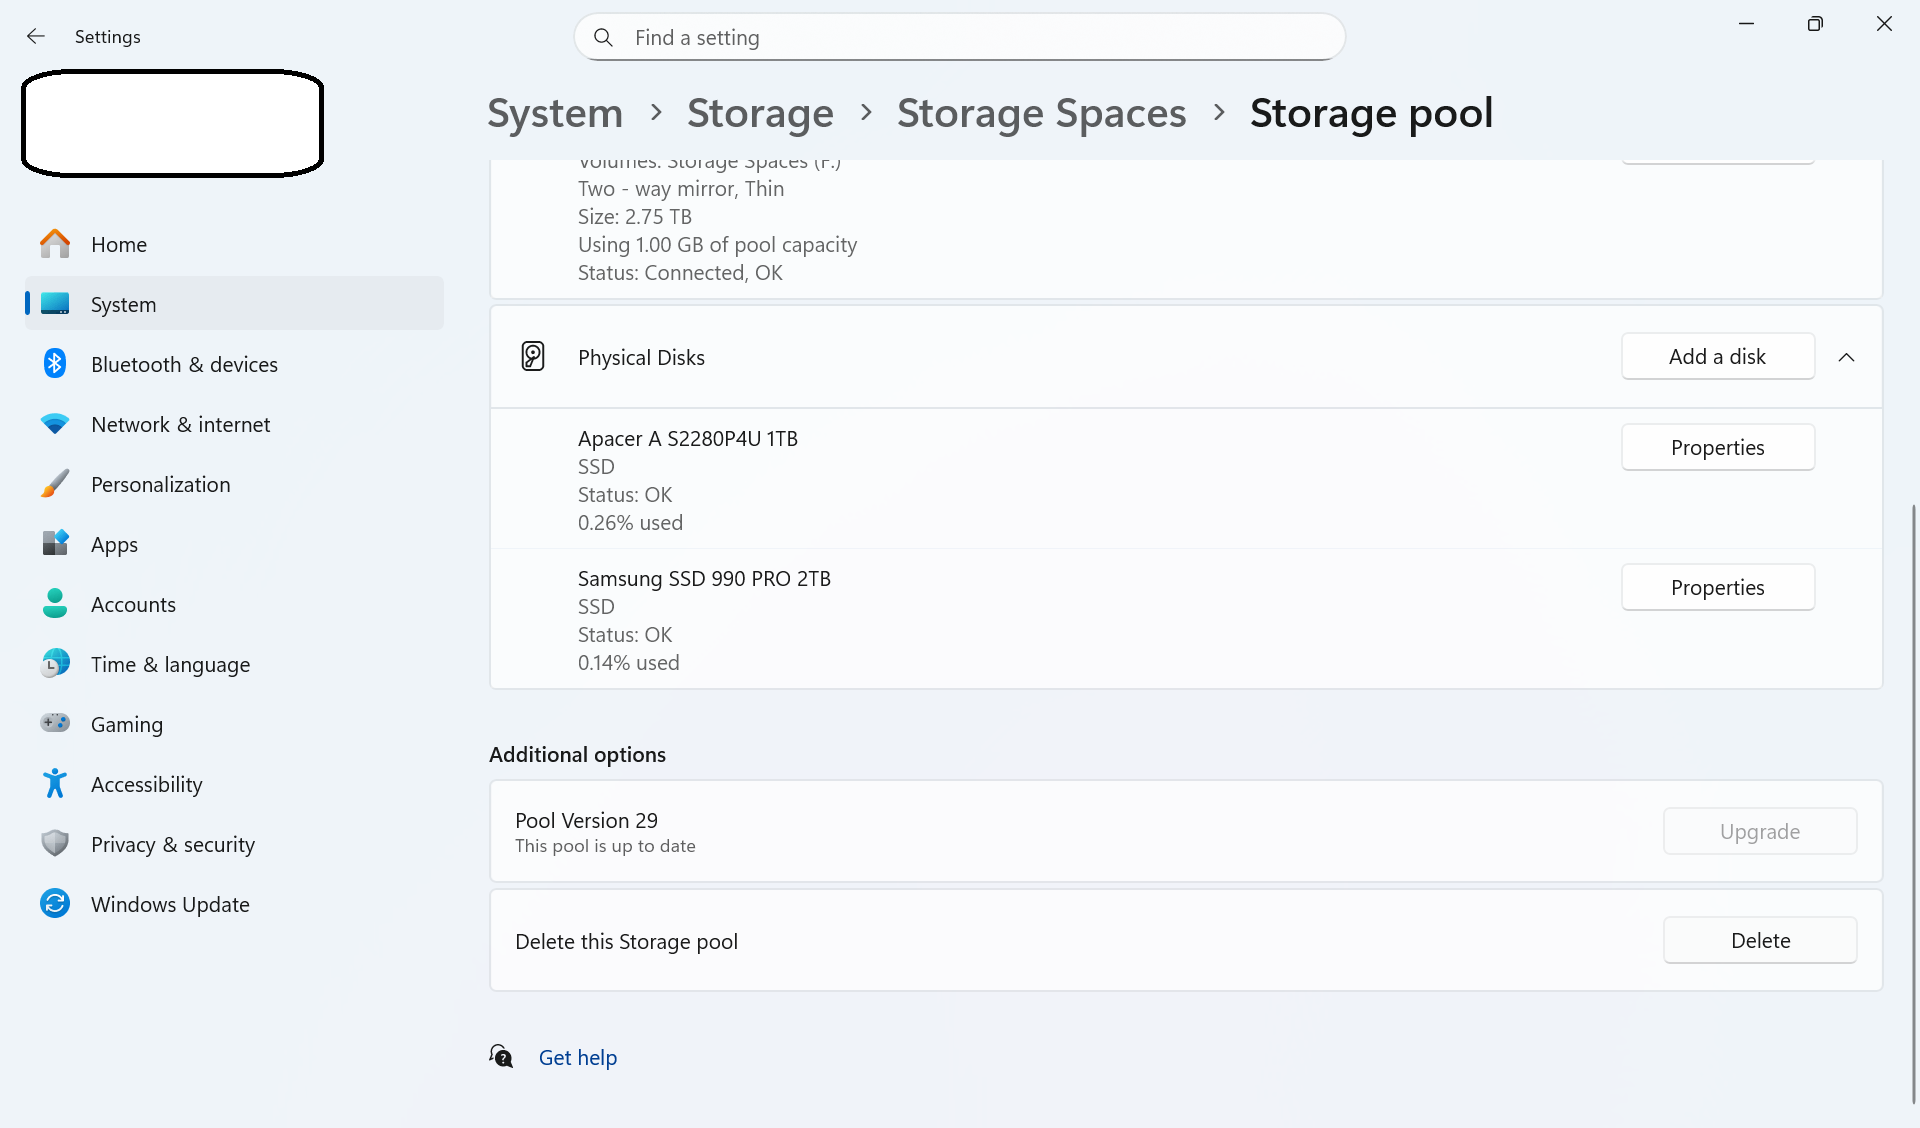
Right-click Start, then select Settings > System > Storage > Advanced storage settings > Storage Spaces.
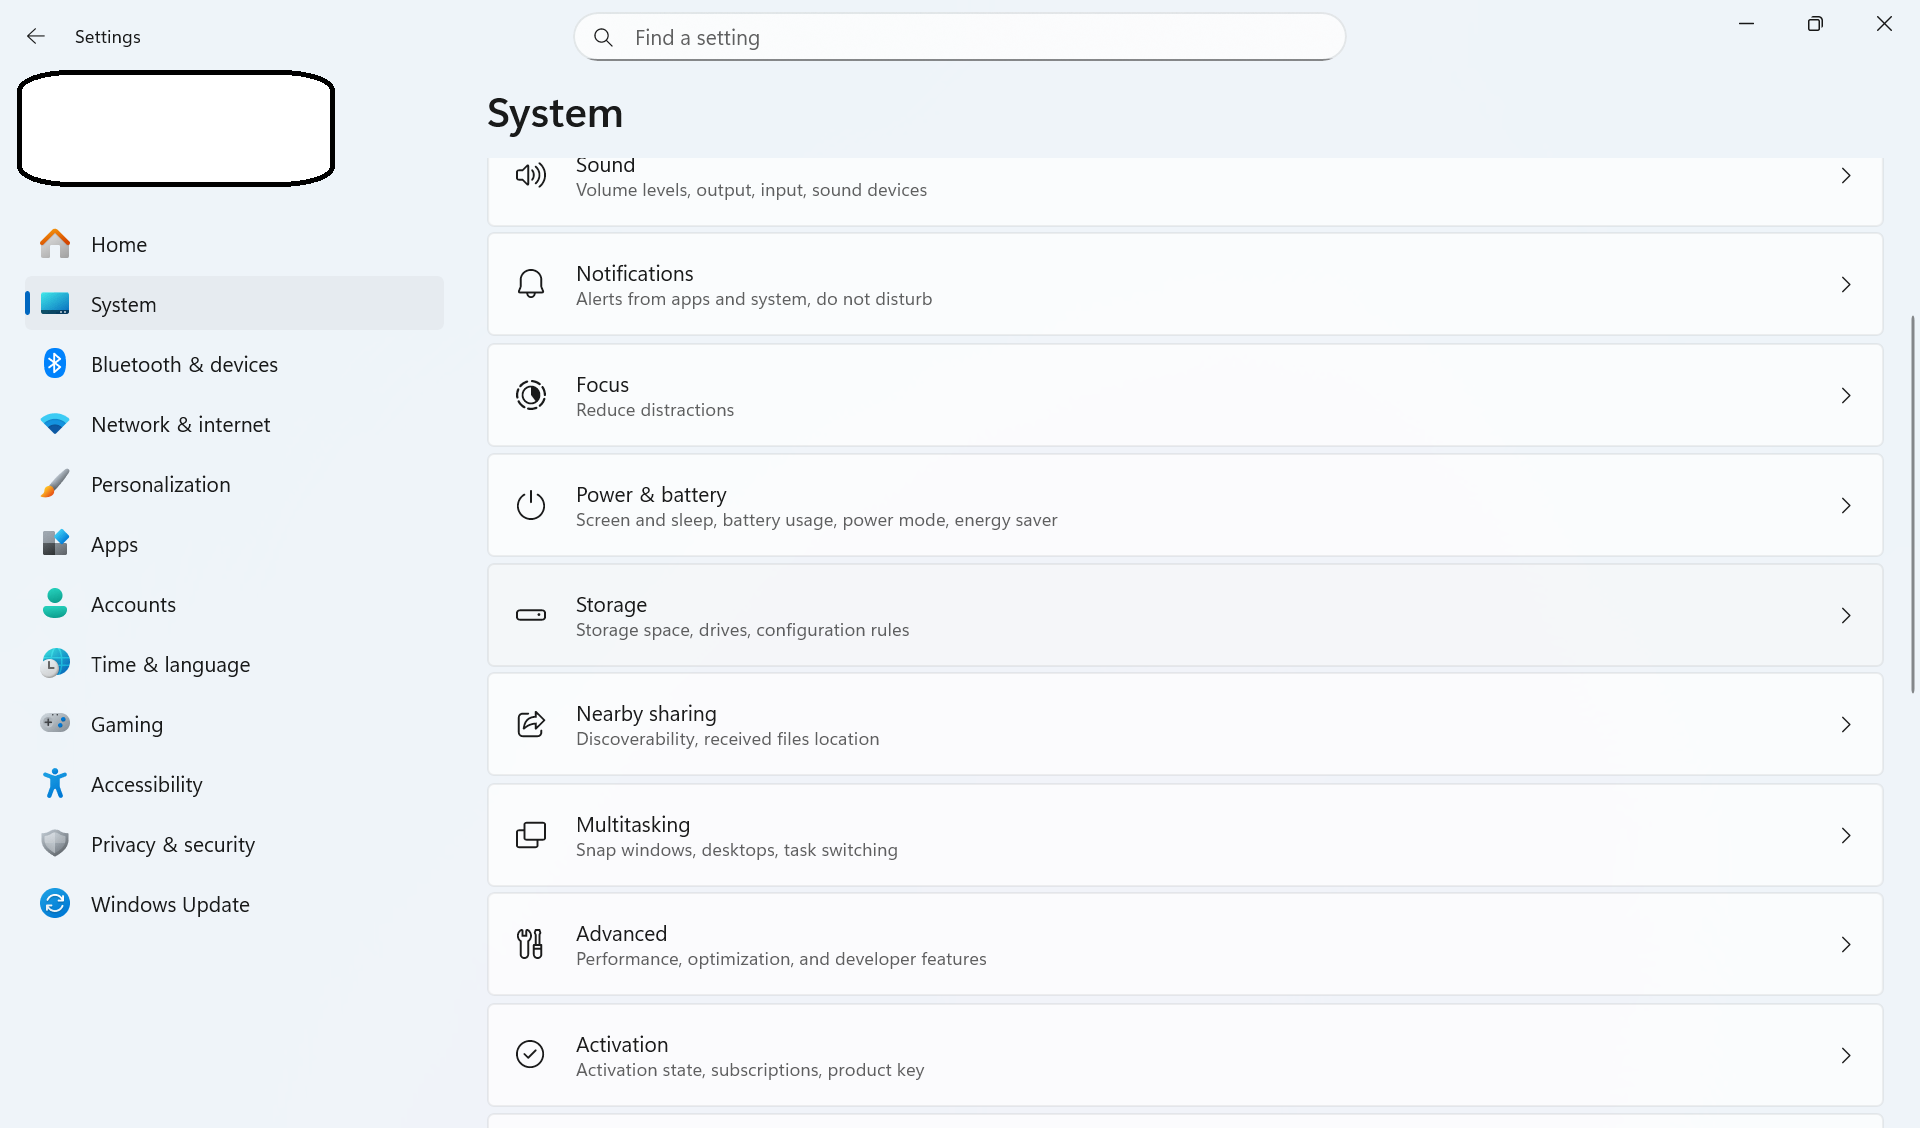
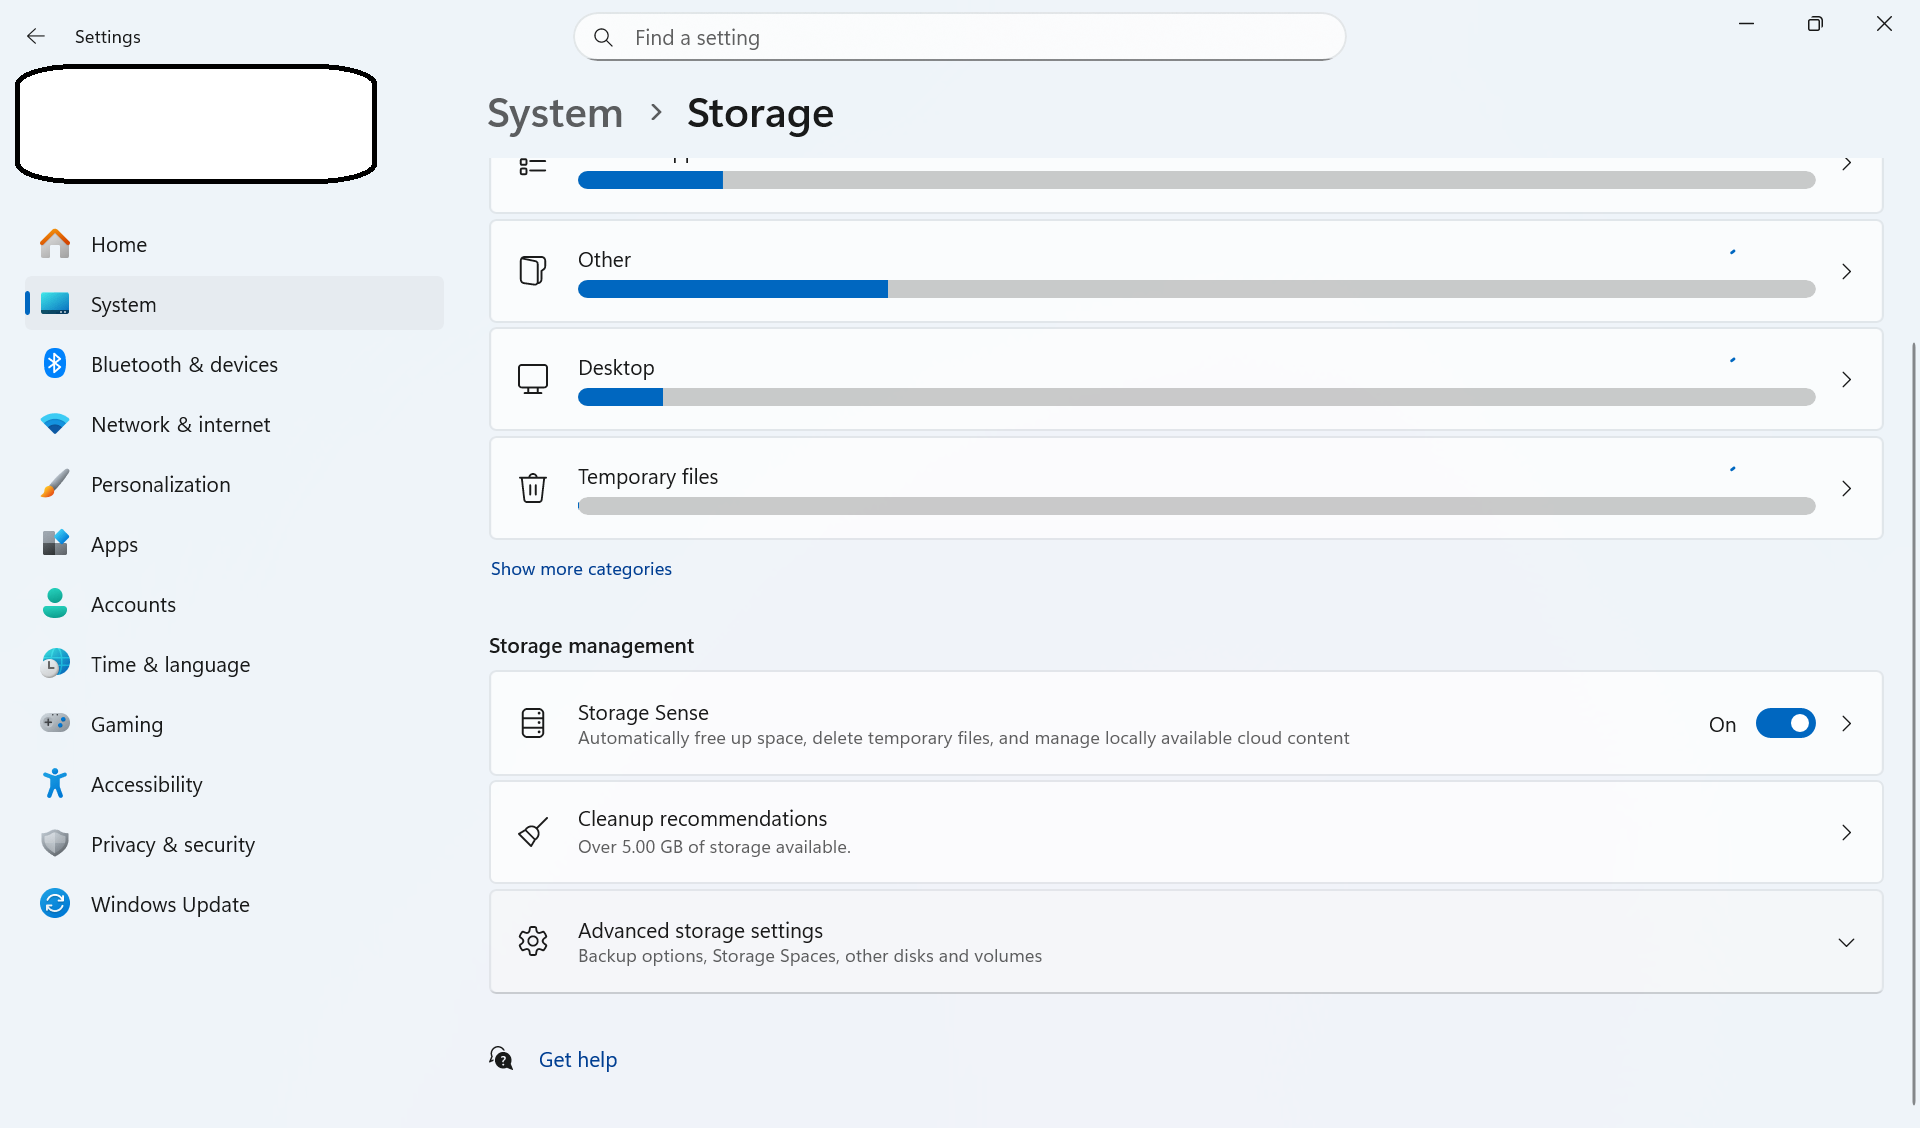
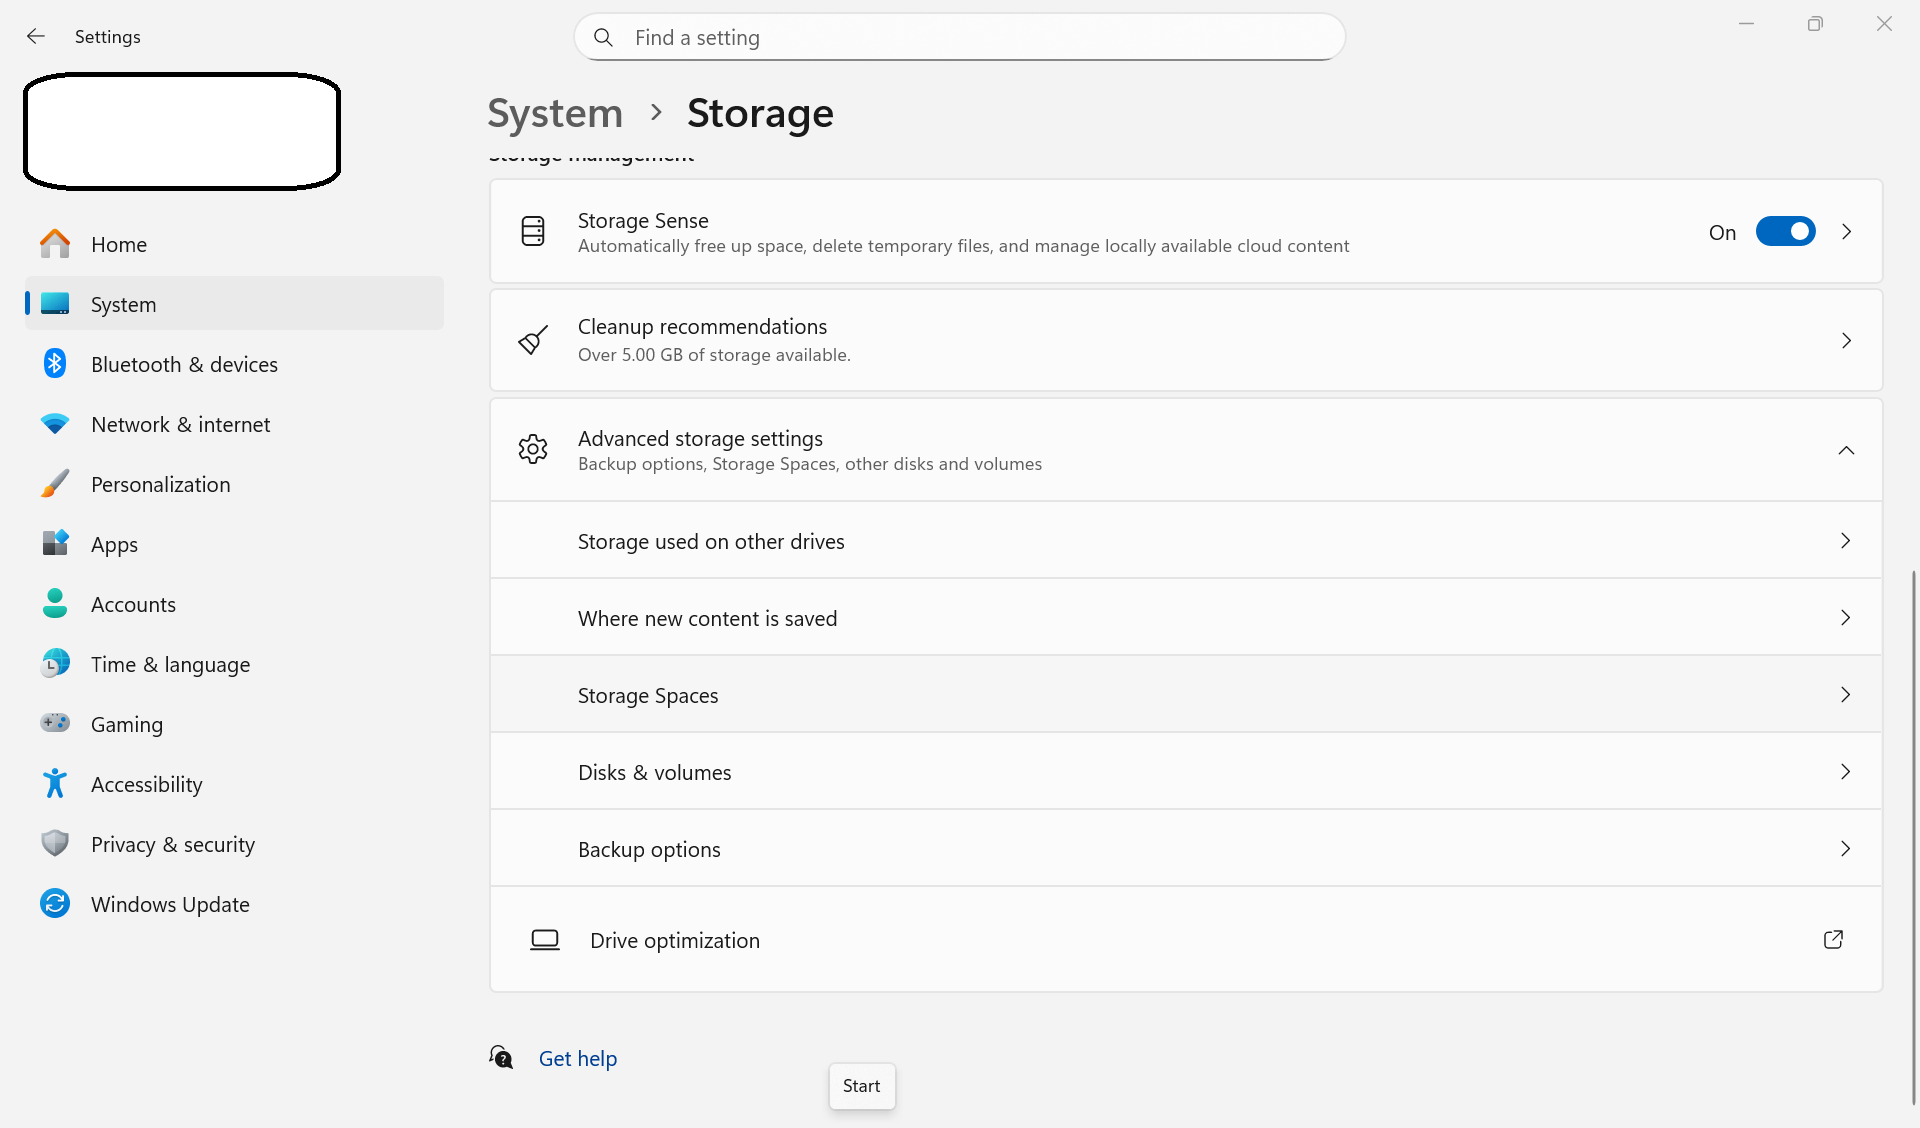
Select the storage pool you want to work with.
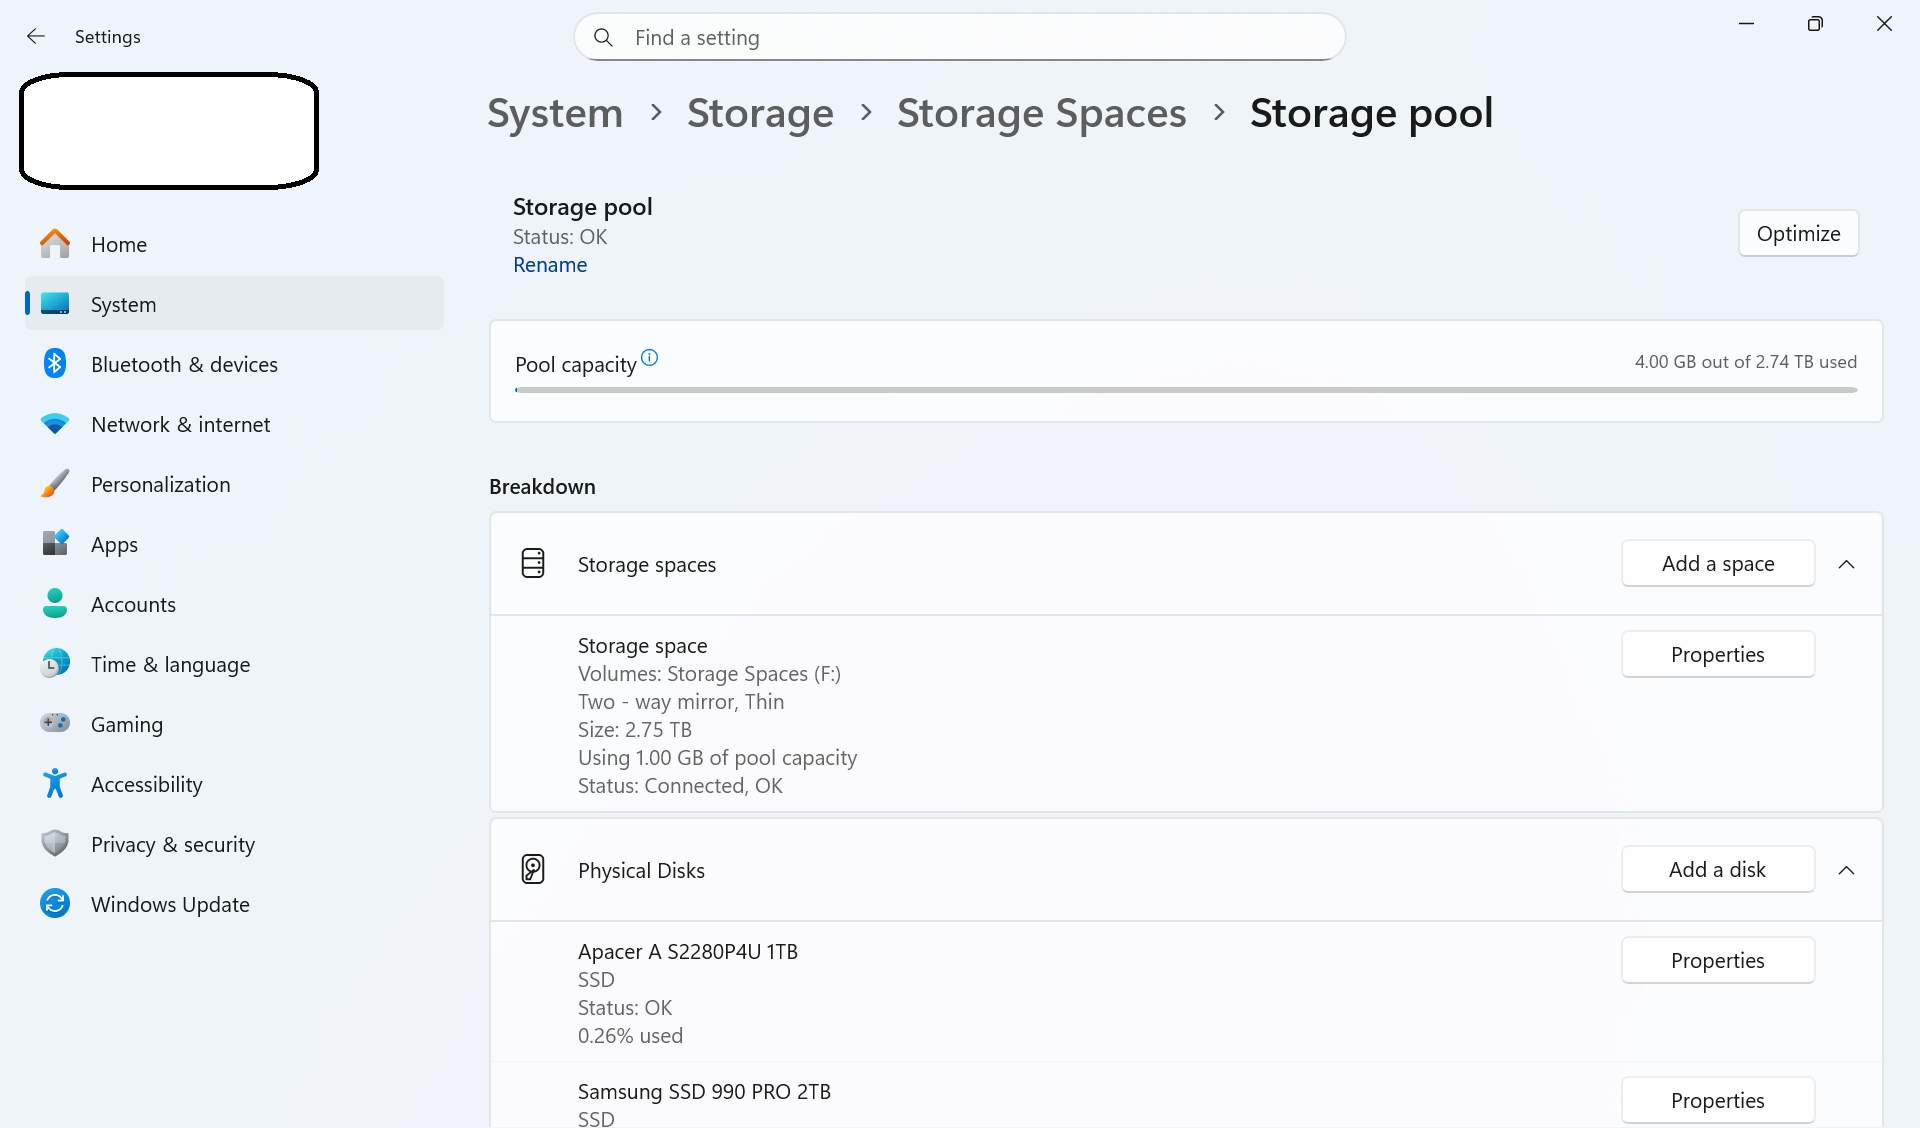
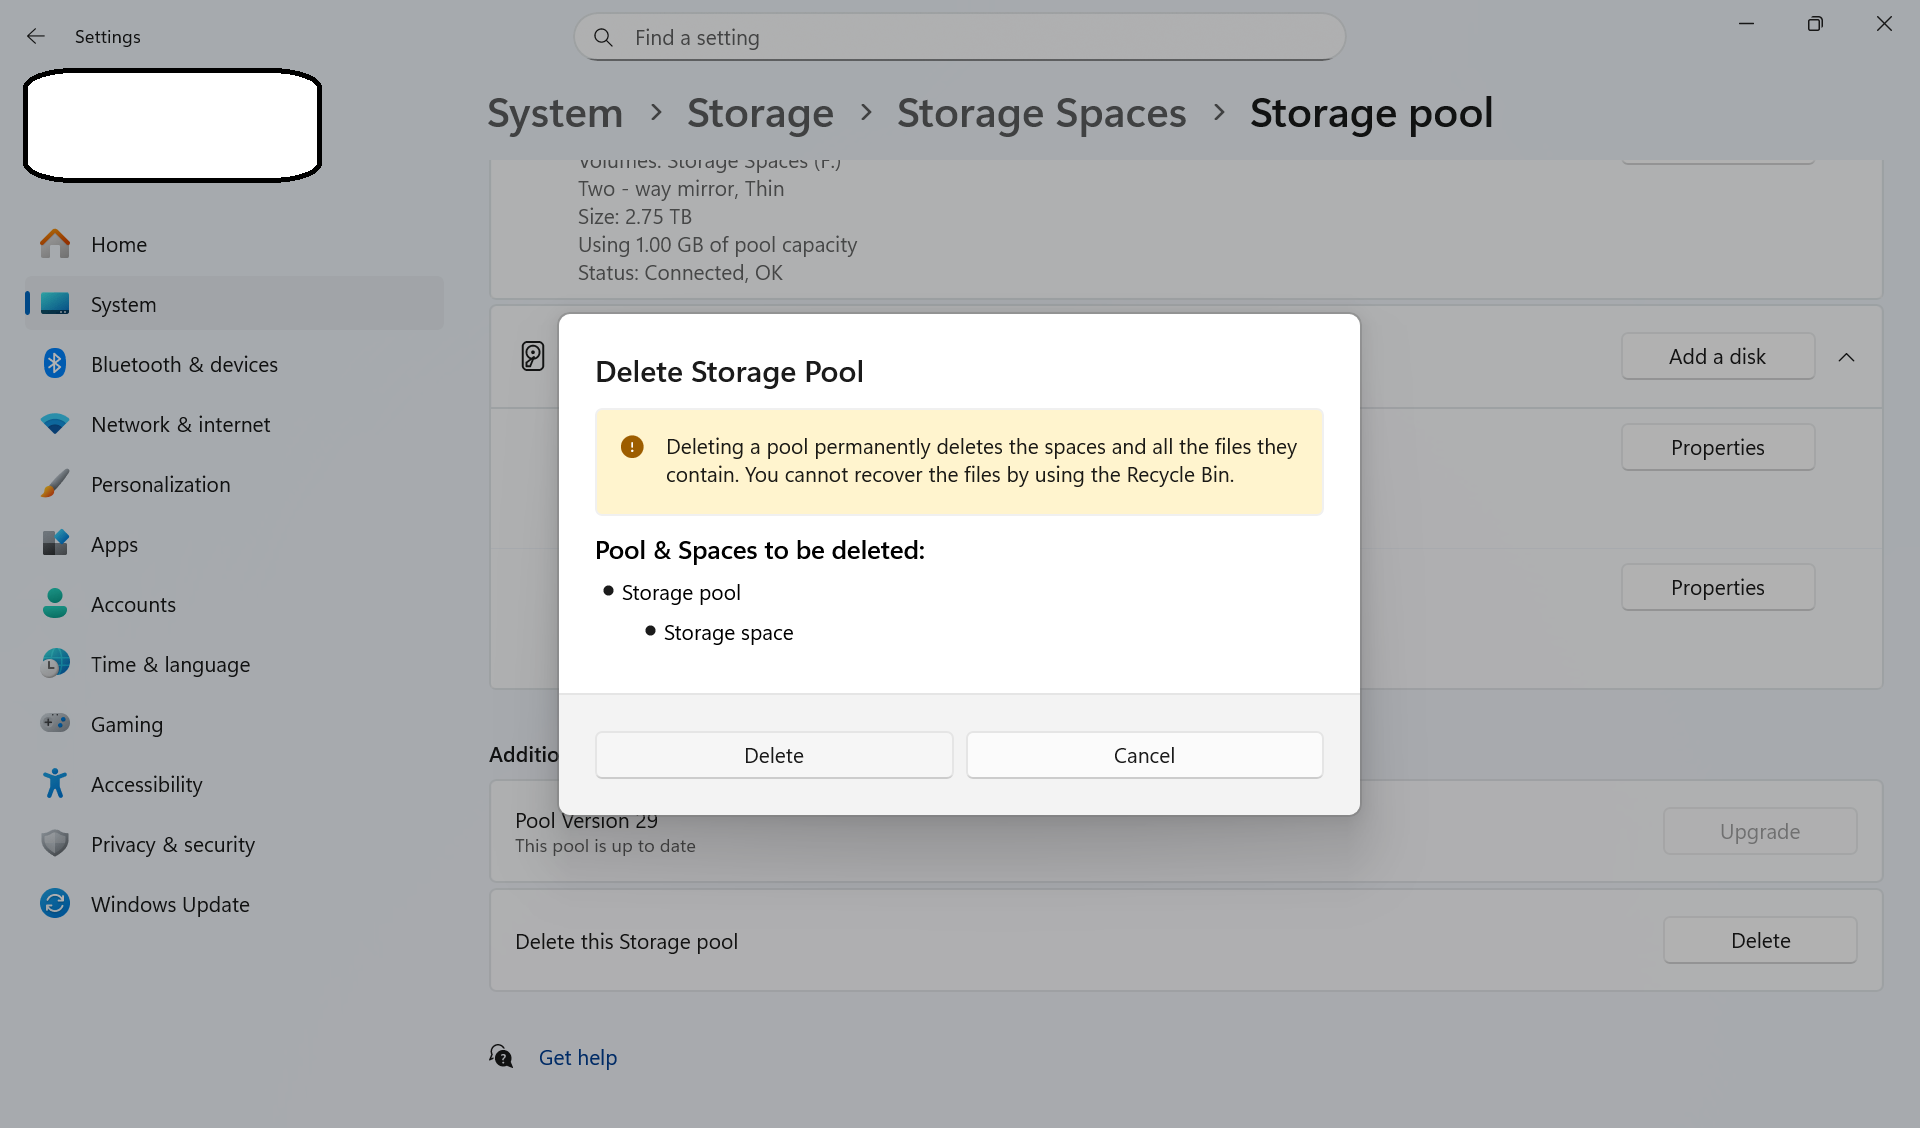
Scroll down to Delete this storage pool and click Delete.
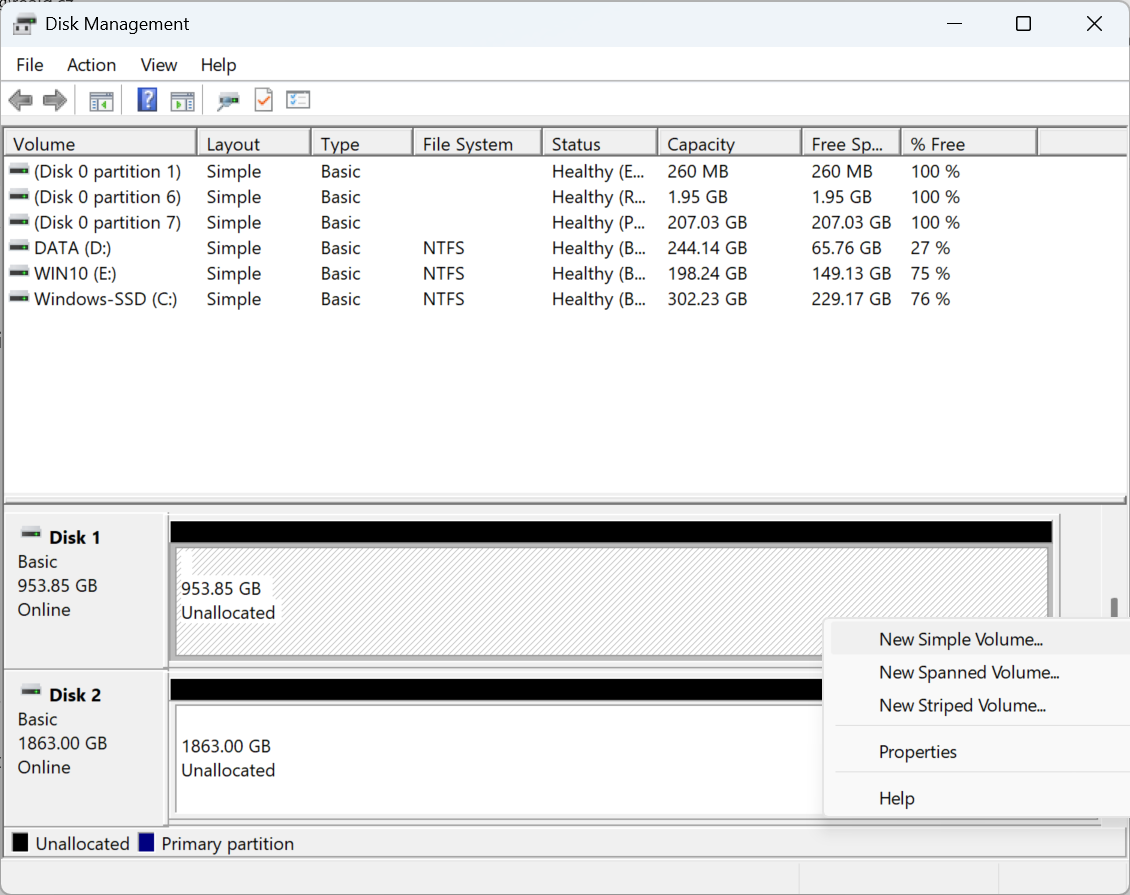
Right-click Start and select Disk Management from the context menu. Select an unallocated drive and use the wizard to create a volume. If you plan to continue using the drives in Windows, you must create a new volume.
How to remove an existing Storage Space in Windows 10 and 8.1
If you still use Windows 10 or Windows 8.1, follow these steps to remove the Storage Spaces configuration:
- Connect the drives that belong to the storage space.
- THE FOLLOWING STEPS WILL FORMAT EVERY DRIVE IN THIS STORAGE SPACE. BACK UP YOUR DATA FIRST.
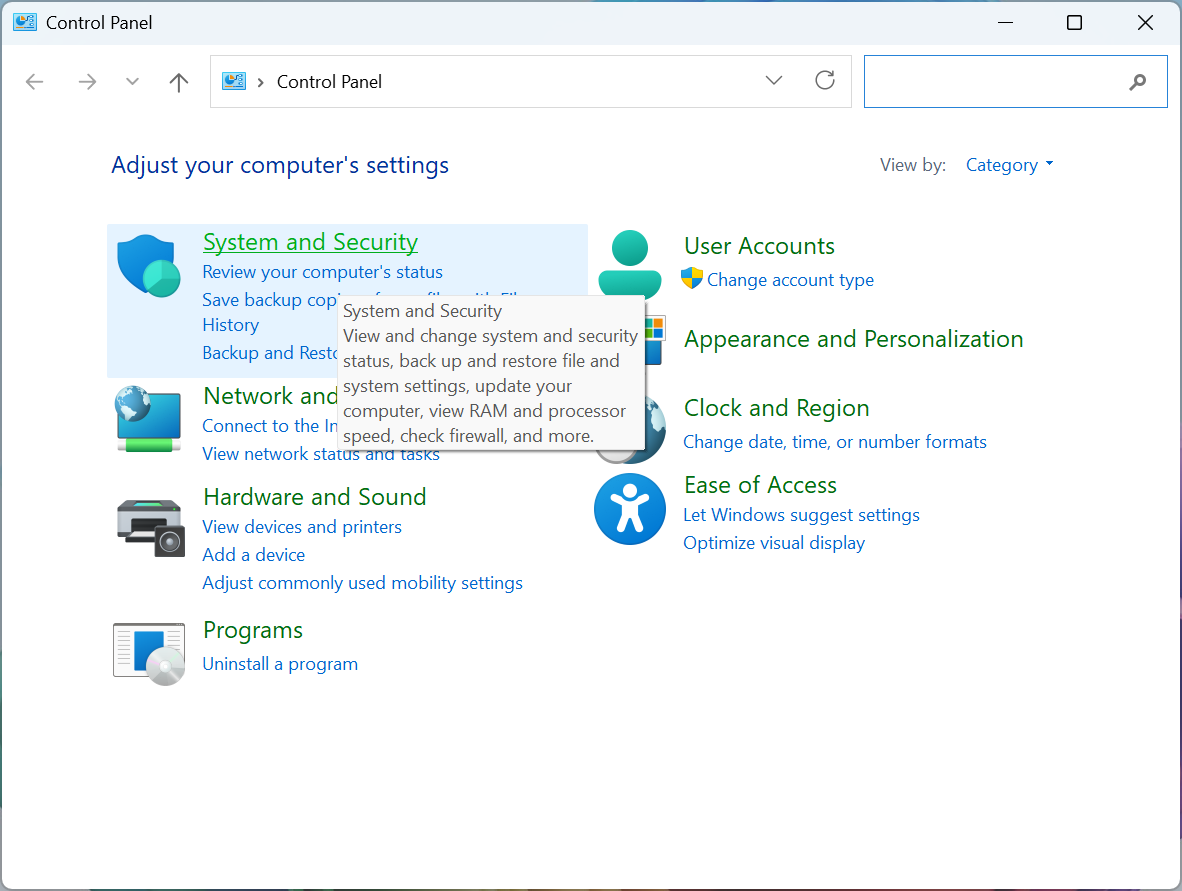
Open Control Panel > System and Security > Storage Spaces.
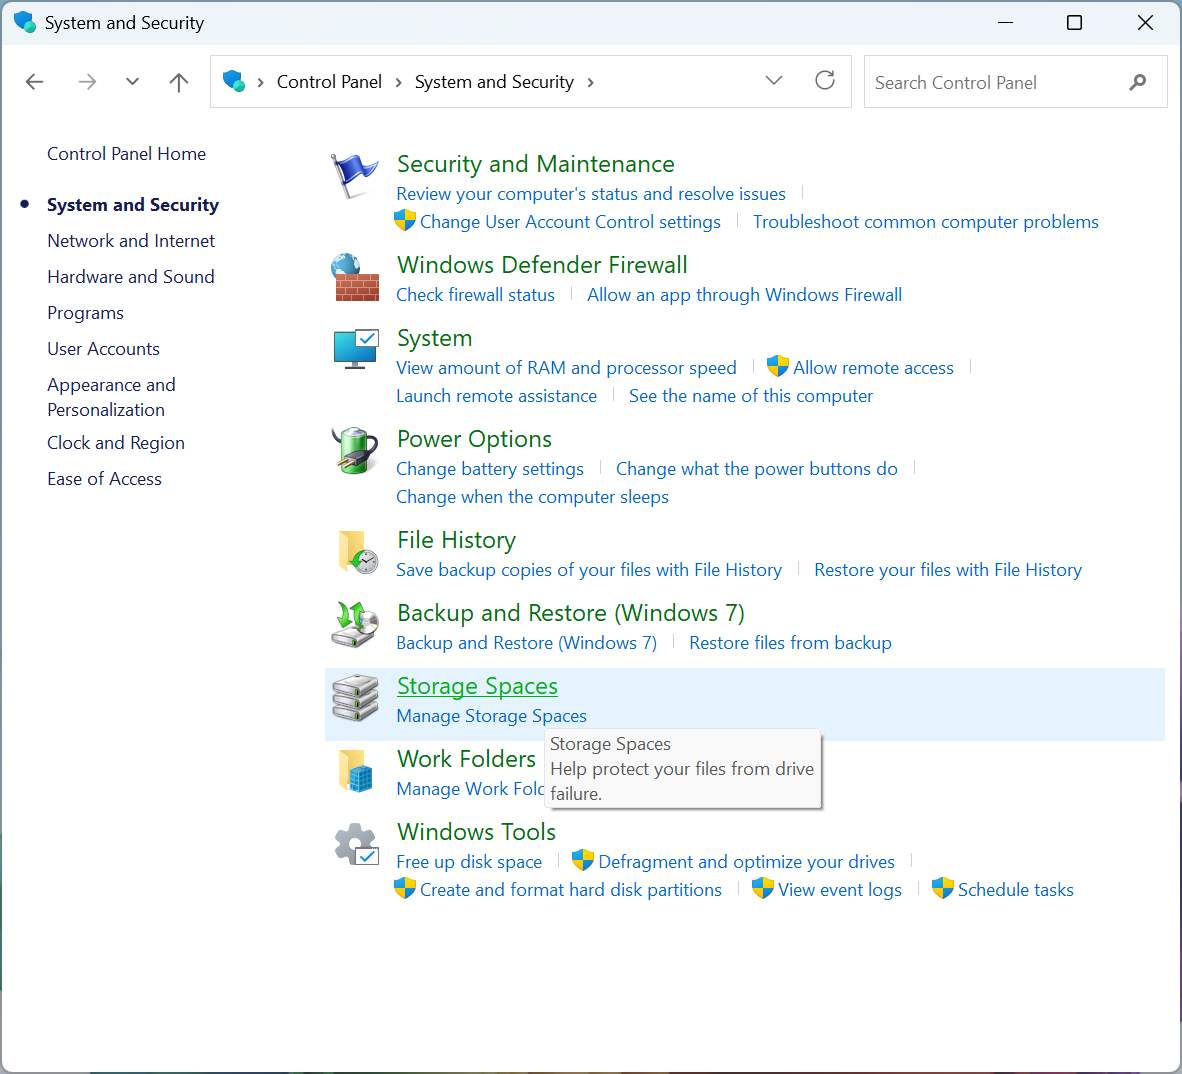
Click Change settings. Under Storage spaces in the relevant storage pool, click Delete.
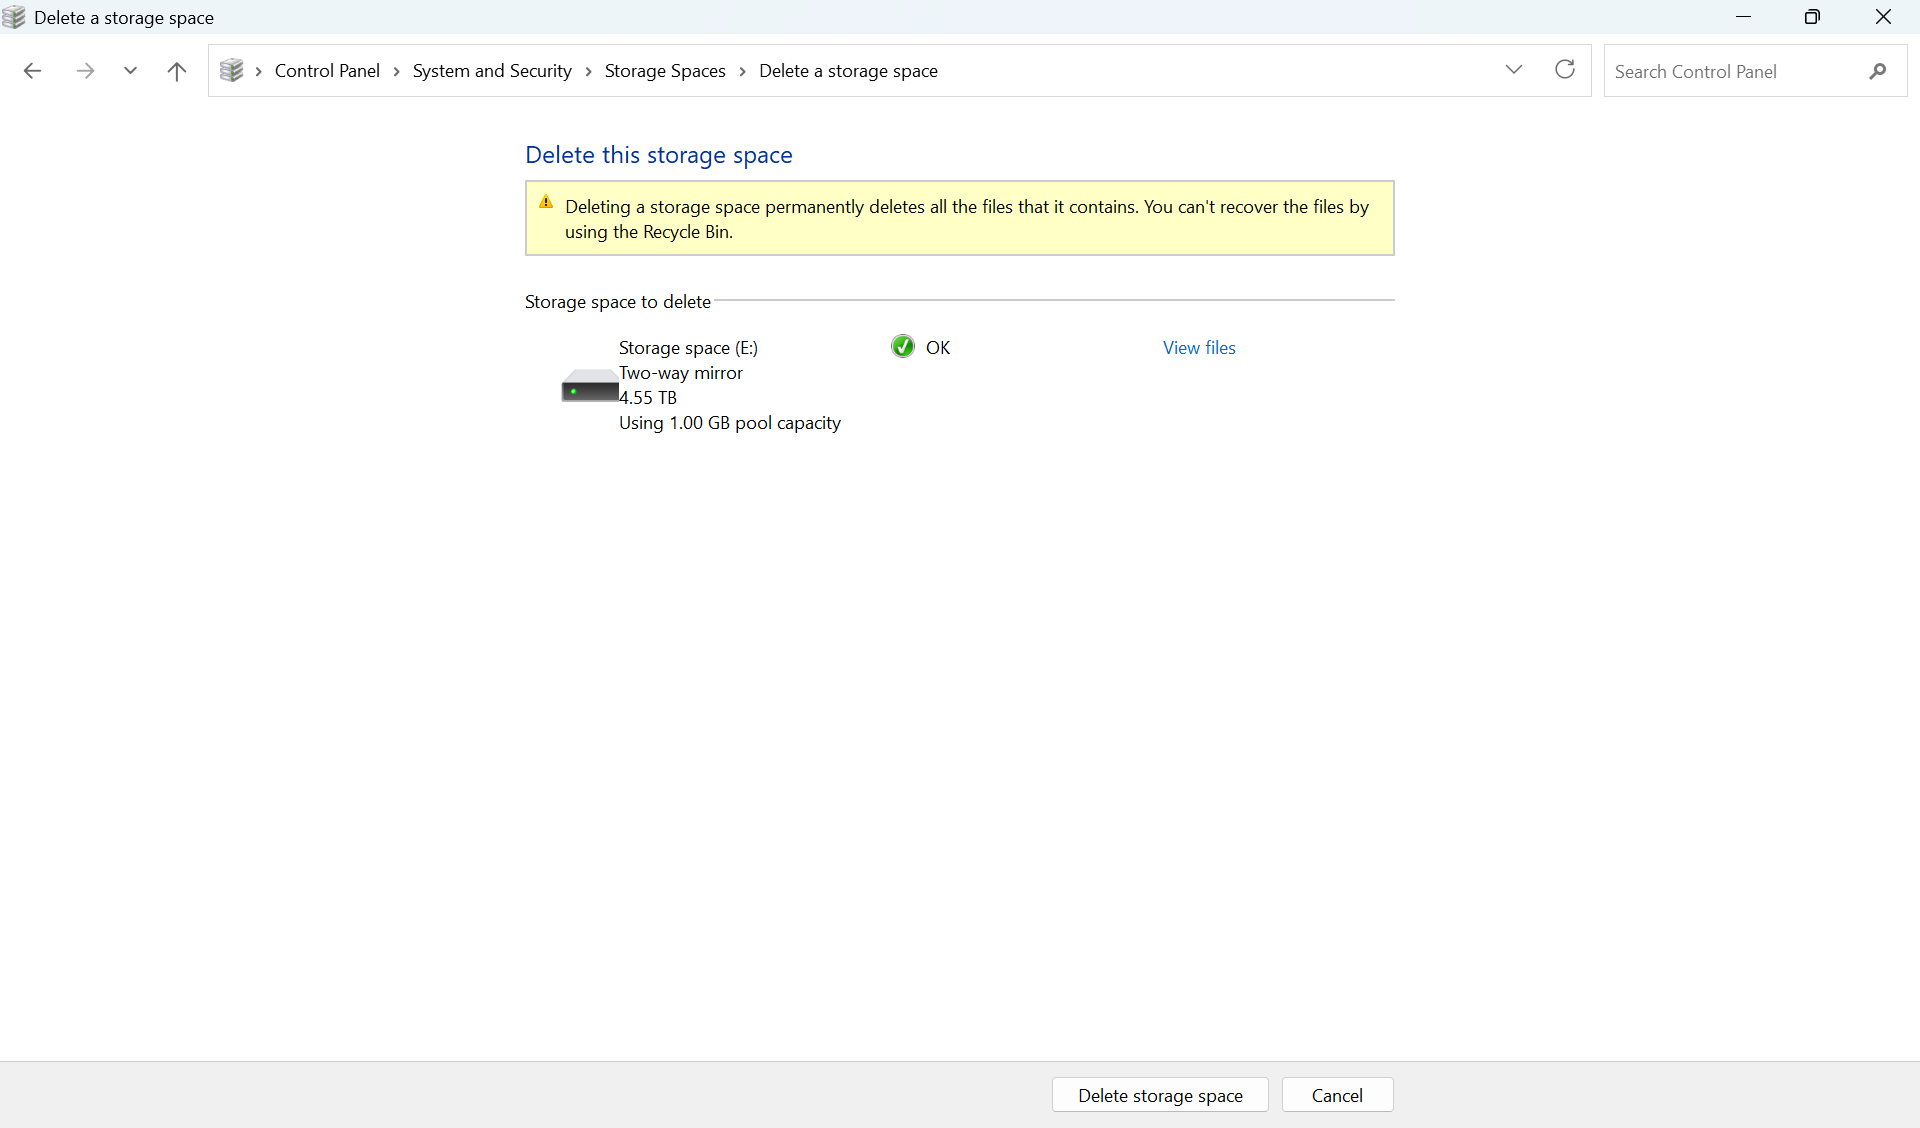
Confirm that this is the storage space you want to remove, then click Delete storage space.
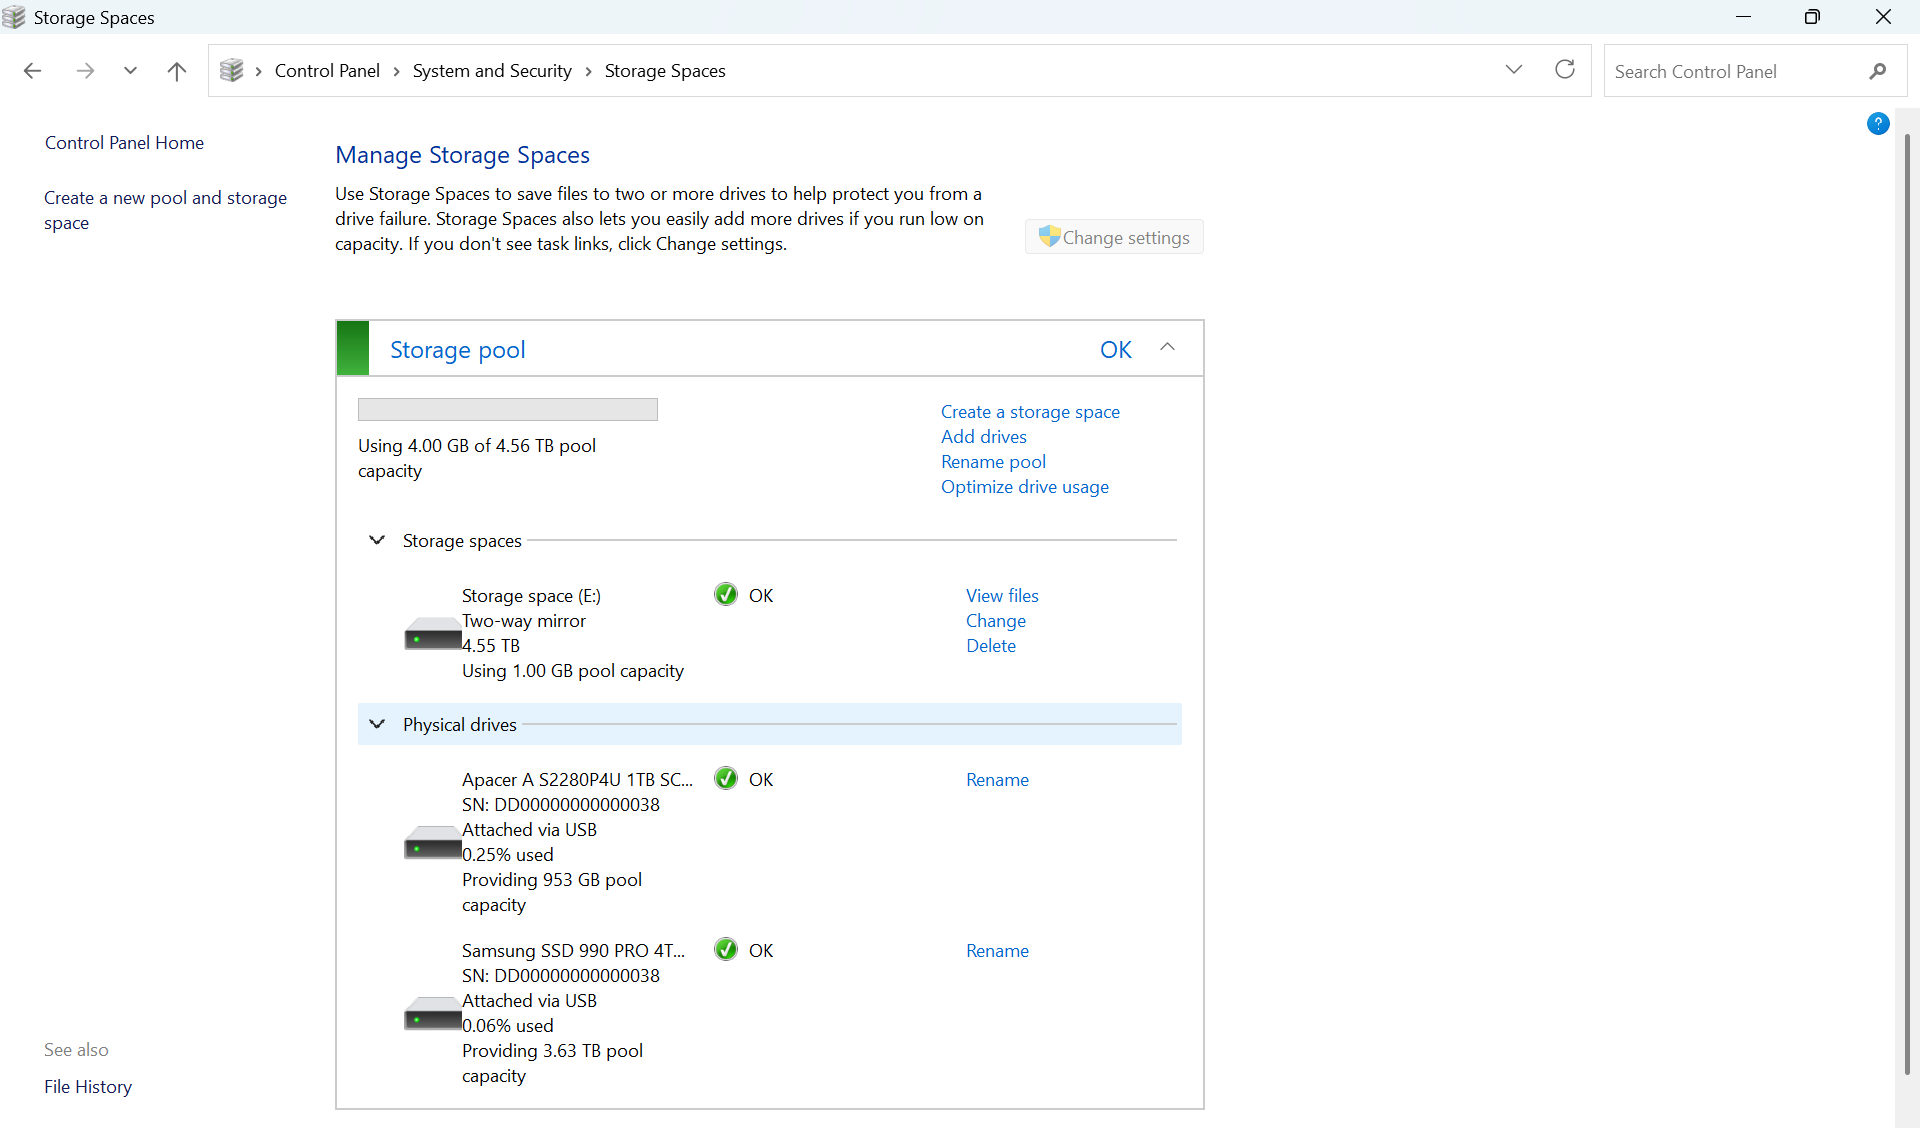
After deleting the storage space, delete the storage pool by clicking Delete pool.
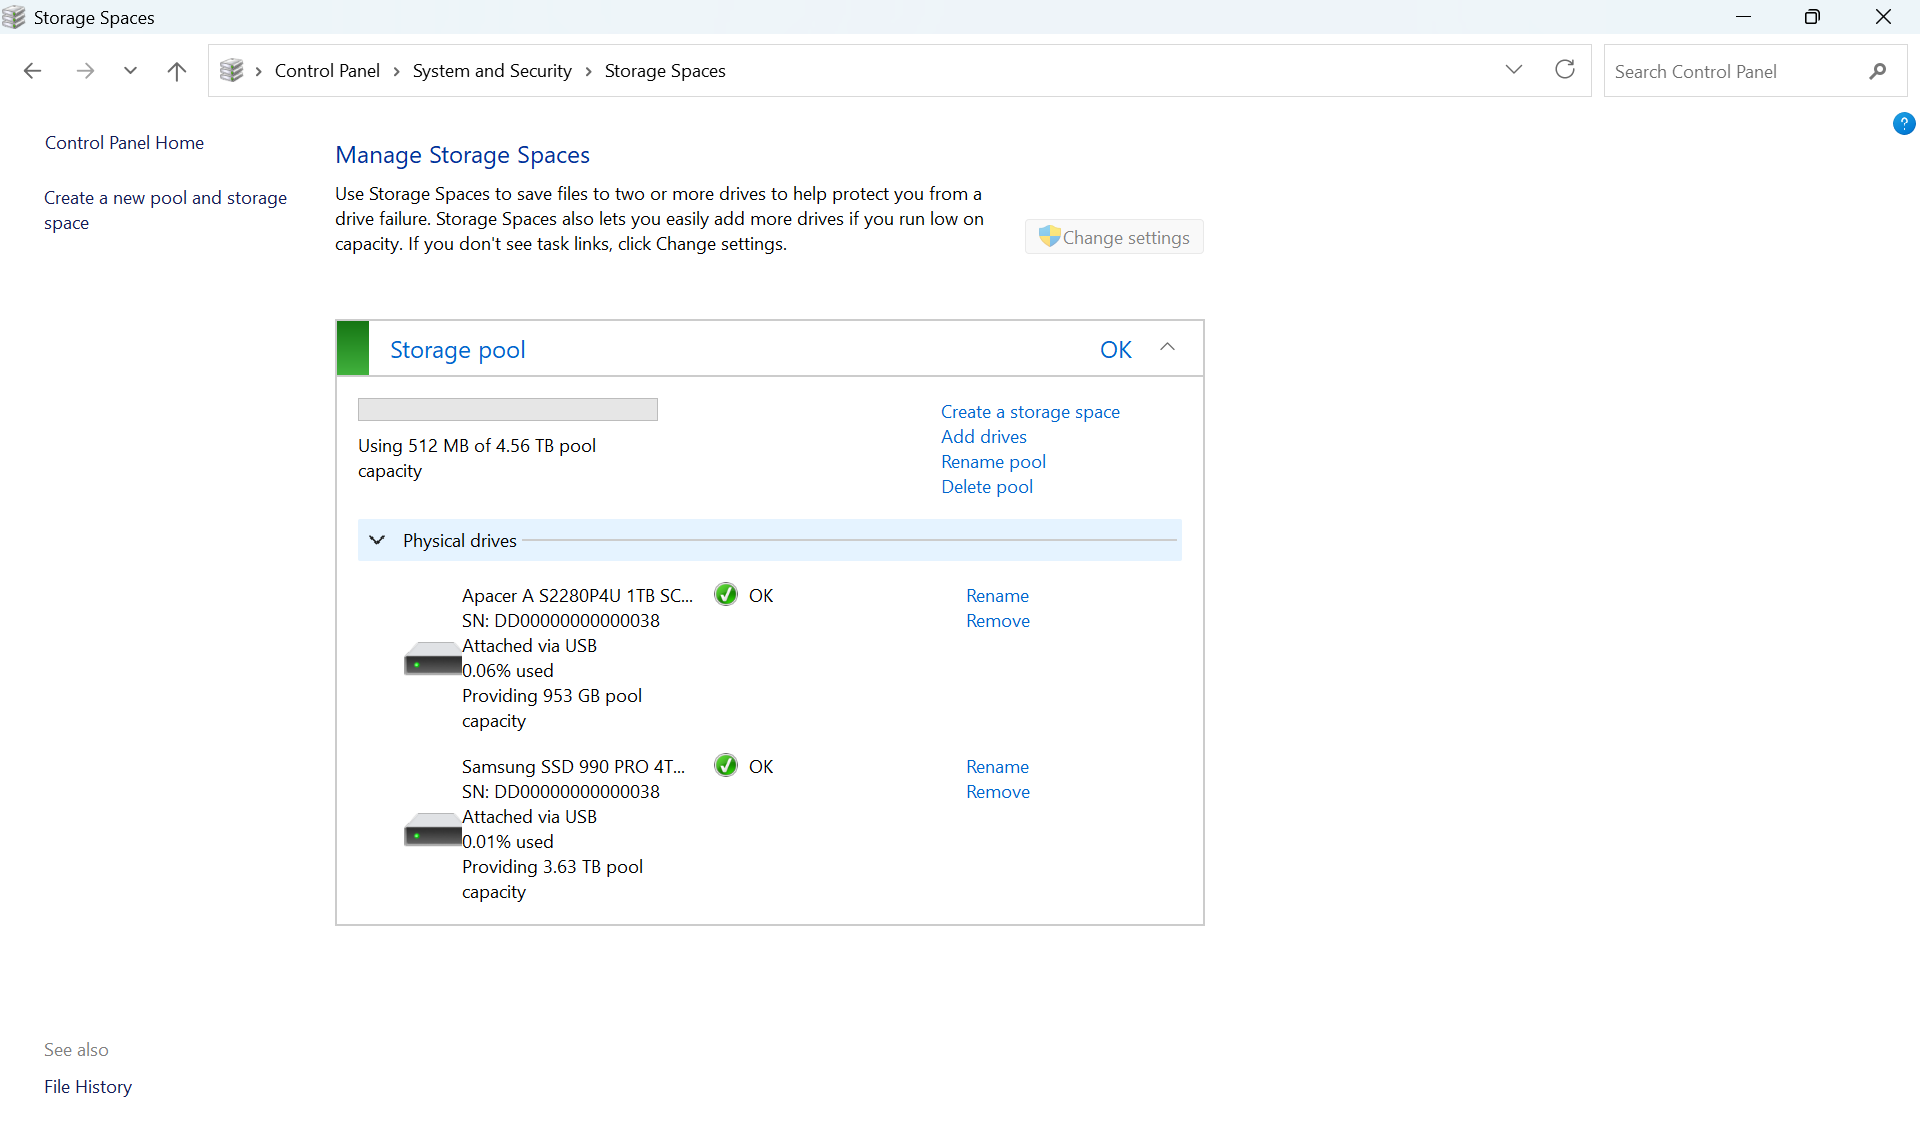
The drives are separated and appear individually in This PC and Disk Management. Rename the drives if required.
Summary: RAID can keep data available and protect against the failure of one or more drives. However, remember that RAID is not a backup. It can protect against hardware failure, but it will not help if files are deleted accidentally, encrypted by ransomware, corrupted, lost through user error, or stolen with the device.
RAID should therefore be only one part of a data protection plan. To keep data safe, follow the 3-2-1 rule: keep at least 3 copies of your data on 2 different types of media, with 1 copy stored away from the main device or location. Combining RAID with regular backups is the most reliable way to reduce the risk of losing important data.
AXAGON tip: If you have spare drives and need a practical way to connect them, these docking stations can help:
for two drives:
EEM2-20GD
ADSA-M2C
ADSA-M2C22
ADSA-M2C22L
ADSA-CC
ADSA-DC
ADSA-D25
ADSA-SN
for more drives:
Follow!


